
Custom Parameters
Custom Parameters offers a powerful and user-friendly tool, allowing customers to fine-tune loyalty programs and other features to perfectly match their specific needs. It allows the user to add important information like website links and contact information to be added to the location of their choice.
Creating a new Custom Parameter
To create a new one, go to Settings -> Custom params and click the Add new button.
Fill in the fields as follows:
- slug - a unique identifier used primarily for internal or computer-to-computer interactions, such as in API communications (typically consists of lowercase alphanumeric characters, hyphens (-), and underscores (_), spaces and special characters are generally excluded for URL compatibility.)
- description - optional, visible to the user in the loyalty program
- note - optional, not visible to the user, for internal purposes only
- entity - selects the primary data source
- context - defines a category of a custom parameter
- type - data type
- STRING: A sequence of characters. Suitable for text data that is not formatted in any specific way, such as names, addresses, or any other general text input.
- INT: Short for integer, this type is for whole numbers without decimal points. Ideal for numeric data where fractions are not needed, such as age or quantity.
- TEXT: A larger or longer block of text, often used for descriptions, notes, or any kind of lengthy textual information. It typically supports more characters than a simple string.
- DATE_TIME: Combines date and time information into a single format. Useful for timestamps, event scheduling, or any application where both date and time need to be recorded.
- DATE: Specifically for date information without time. Used for birthdates, appointment dates, or any scenario where only the date is relevant.
- DECIMAL: Numbers that can have fractional parts. Used for precise numeric data, such as prices, measurements, or financial data.
- JSON: Stands for JavaScript Object Notation, a format for structuring data. Allows the user to define variables.
- BOOL: Short for boolean, this type represents true/false values. Ideal for binary data like yes/no, on/off, or any scenario requiring a simple true or false value.
- ENUM: Short for enumeration, this type allows a variable to be one of a predefined set of constants, like a dropdown menu. Useful for data with a limited set of possible values, such as days of the week, roles, or categories
- type - data type
Mapping
Custom Parameters can be mapped to default entity parameters, a feature especially useful for member-related parameters such as firstName, lastName, email, and user address details. This ensures seamless integration and data consistency across the platform.
Privacy Settings
Custom Parameters can be categorized as private or public. Private parameters are accessible only within the Content Cockpit and via private API, ensuring a secure layer of information management. Conversely, public parameters are accessible to the end-users of loyalty channels, fostering enhanced interaction and data exchange.
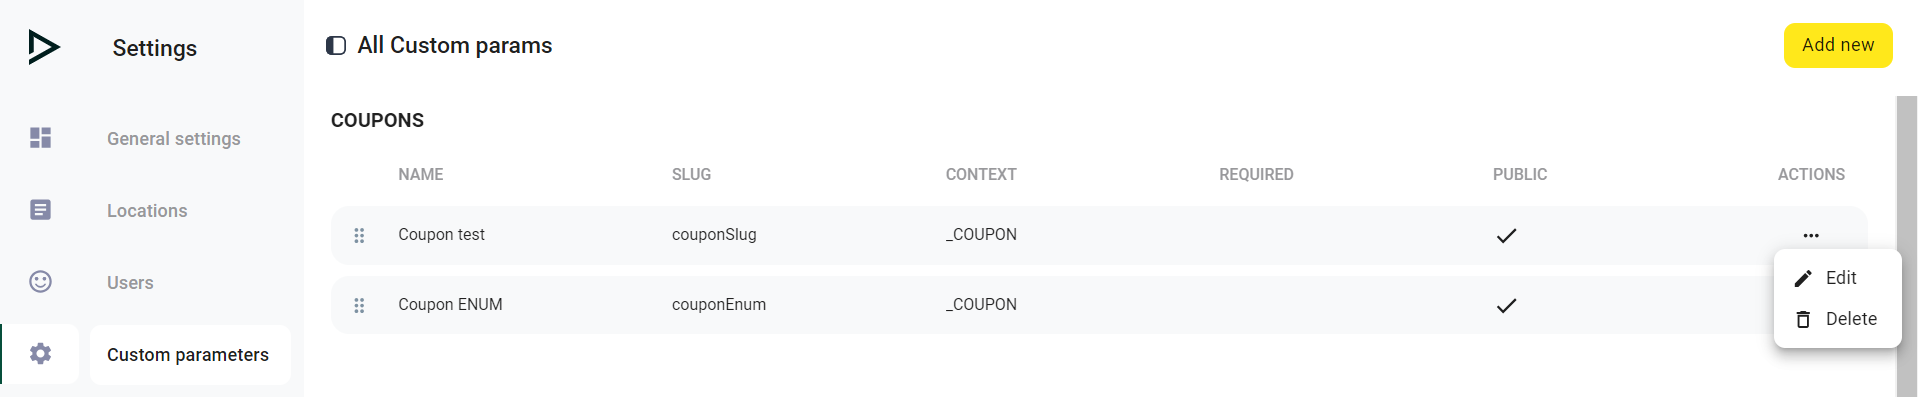
Editing Existing Custom Parameters
Once created, all custom parameters are grouped based on the chosen context. You may edit them directly from the preview page by clicking the pencil icon, or delete them by clicking the trash icon.
An Example of Where to Use Custom Parameters:
Members:
The Custom Parameter when used with members is used to extract information from existing members and display it in the app.
We will take the example of displaying your members' first name in the Homepage section of the app.
Follow the steps mentioned above to create a new custom parameter
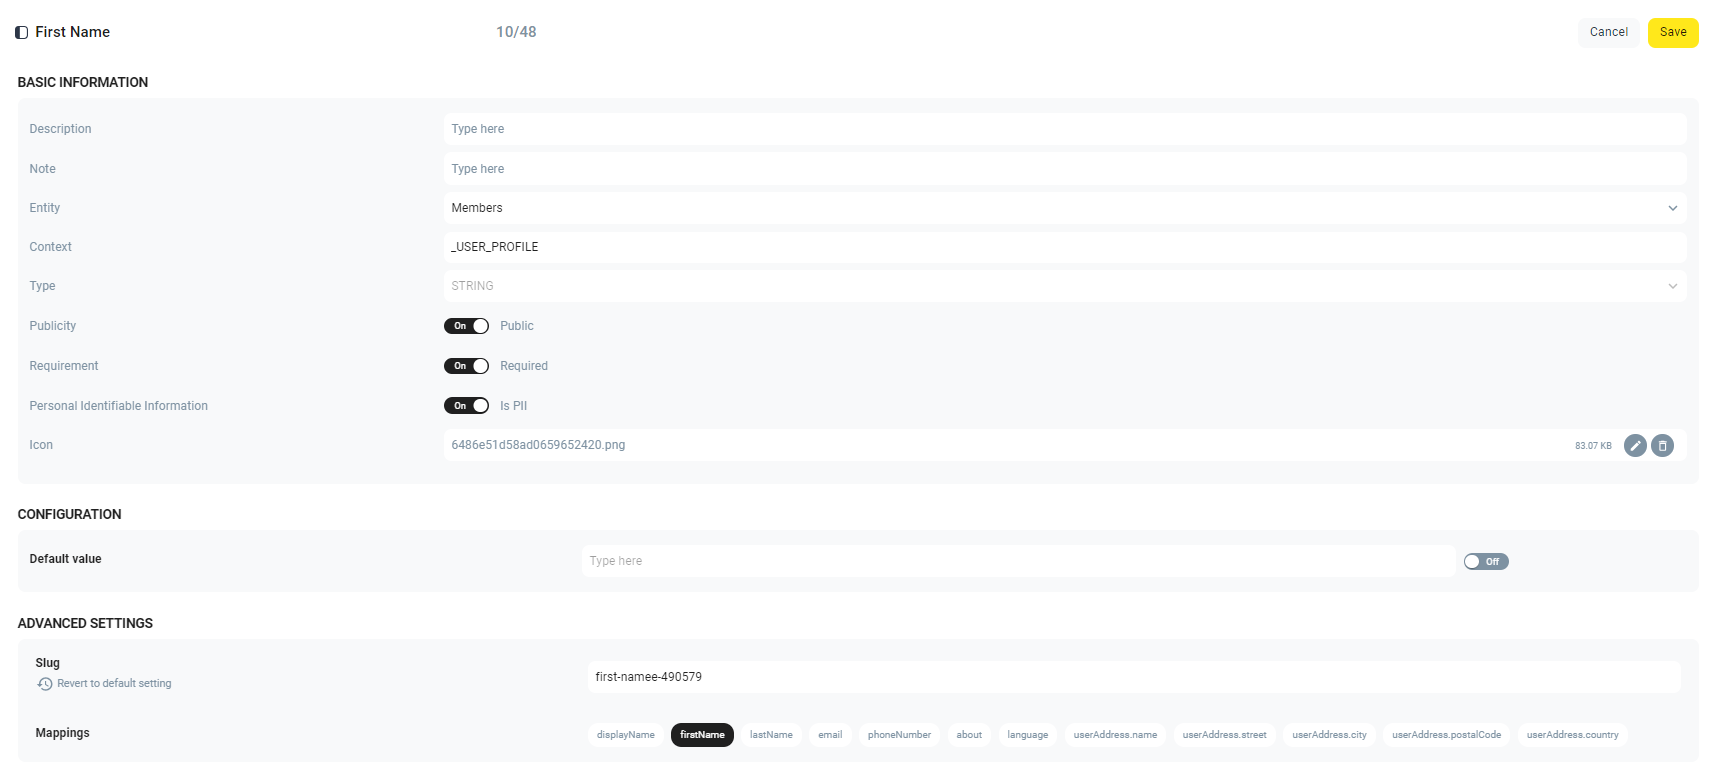
Step 1: Select the Entity field and click on Members (this signifies that the information to be extracted should be from the registered members).
Step 2: Click on the Context field and select USER_PROFILE (this allows you to extract the information to the desired location).
Step 3: In the Type field, select String (String is the suitable data type for text data).
Step 4: Turn on Publicity and Personal Identifiable Information (PII) (PII is any data that can be used to identify a specific individual, either on its own or when combined with other information).
Step 5: In the Advanced Settings, click and fill out the slug (The slug is typically a simplified and human-readable version of the parameter name. It should be unique and avoid spaces and special characters).
Step 6: Select firstName in Mappings. Mappings link the custom parameter to specific data points within the system. For instance, when displaying a user's profile, the system uses the Mapping to fetch and display the correct data from the firstName field.
Step 7: Click on Save to apply the changes.
Dynamic Text
Now the task remains to use the Custom Parameters in real-world practice. The best way to learn the potential of Custom Parameters is through Dynamic Text. Dynamic text allows you to provide a more personal touch to your user experience.
To add Dynamic Text :
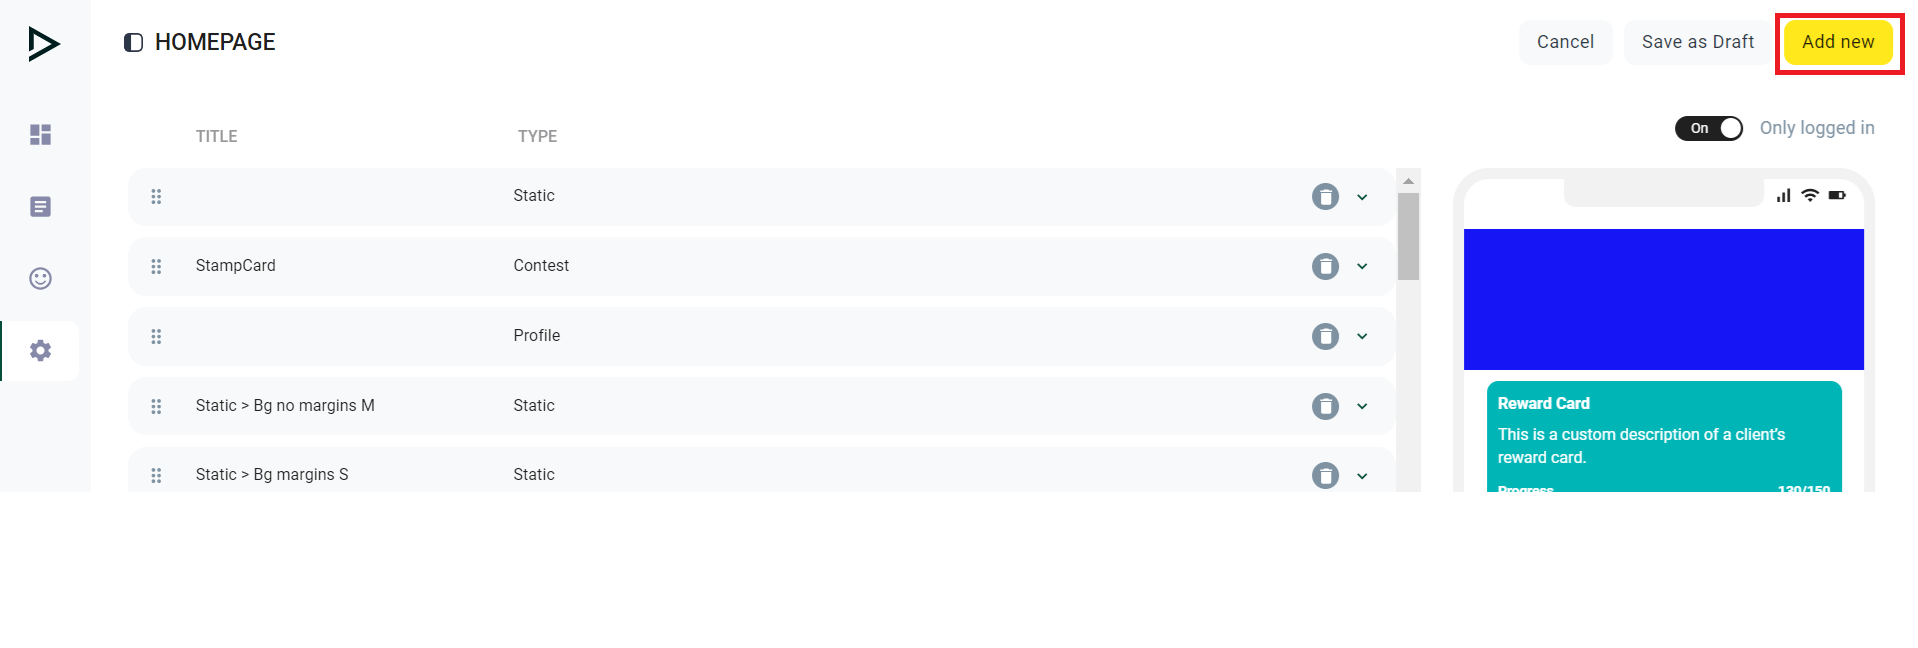
Step 1: Open the Content Cockpit and click on Settings.
Step 2: Go to channels and then MOBILE_APP or create a MOBILE_APP channel following this guide.
Step 3: On the MOBILE_APP section, you will see the Home/Homepage screen. Click on it.
Step 4: You will be able to see an "Add New" option in the top right corner of the Content Cockpit. This will create a static widget.
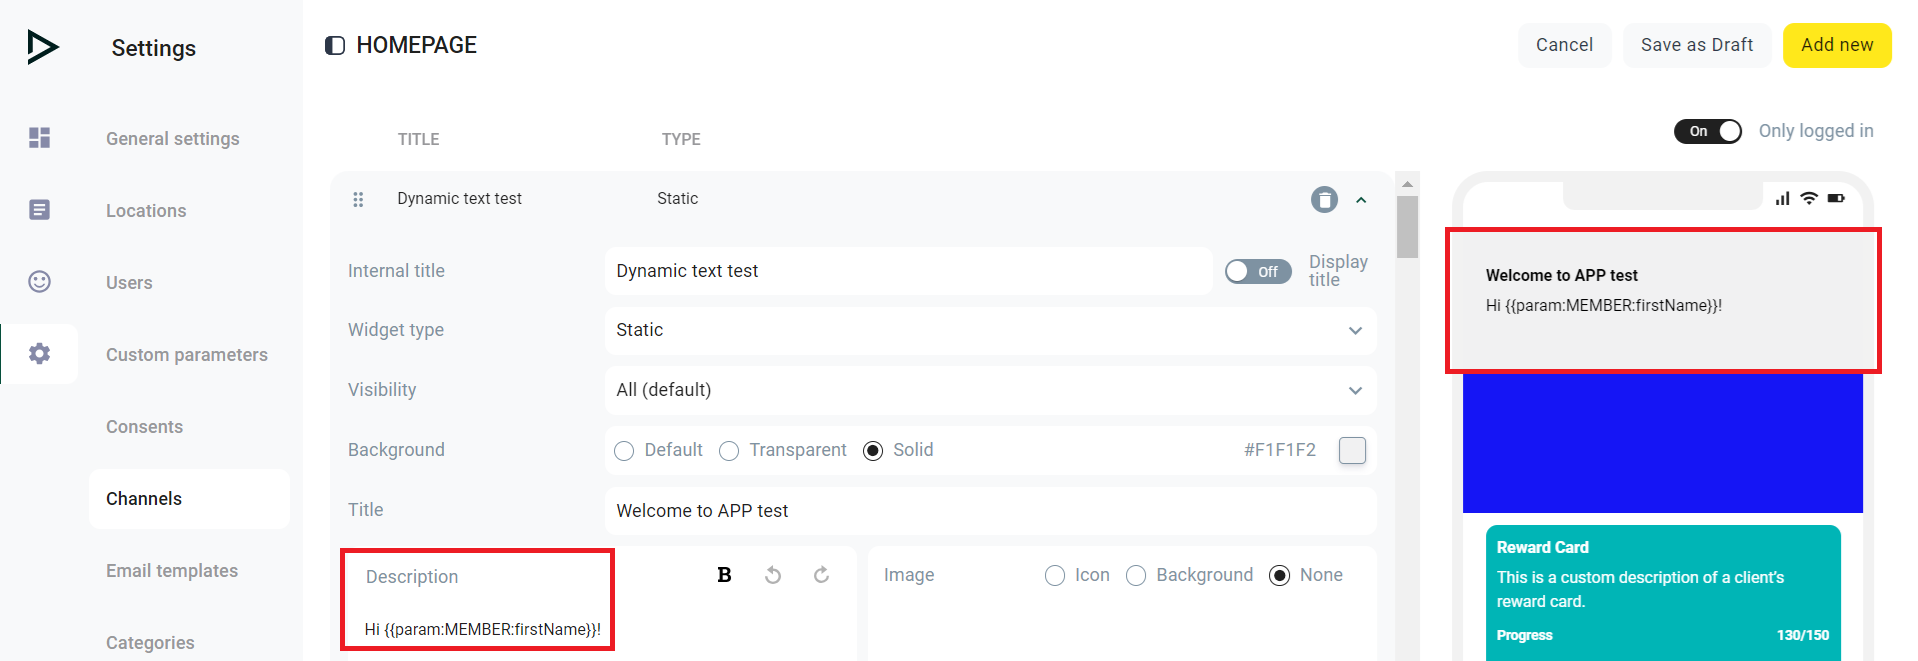
Step 5: Customise the static widget in the way that you want, add a title and within the description section add,
"Message you want to add" followed by {{param:MEMBER:firstName}}!
This code is important as it extracts the required information.
The basic syntax for this code is: {{param:<Entity>:<slug>}}
It can be used to extract any information collected using the Custom Parameters.
Step 6: Click on "Save as Draft" and then Publish your changes.

The final result should resemble this. You can now replicate this with many other sections within Custom Parameters.
Updated 24 days ago