
Consents overview
This guide will help you understand:
- What is a consent in TRIFFT
- How to create a consent
- How to manage consent groups
- How to create a new versions of consent
- How to access consent records
- Explanation of consent types by format and types
Feature Overview
Having user consents in your app is mandatory under several laws, such as the GDPR in the EU and the DPA in the UK, especially for terms and conditions and data protection. TRIFFT goes beyond these basic requirements by offering additional consent options, such as push notifications, SMS notifications, and email notifications. In TRIFFT, consents can be categorized as either mandatory or voluntary. Additionally, the app provides flexibility by allowing users to give their consents either during the registration process or later through their profile settings.
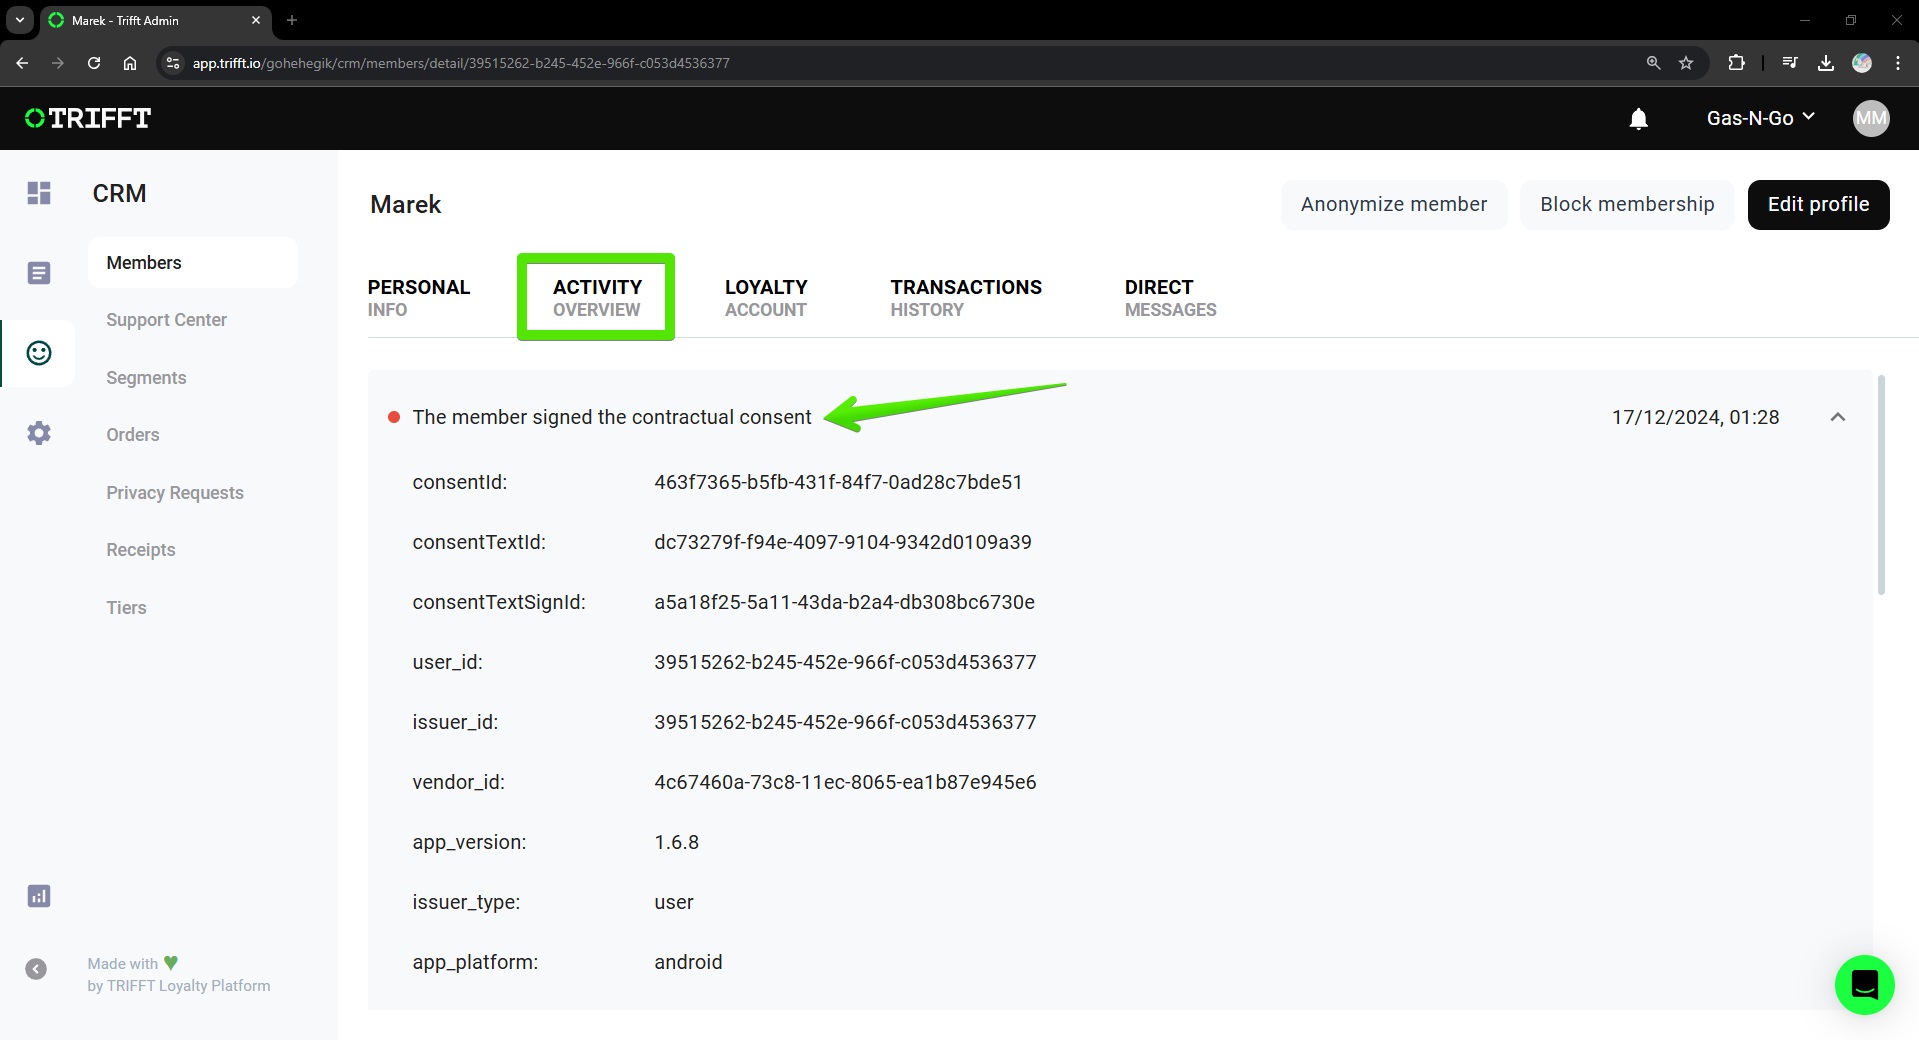
Еxample of a granted consent in the Content Cockpit
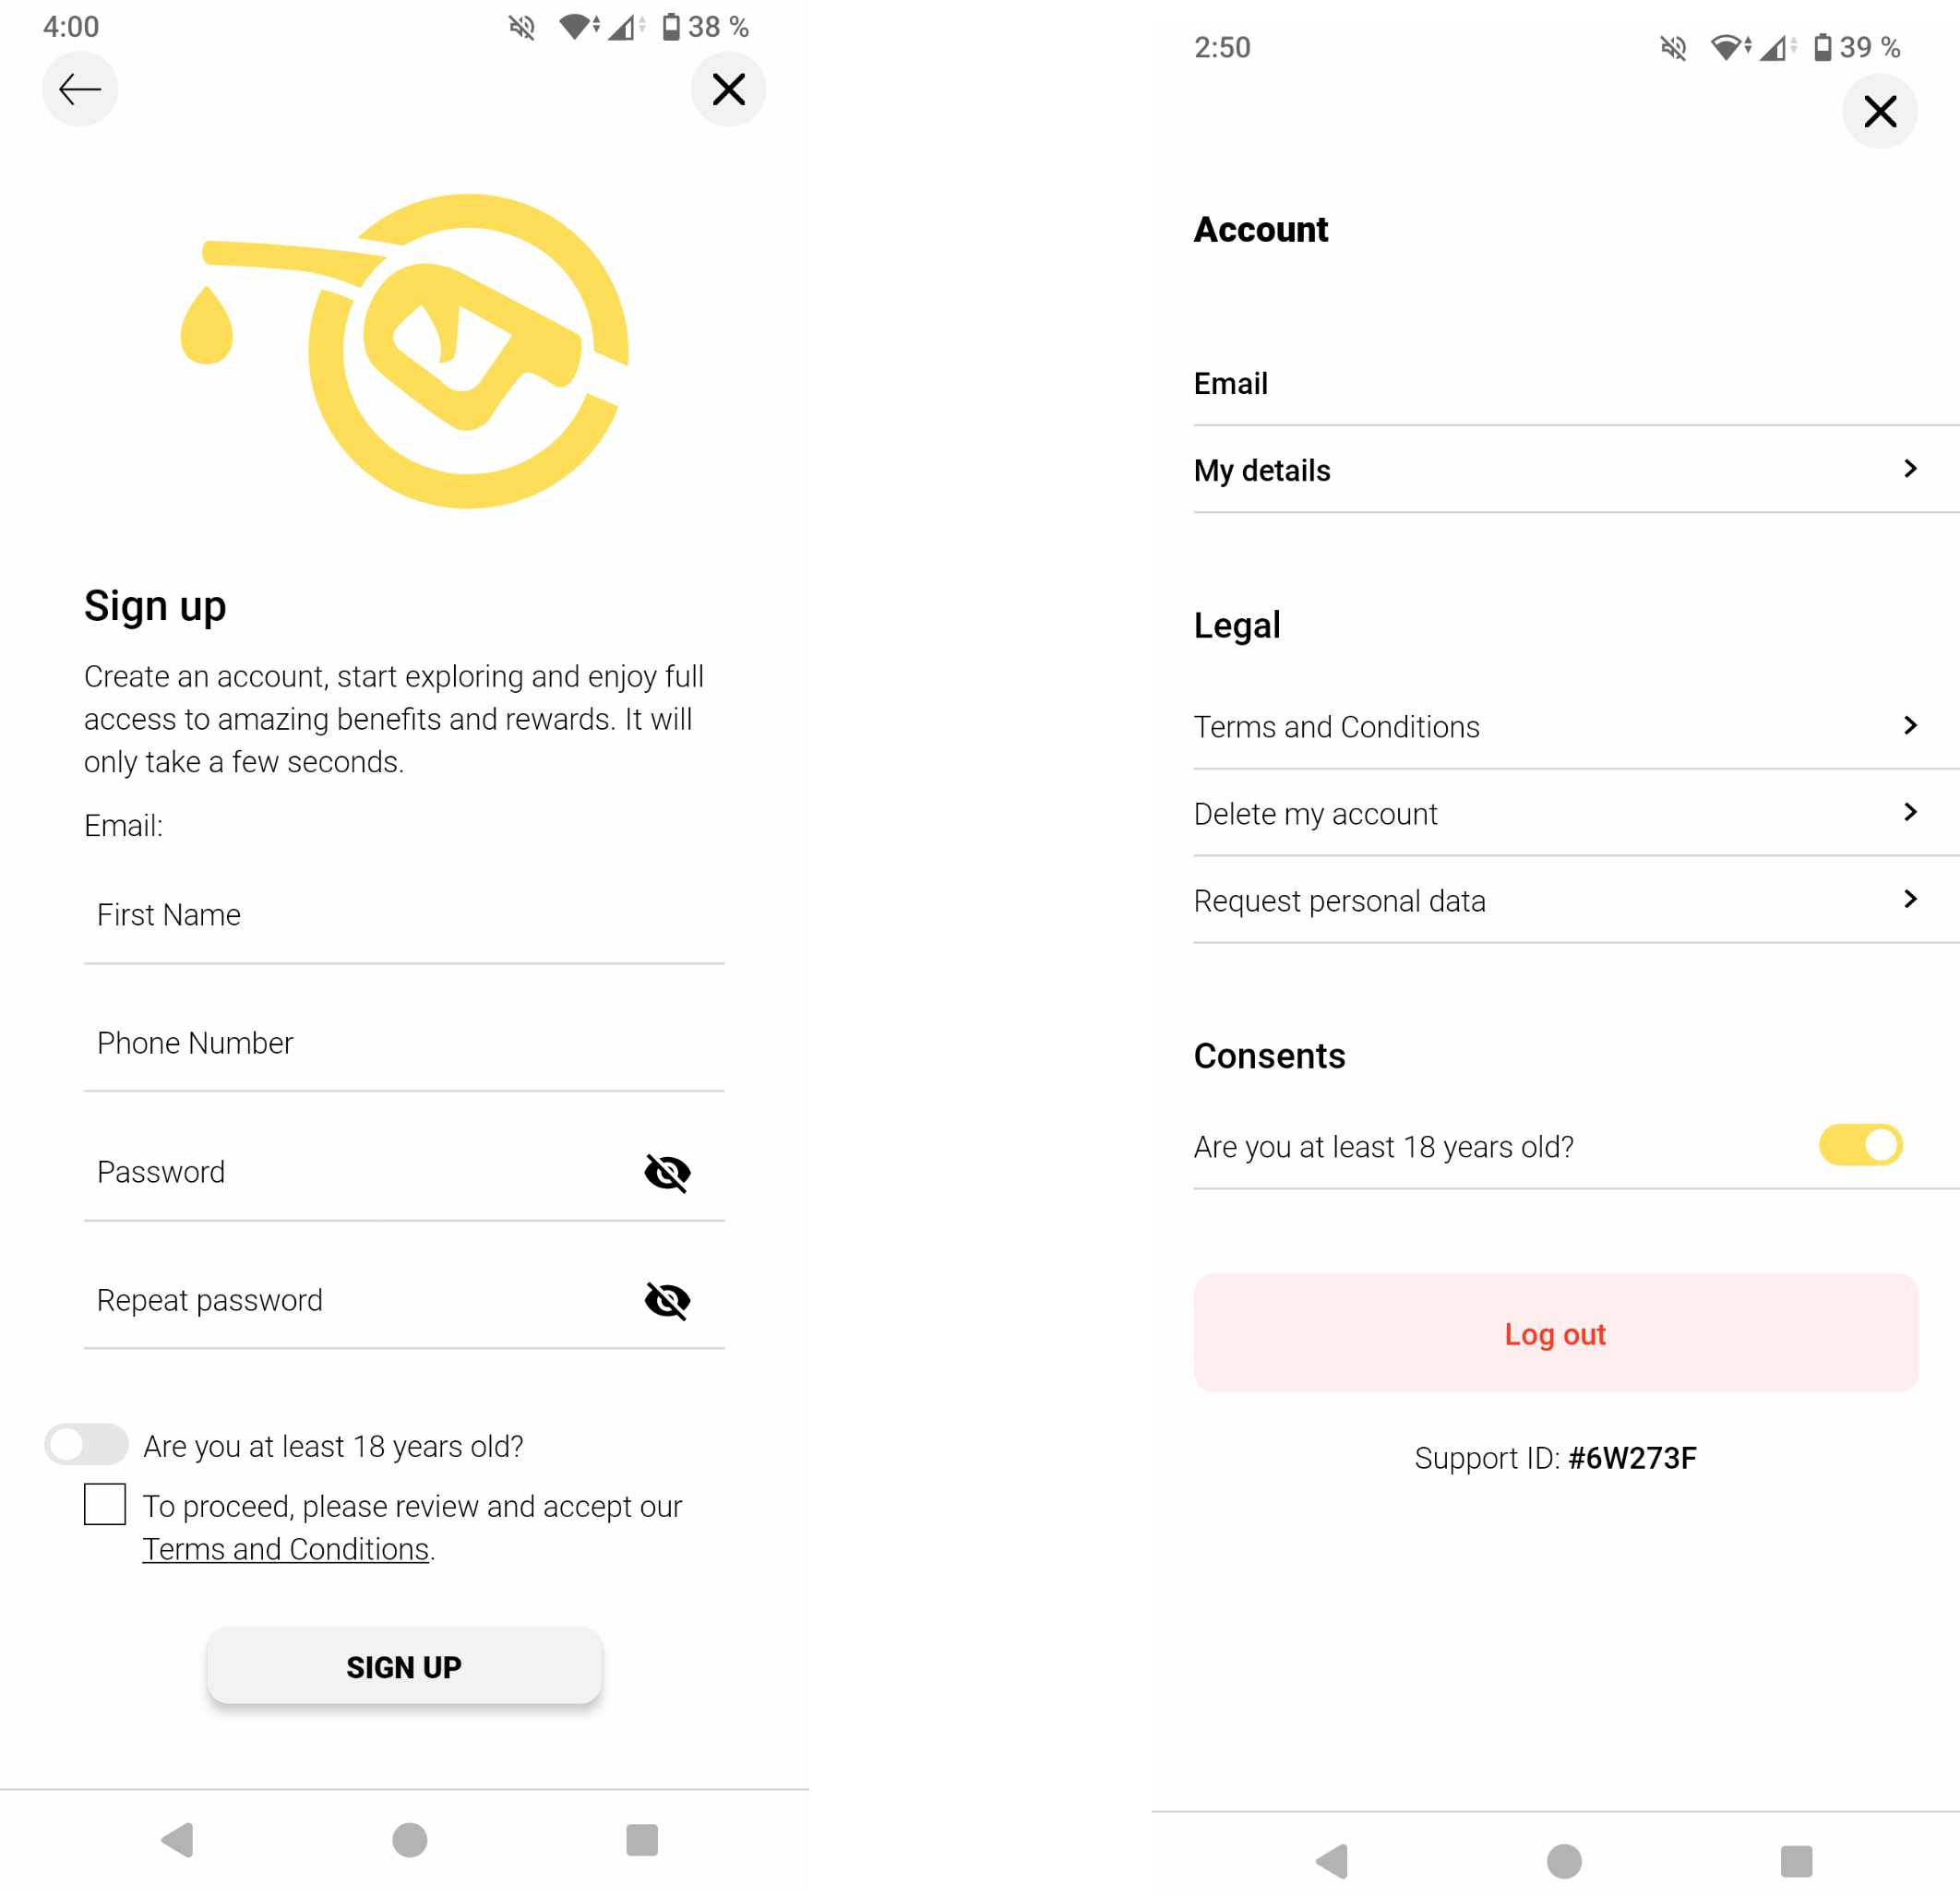
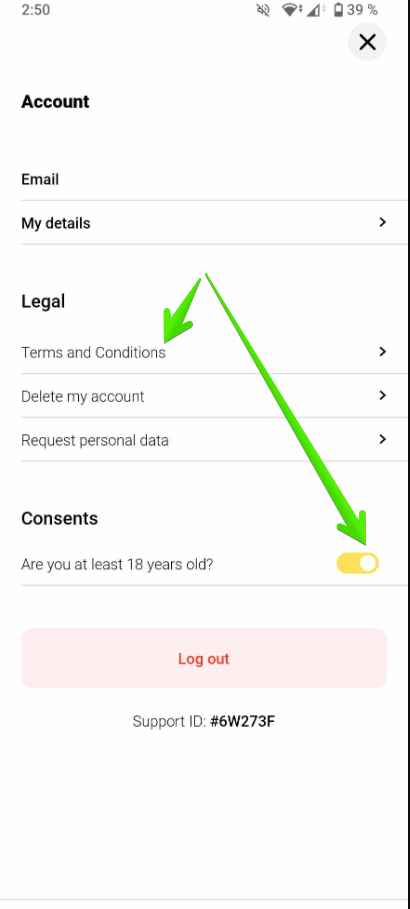
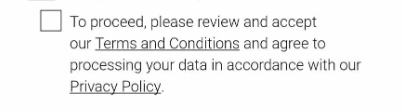
Еxample of consents in the mobile app
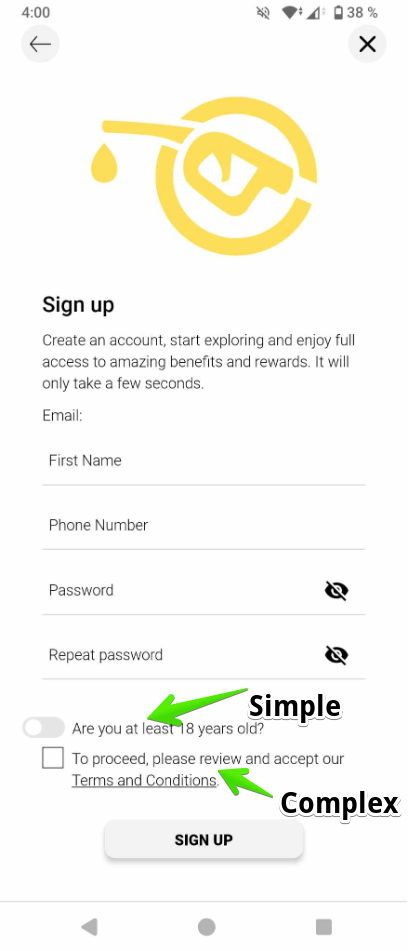
Simple and Complex Consent
TRIFFT offers users two different types of consent options.
Simple Consent is designed for straightforward consent collection, primarily used for cases where a long description is not required. Since it is not possible to provide additional details, this type of consent is ideal for situations like age verification.
Complex Consent is used when detailed information about specific consent is necessary. It is suitable for cases such as data protection agreements or terms and conditions, where longer and more comprehensive consents are required.
Ready to implement consent options in your app? Continue to the next section to learn how to create and customize consent settings effectively.
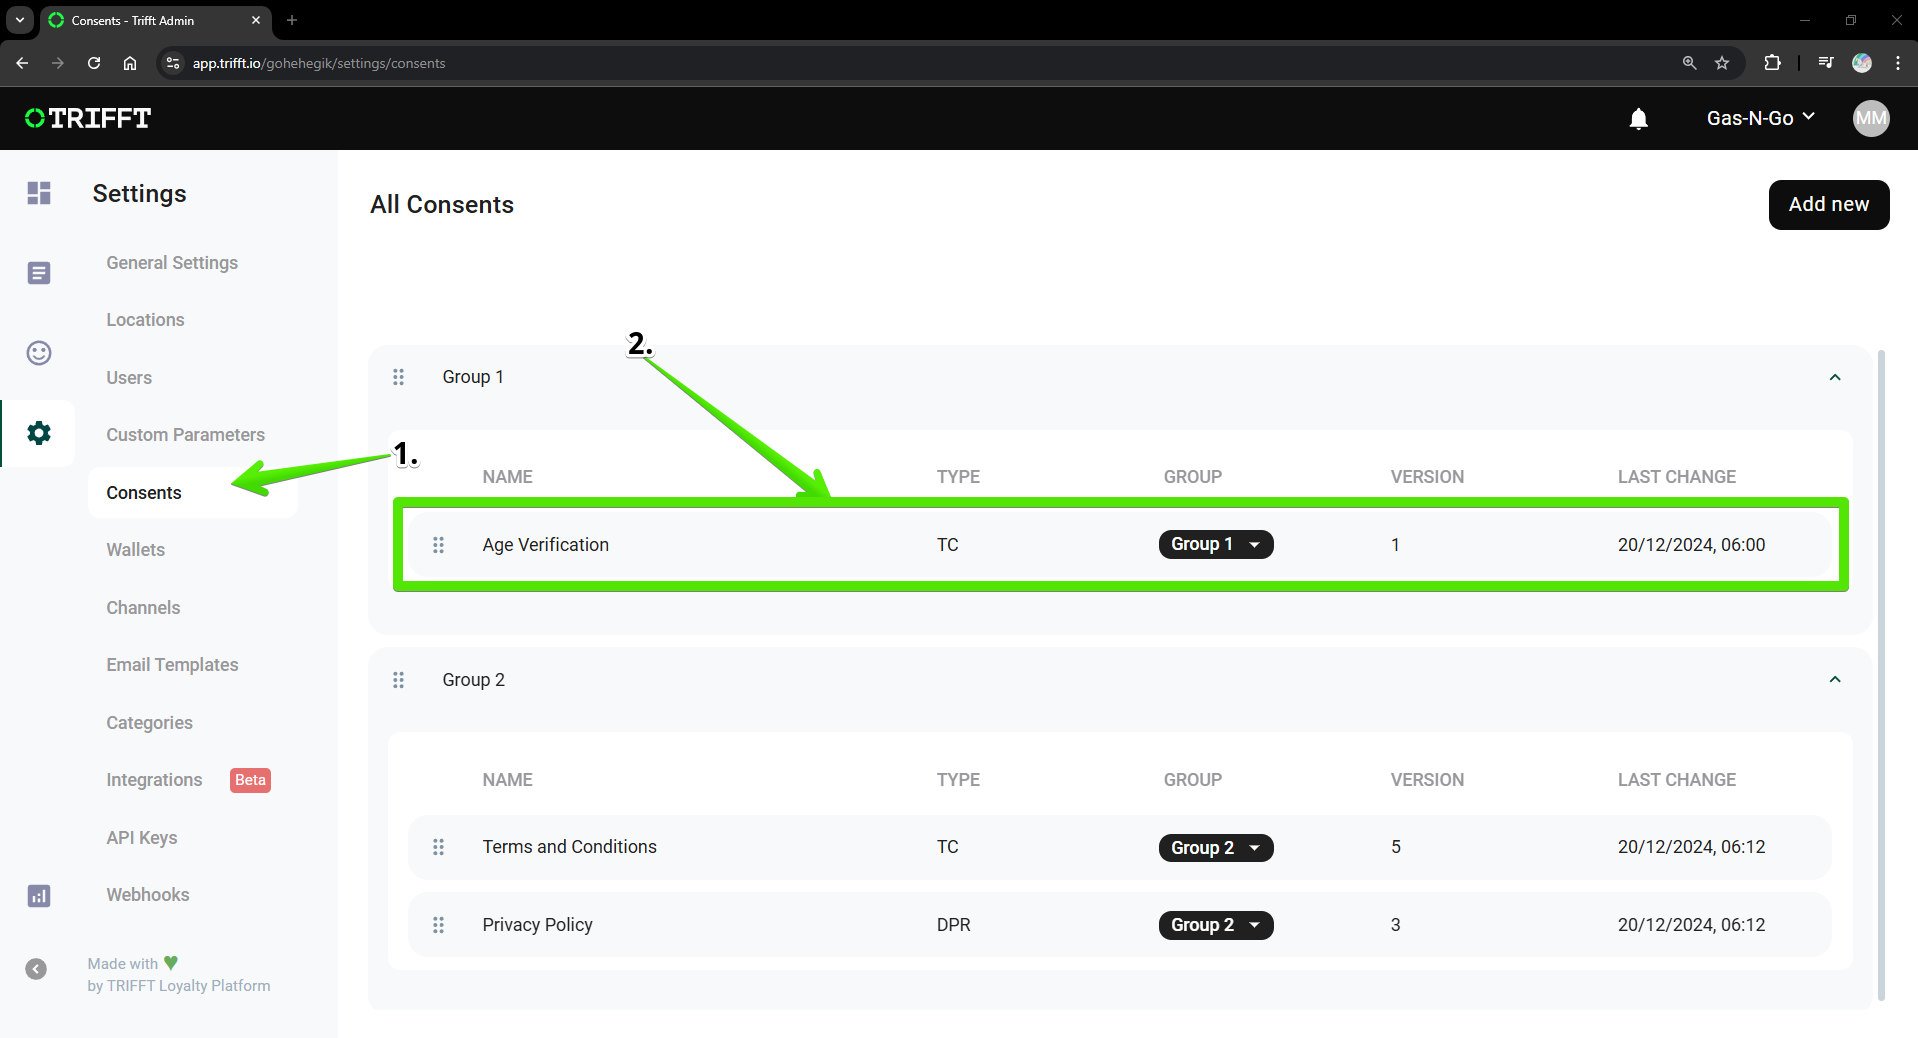
Creating Consents
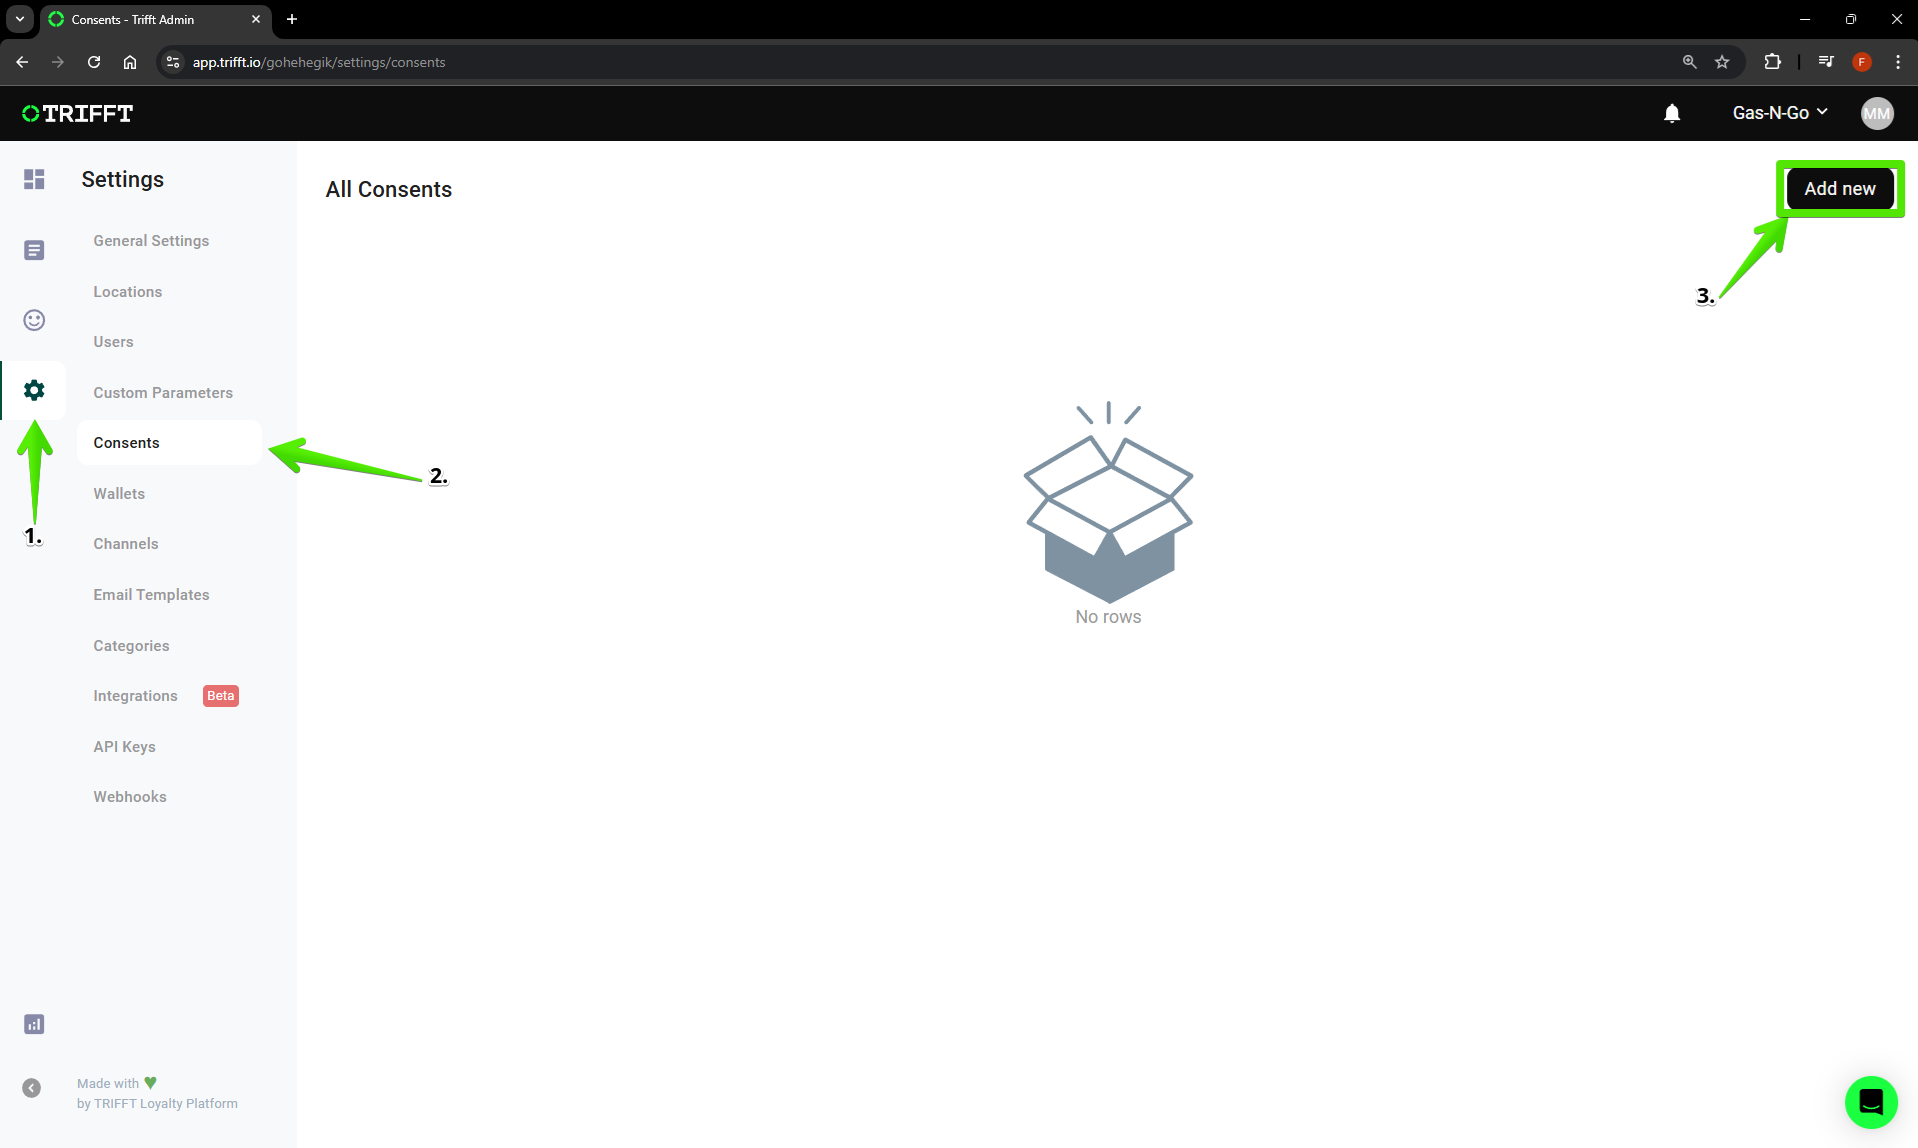
- Click on Settings
- Click on Consents
- Click on Add new
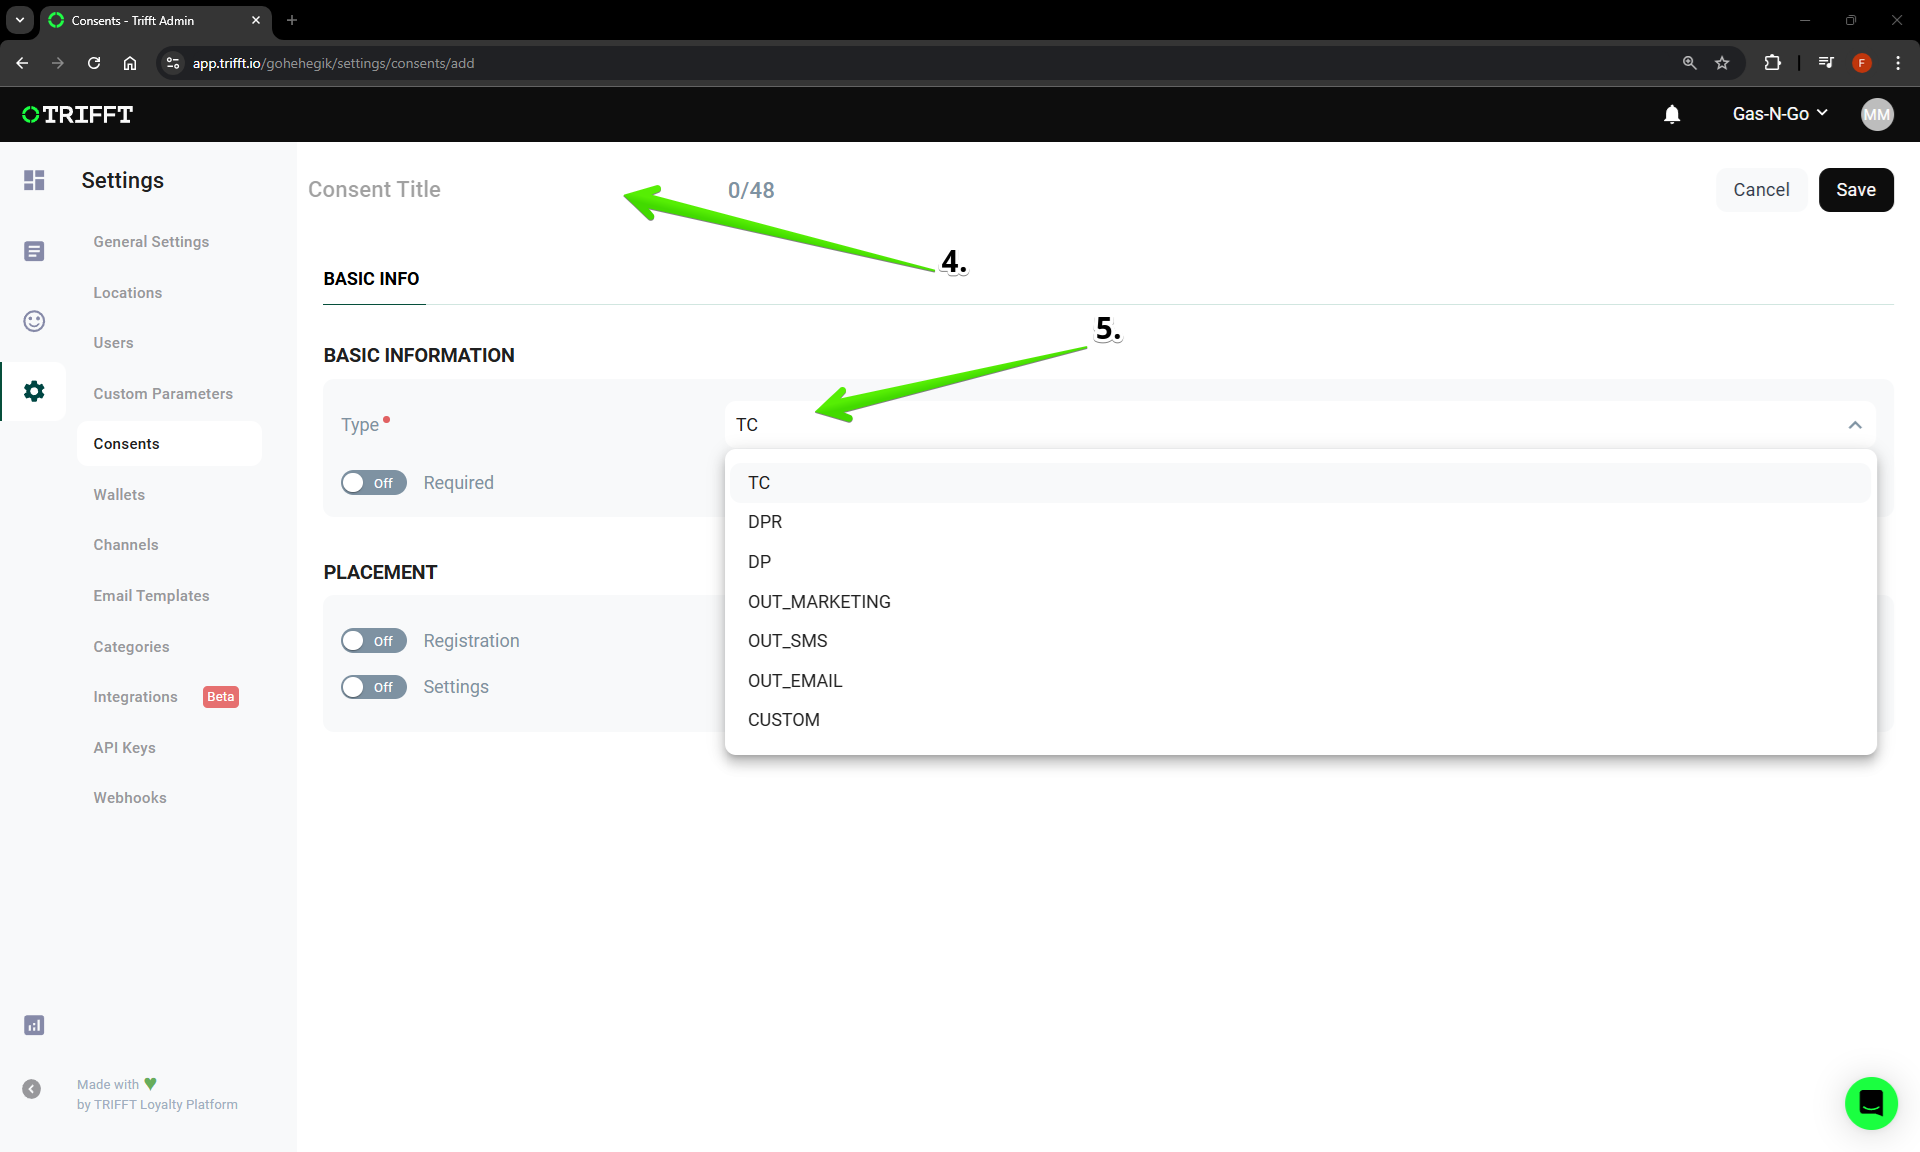
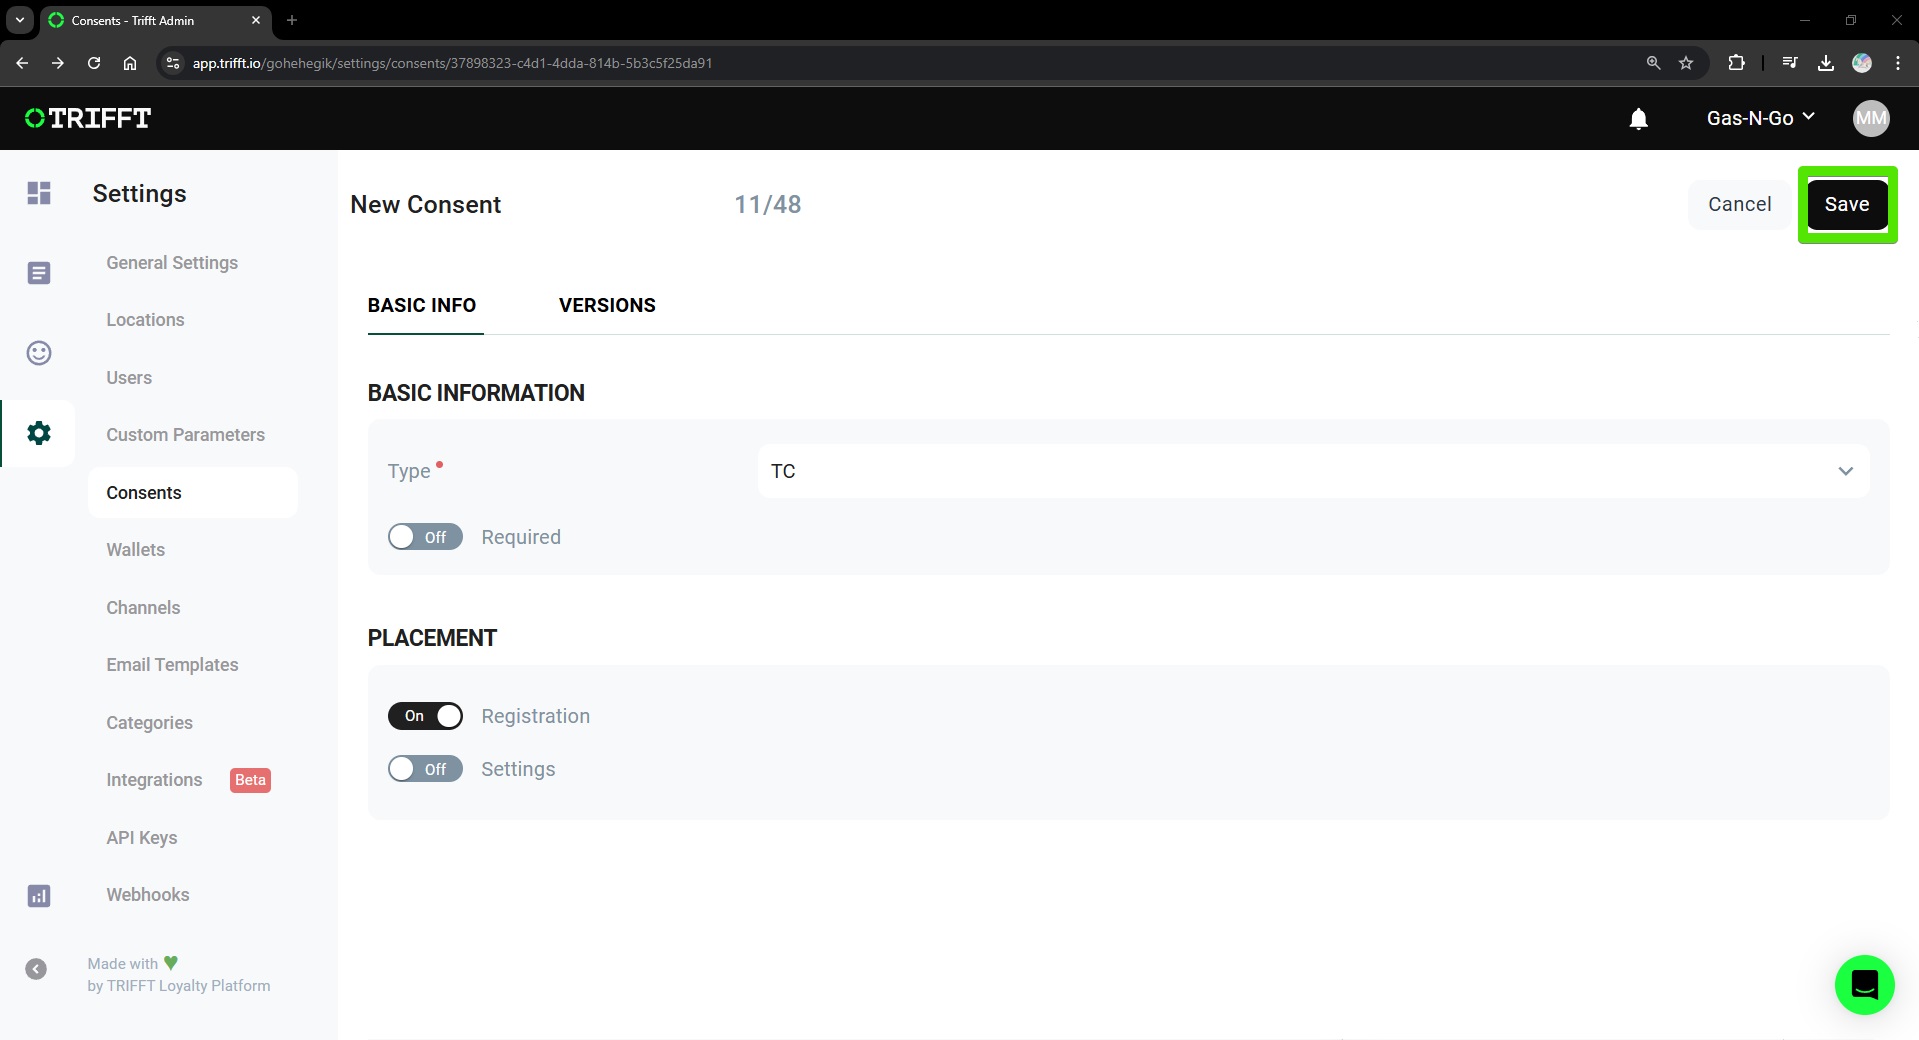
- Fill in Title
Title is only internal and it will not shown in the app
- Choose Type
Explanation of Types
TC = Terms & Conditions
DPR = Data Protection Regulations
DP = Data Protection
OUT_Marketing = General outbound marketing
OUT_SMS = Notification via SMS
OUT_EMAIL = Notification via E-mail
CUSTOM = Custom
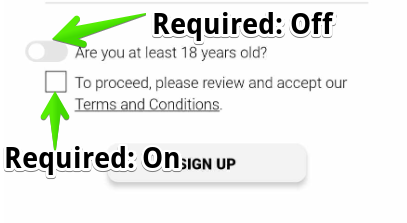
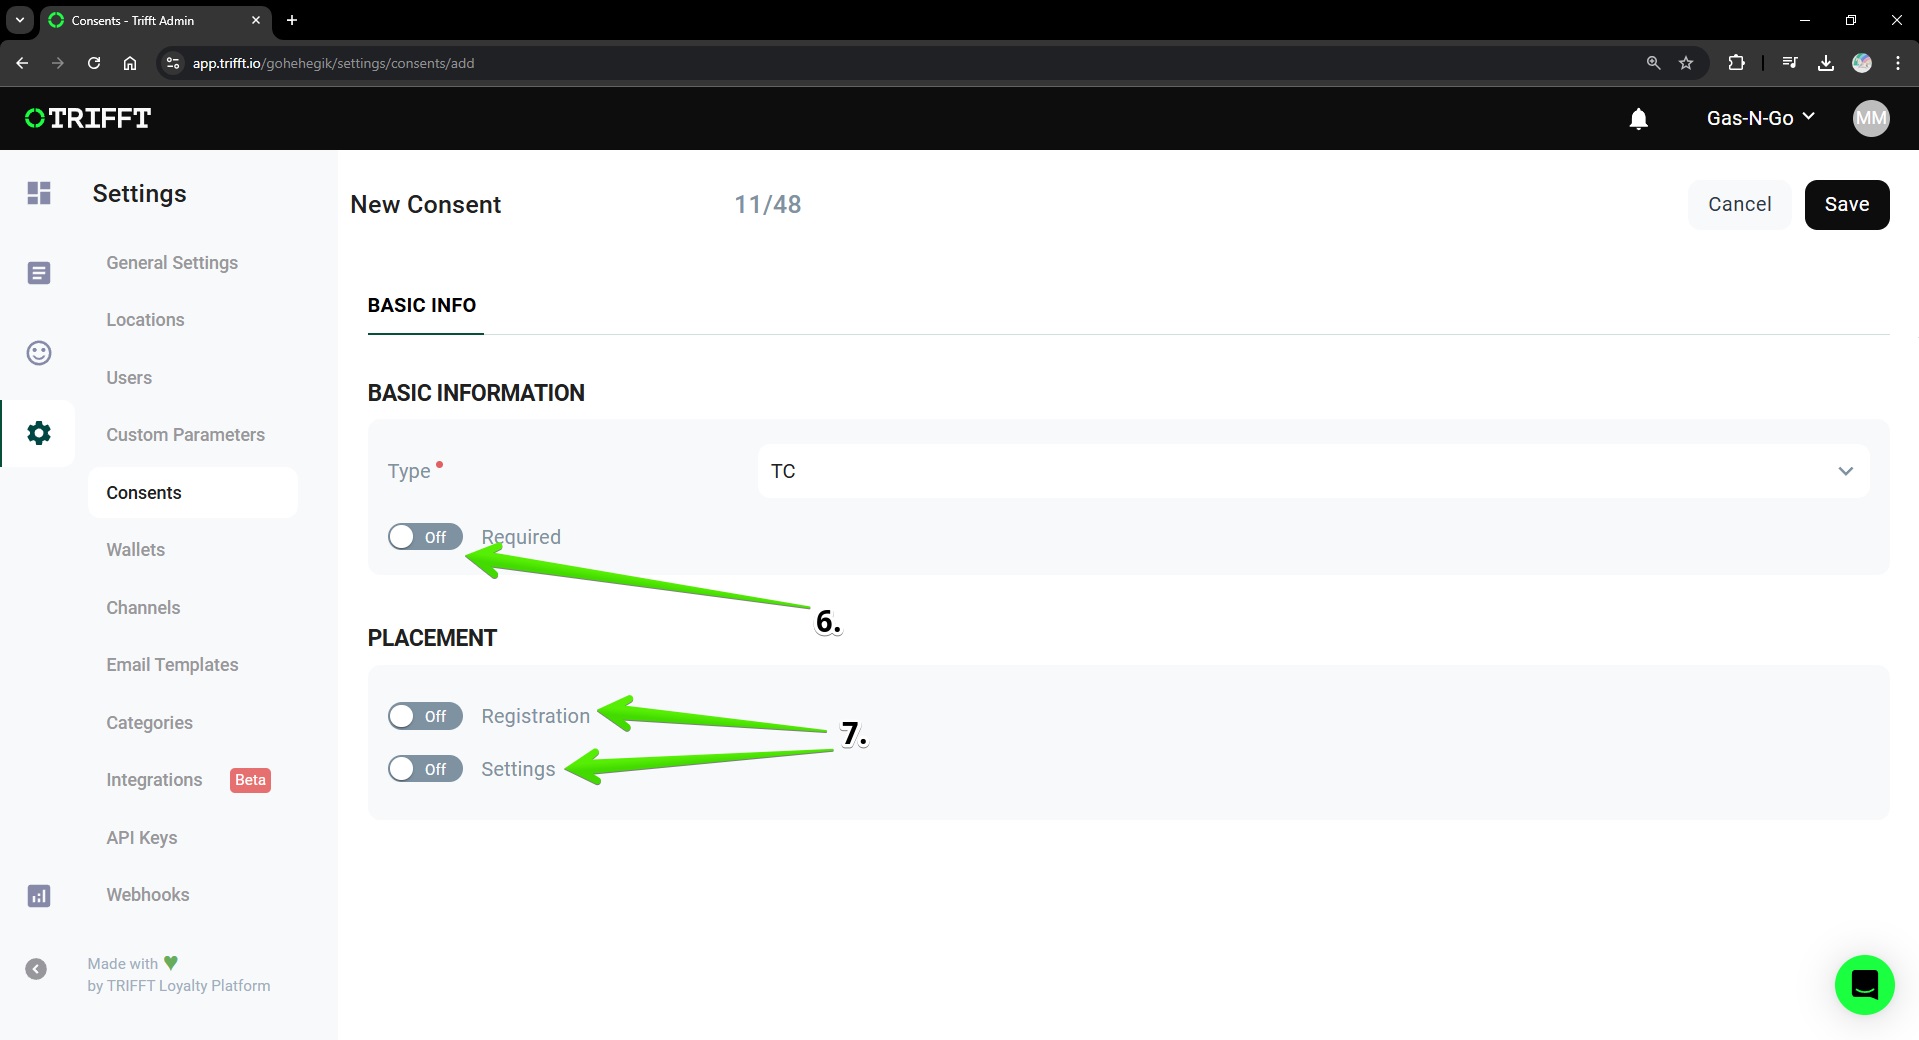
- Choose whether this consent is mandatory
If consent is mandatory user can´t register without ticking the checkbox
If consent is not mandatory user can proceed the registration without sliding the bar
- Select placement
Placement
Registration = This consent will be asked upon registration.
Settings = This consent can be seen only in settings and it will not be asked during registration process.
Required consents that could not be toggled off will appear in Legal Information. Not required consent will show in the Consents category
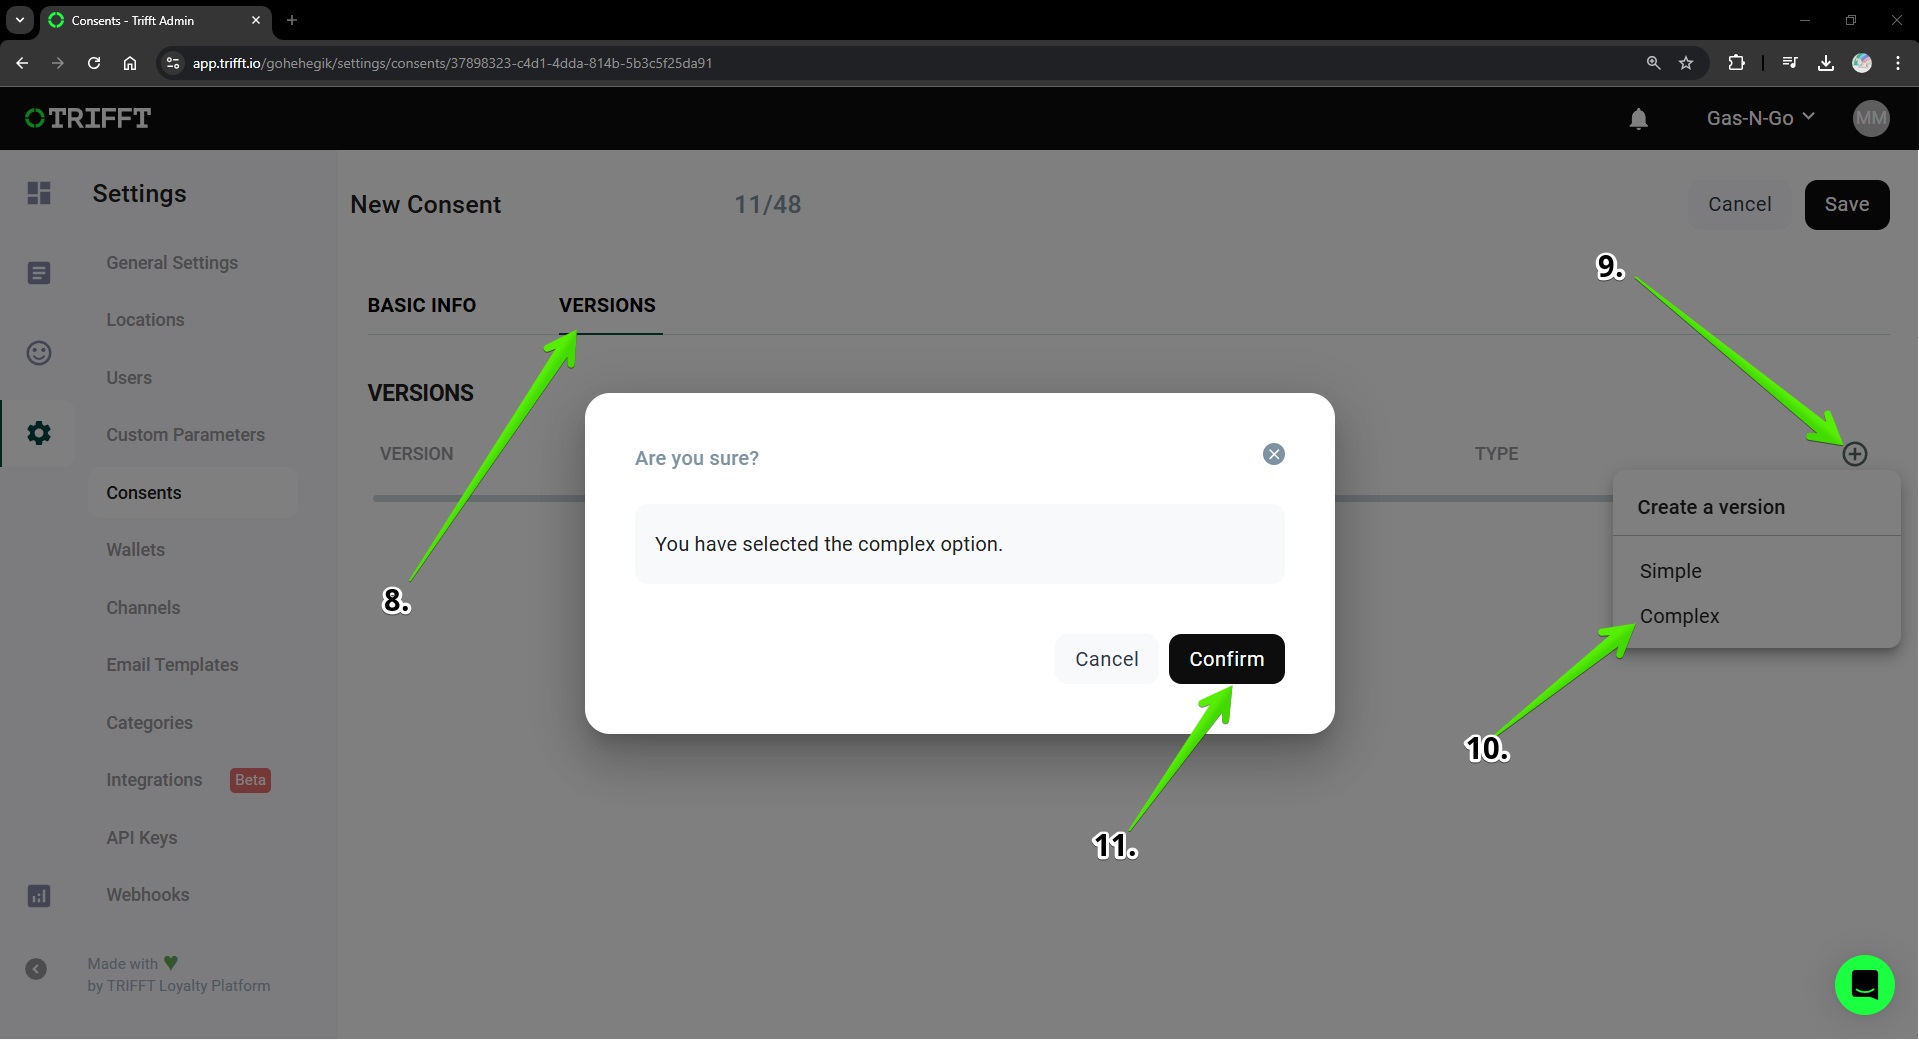
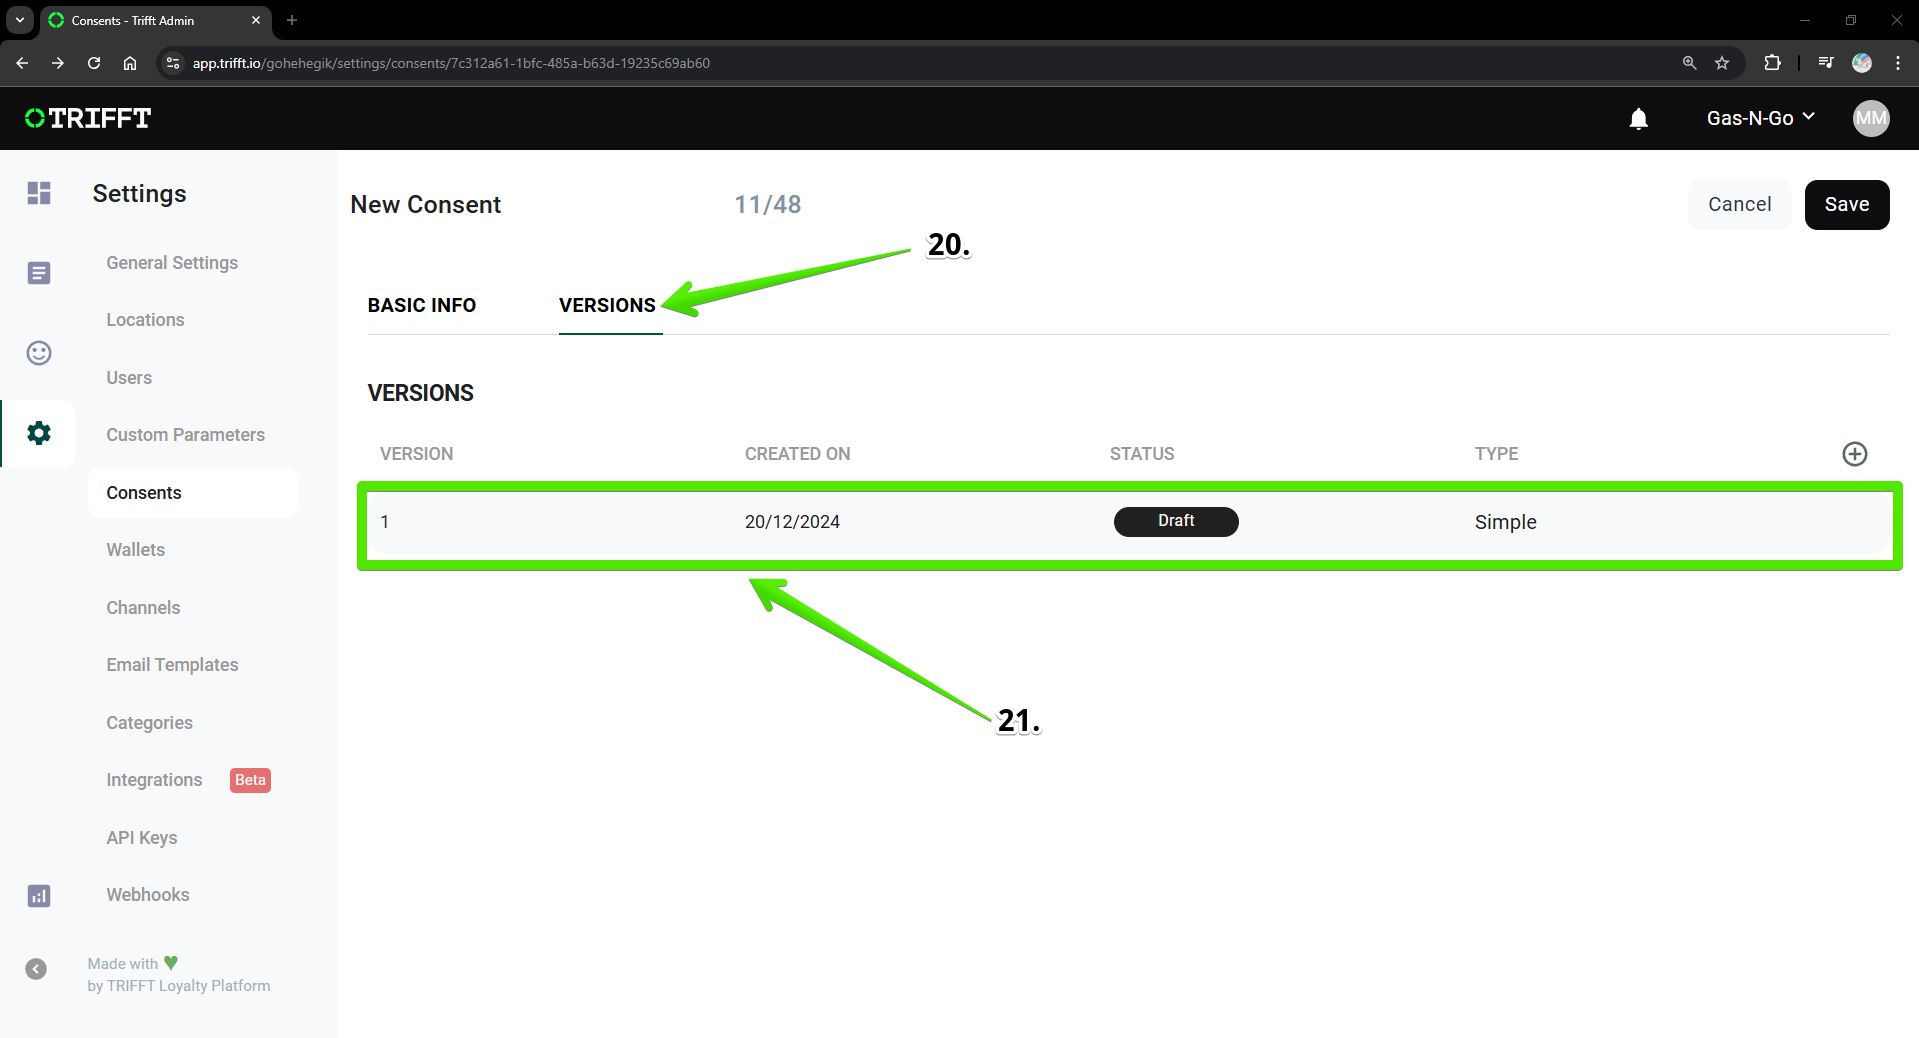
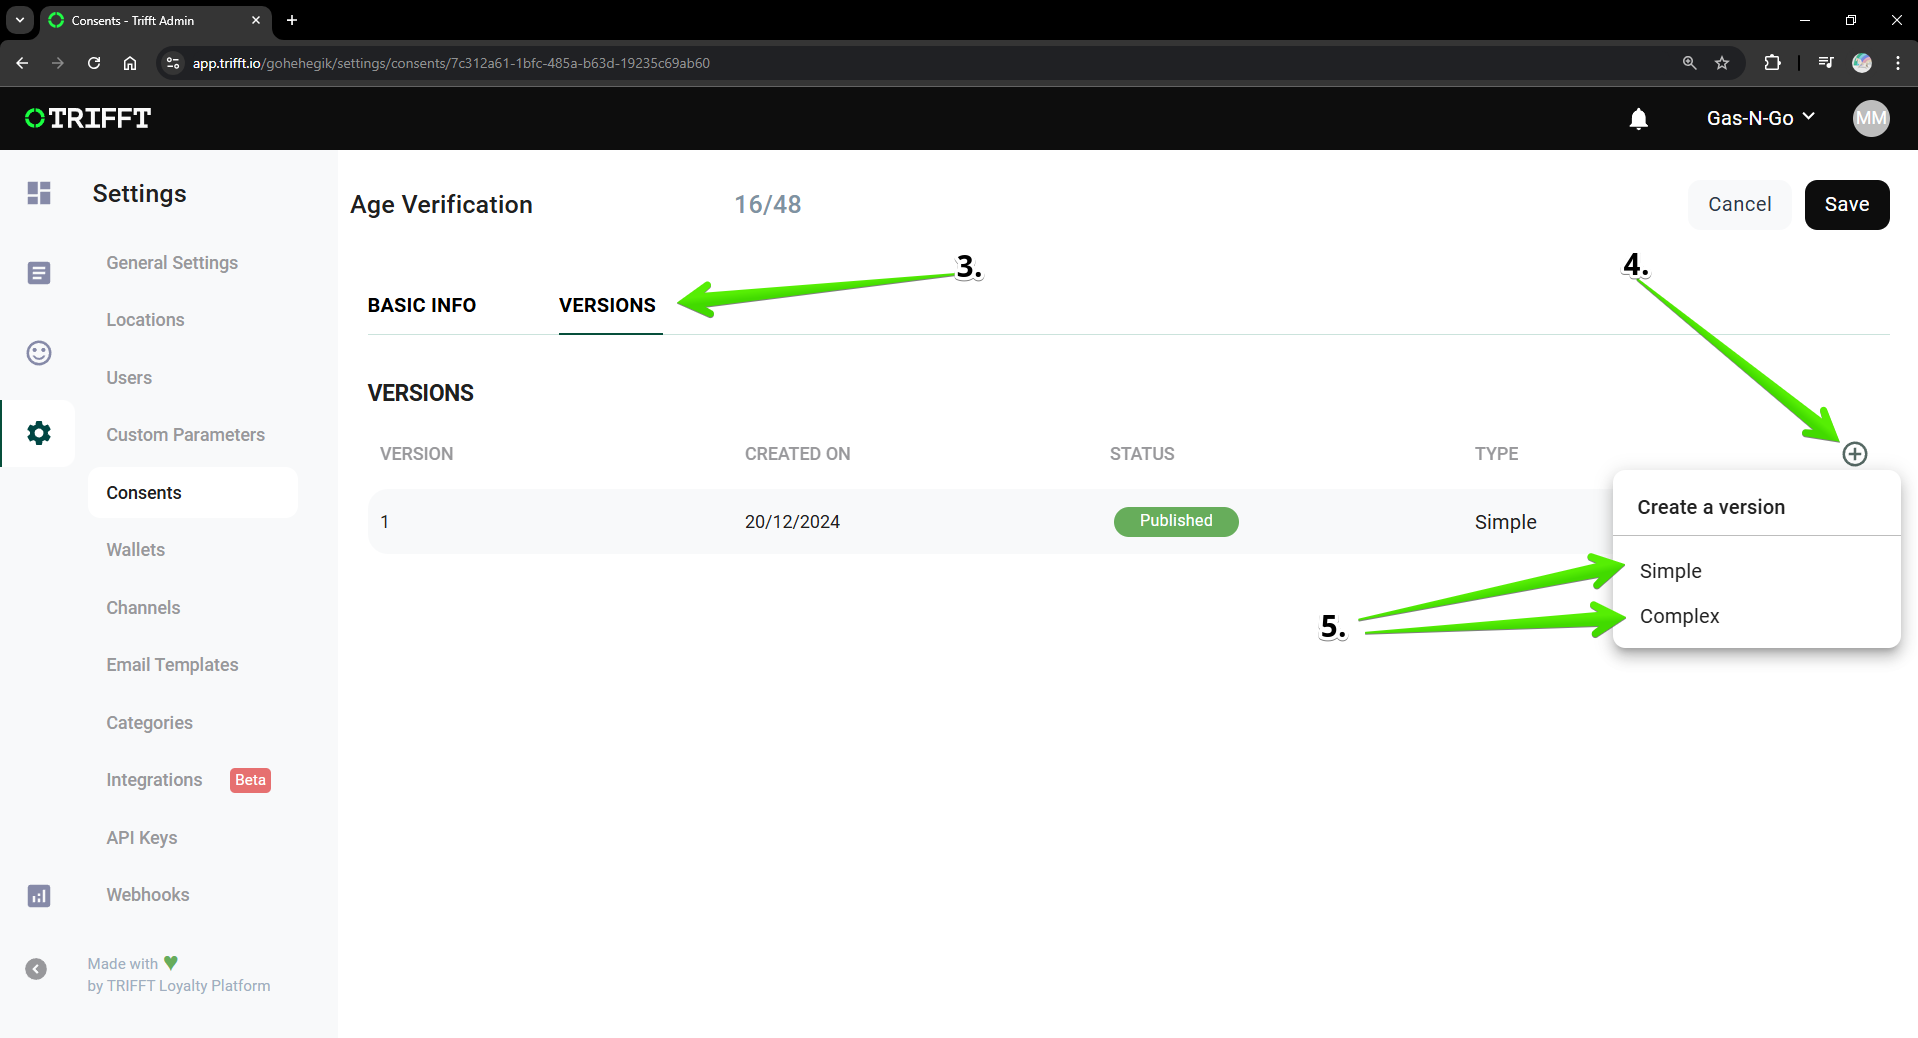
- Click on Versions
- Click on Plus Icon
Here you can decide whether you would like to have Complex or Simple version
- Click on Complex/Simple
- Click on Confirm
Creating Simple consent
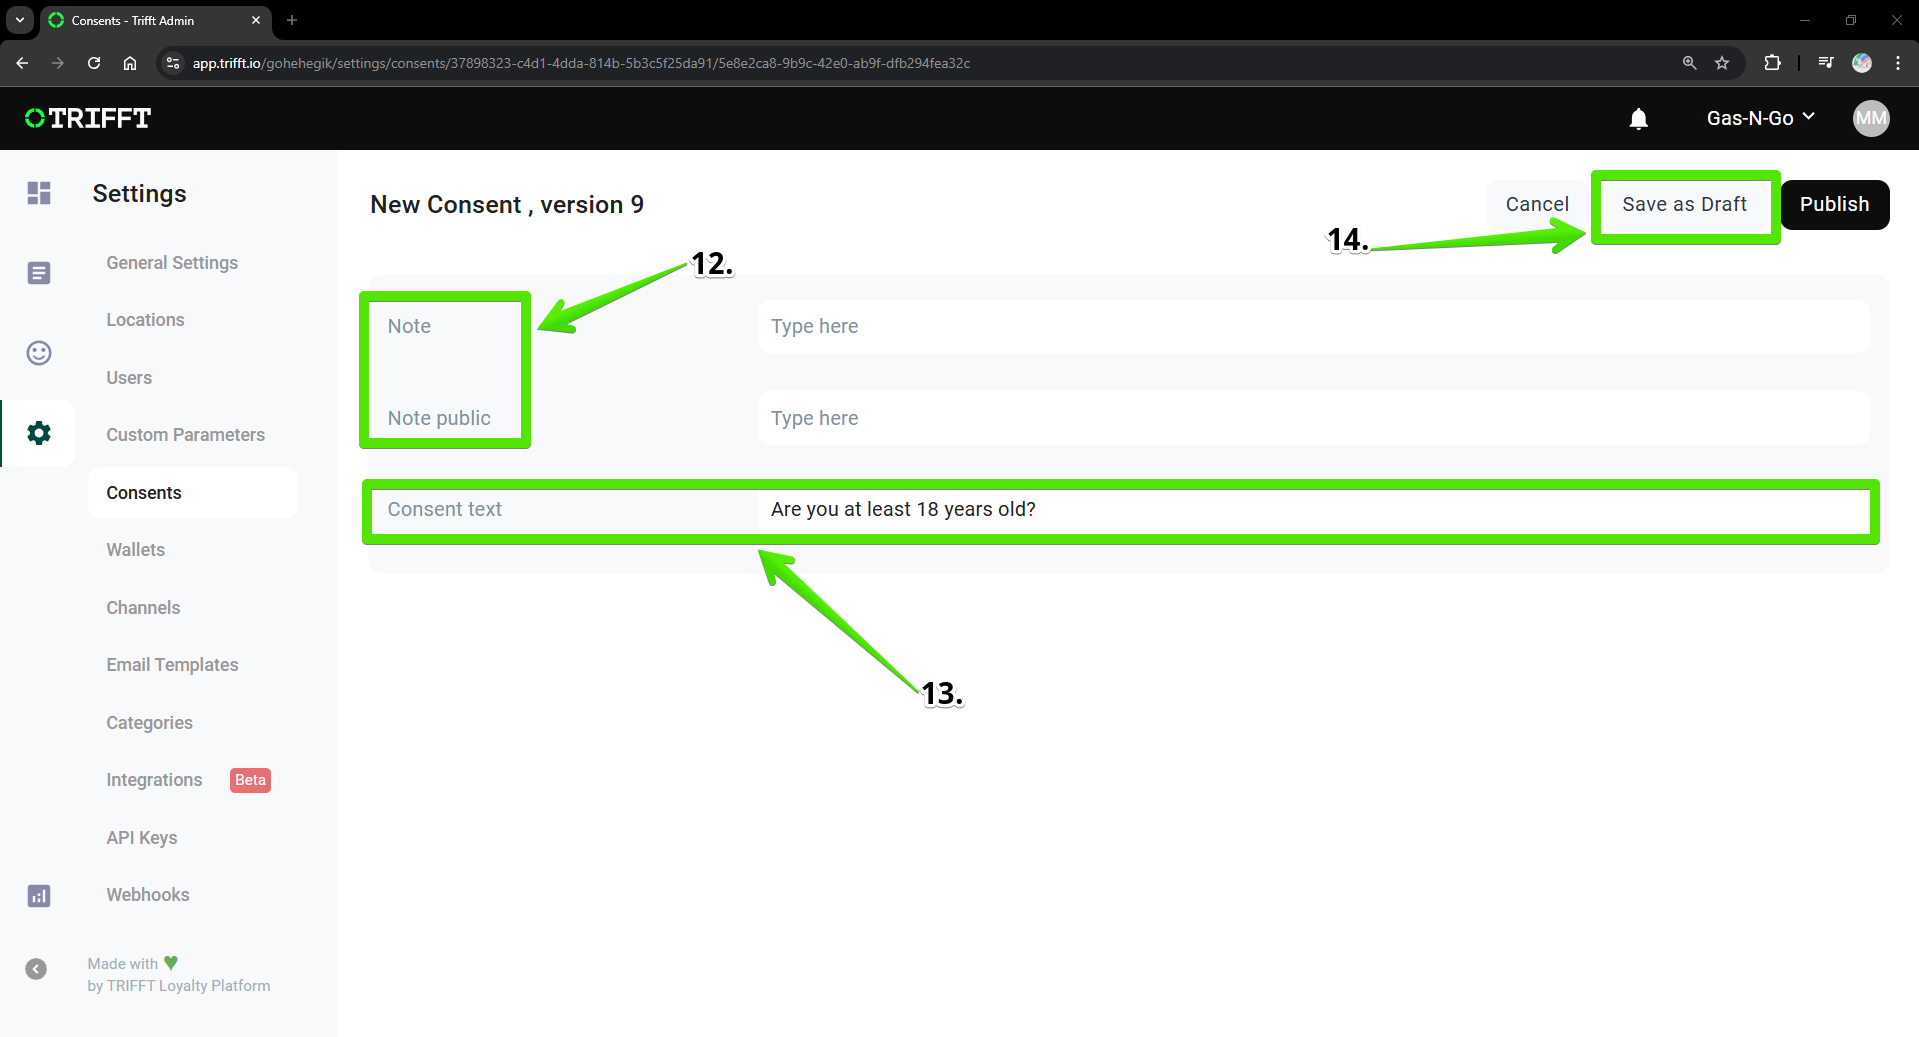
- notes
Both Note and Note Public can remain empty. Note Public is used to notify users about a new version of the consent. If Note Public is empty, the consent text will be displayed as the notification instead.
- Consent text
You can type text of your consent
Еxample
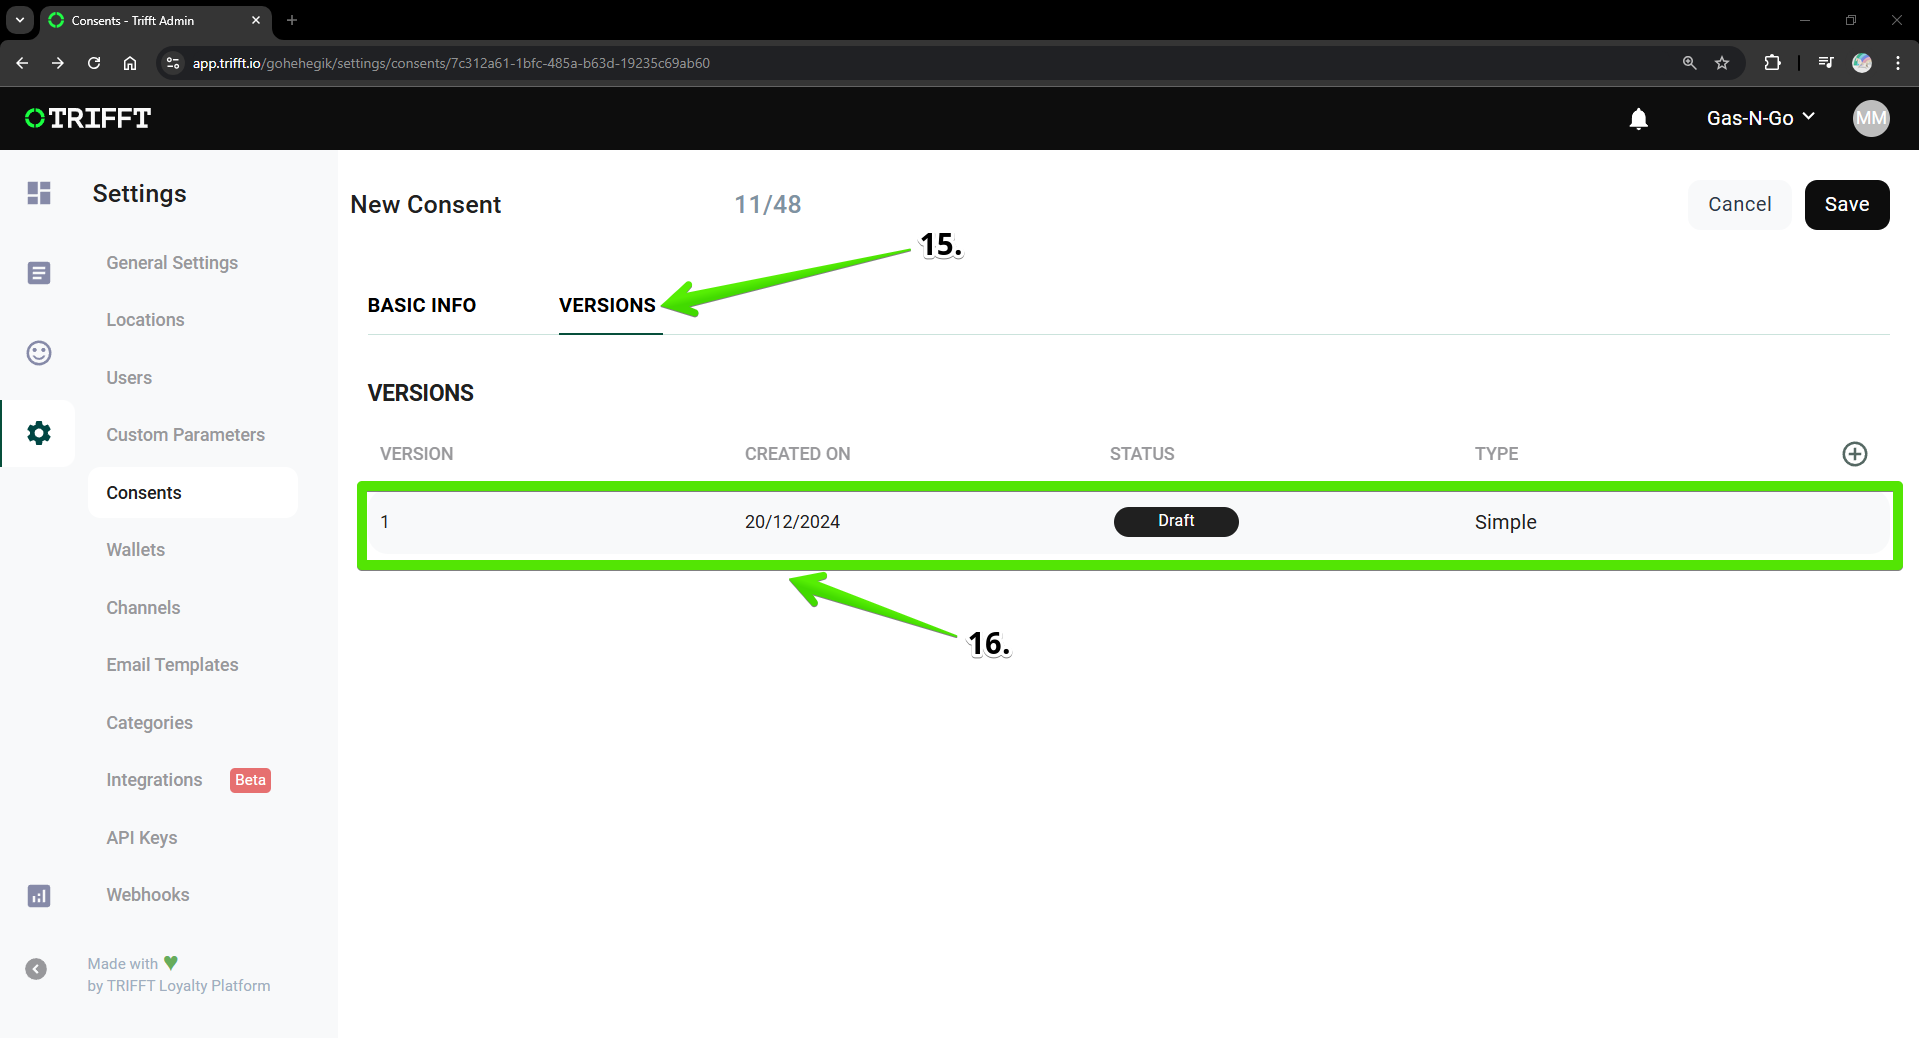
- Click on Versions
- Click on Version that you want to Publish/Edit
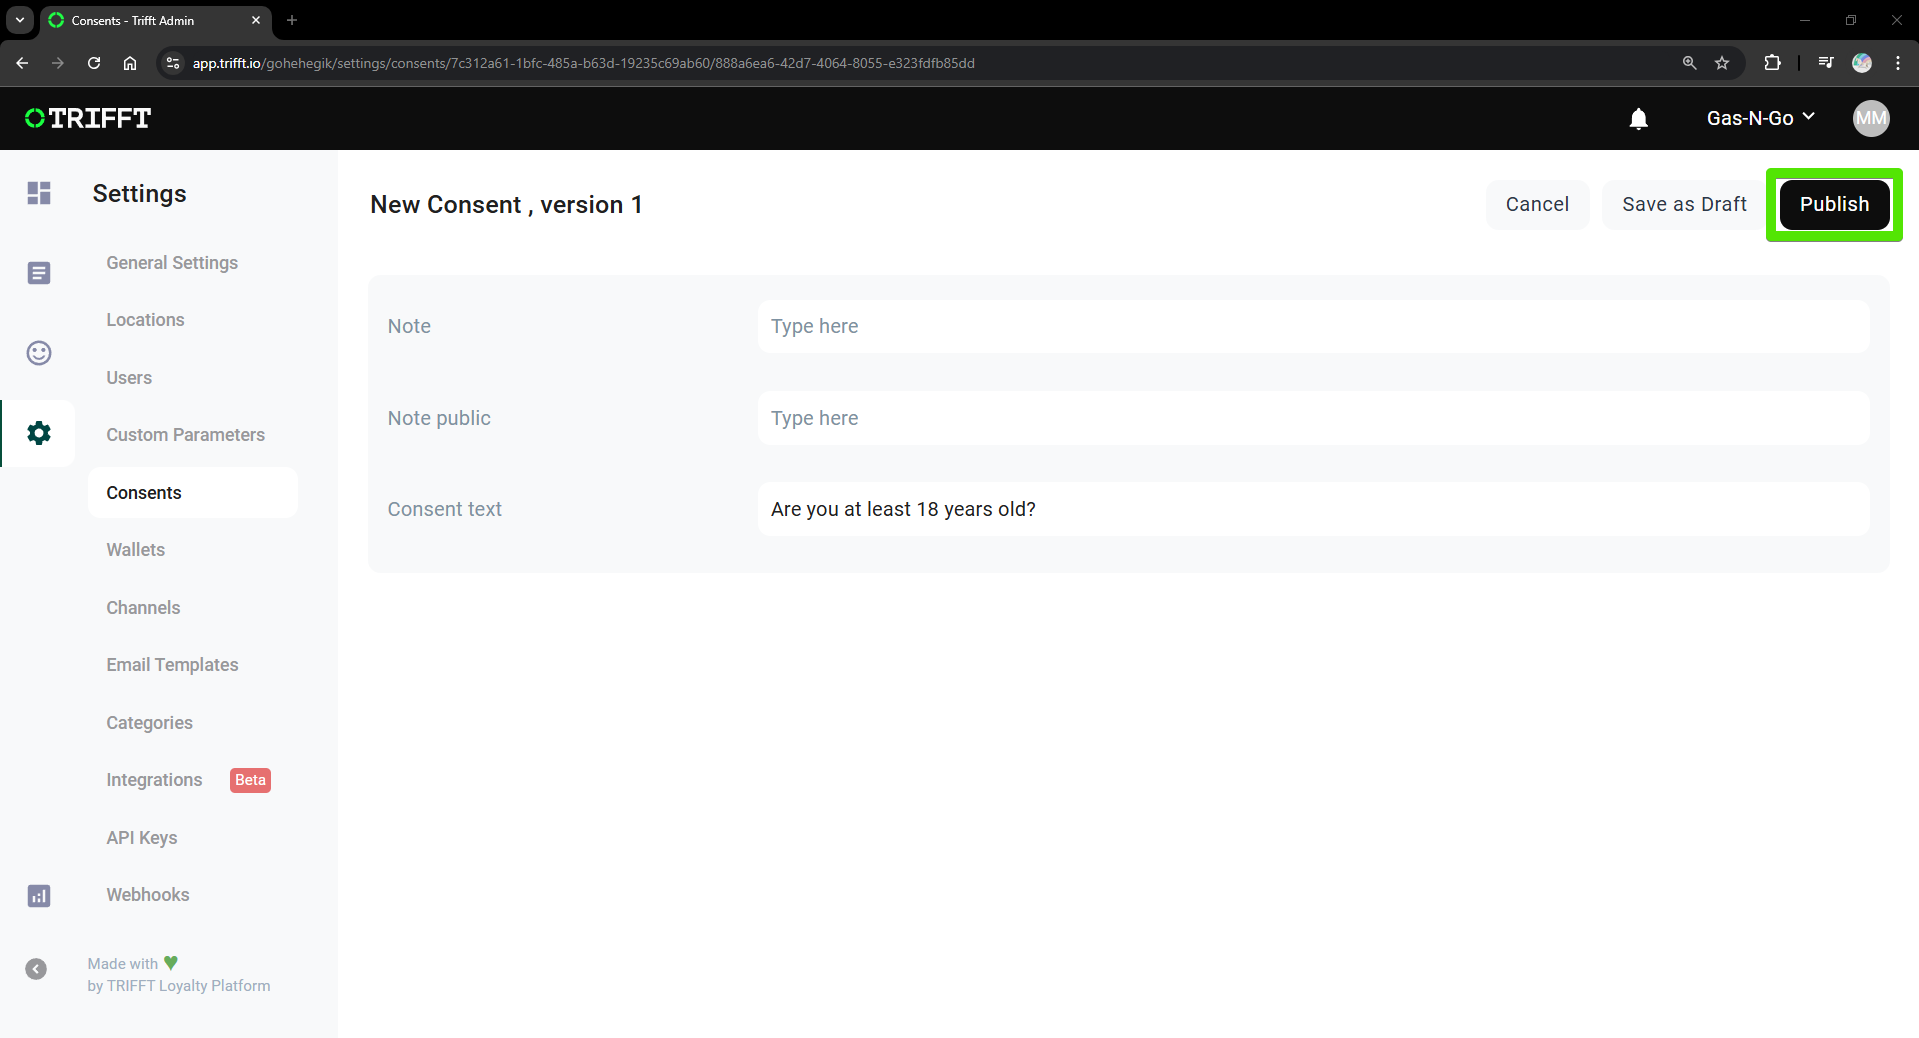
- Click on Publish
Once the consent is published, the wording can only be changed by creating a new version.
Creating complex consent version
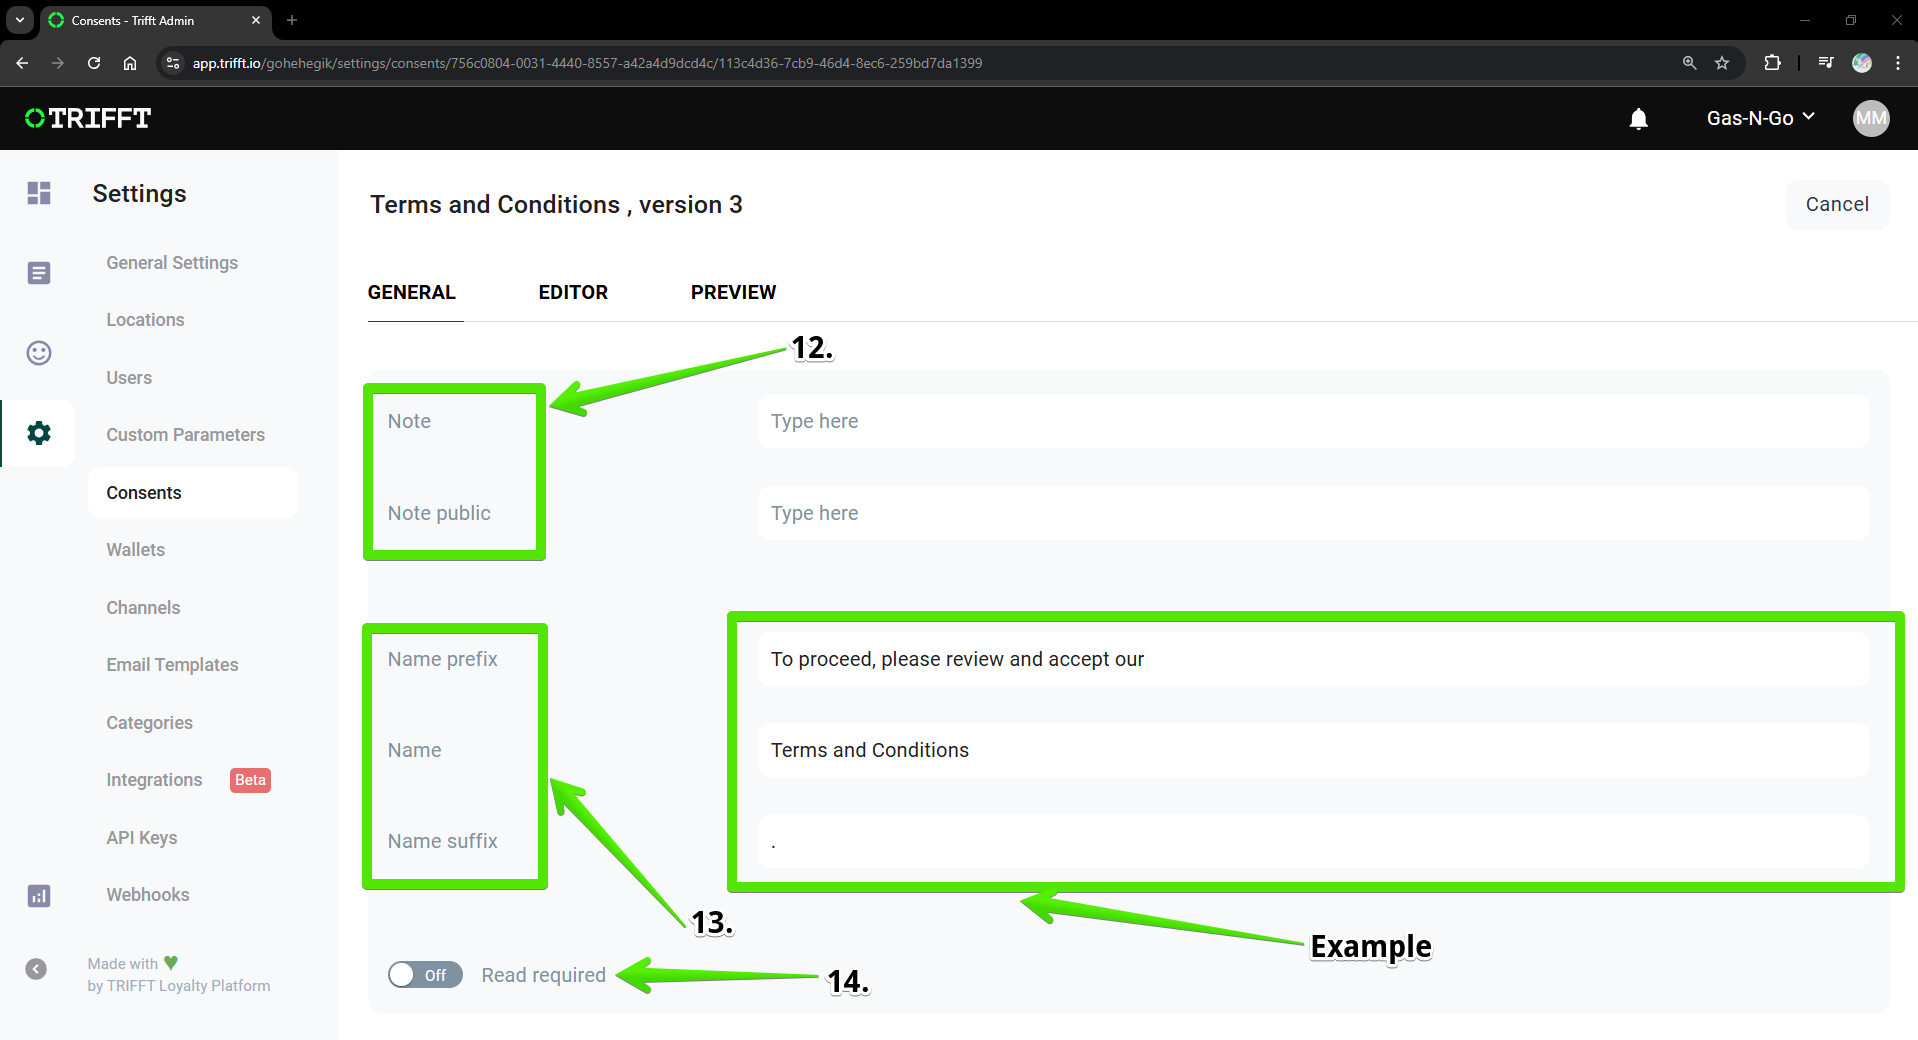
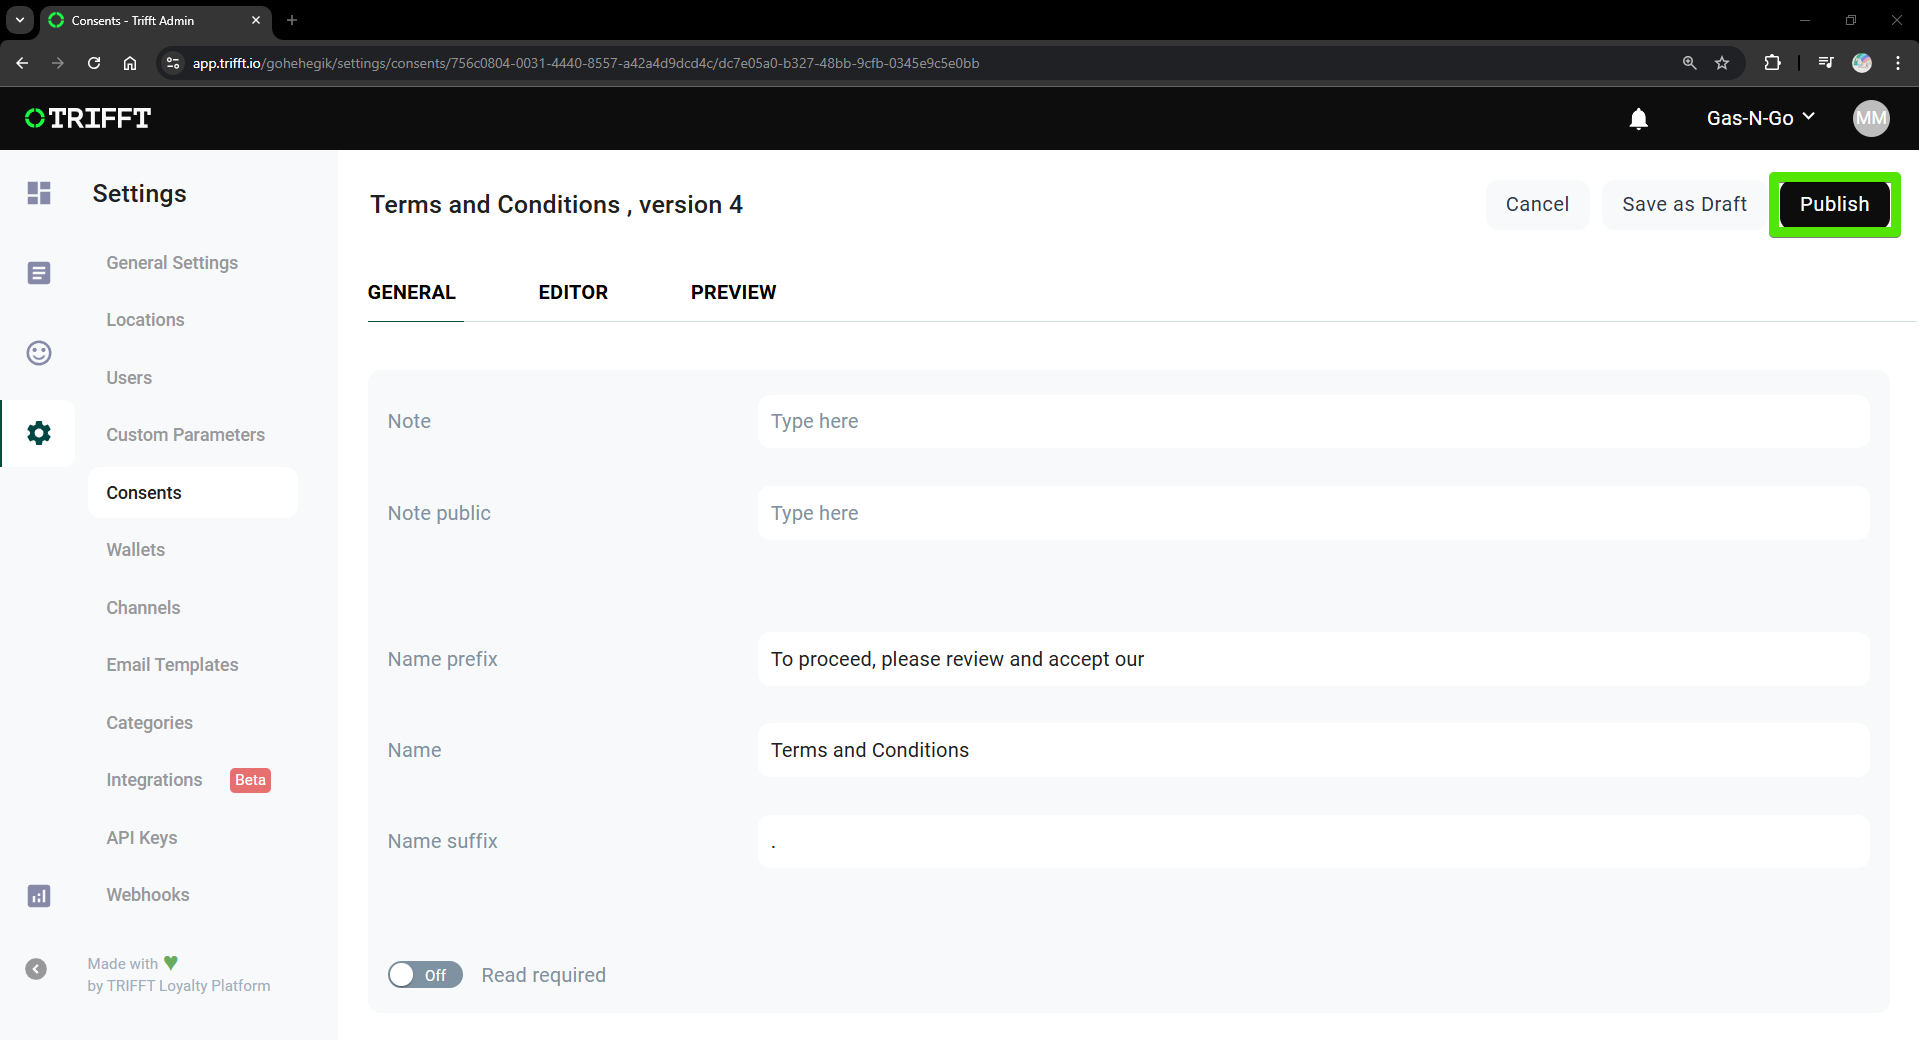
- Notes
Both Note and Note Public can remain empty. Note Public is used to notify users about a new version of the consent. If Note Public is empty, the consent text (Name Prefix, Name, Name Suffix) will be displayed as the notification instead.
Еxample
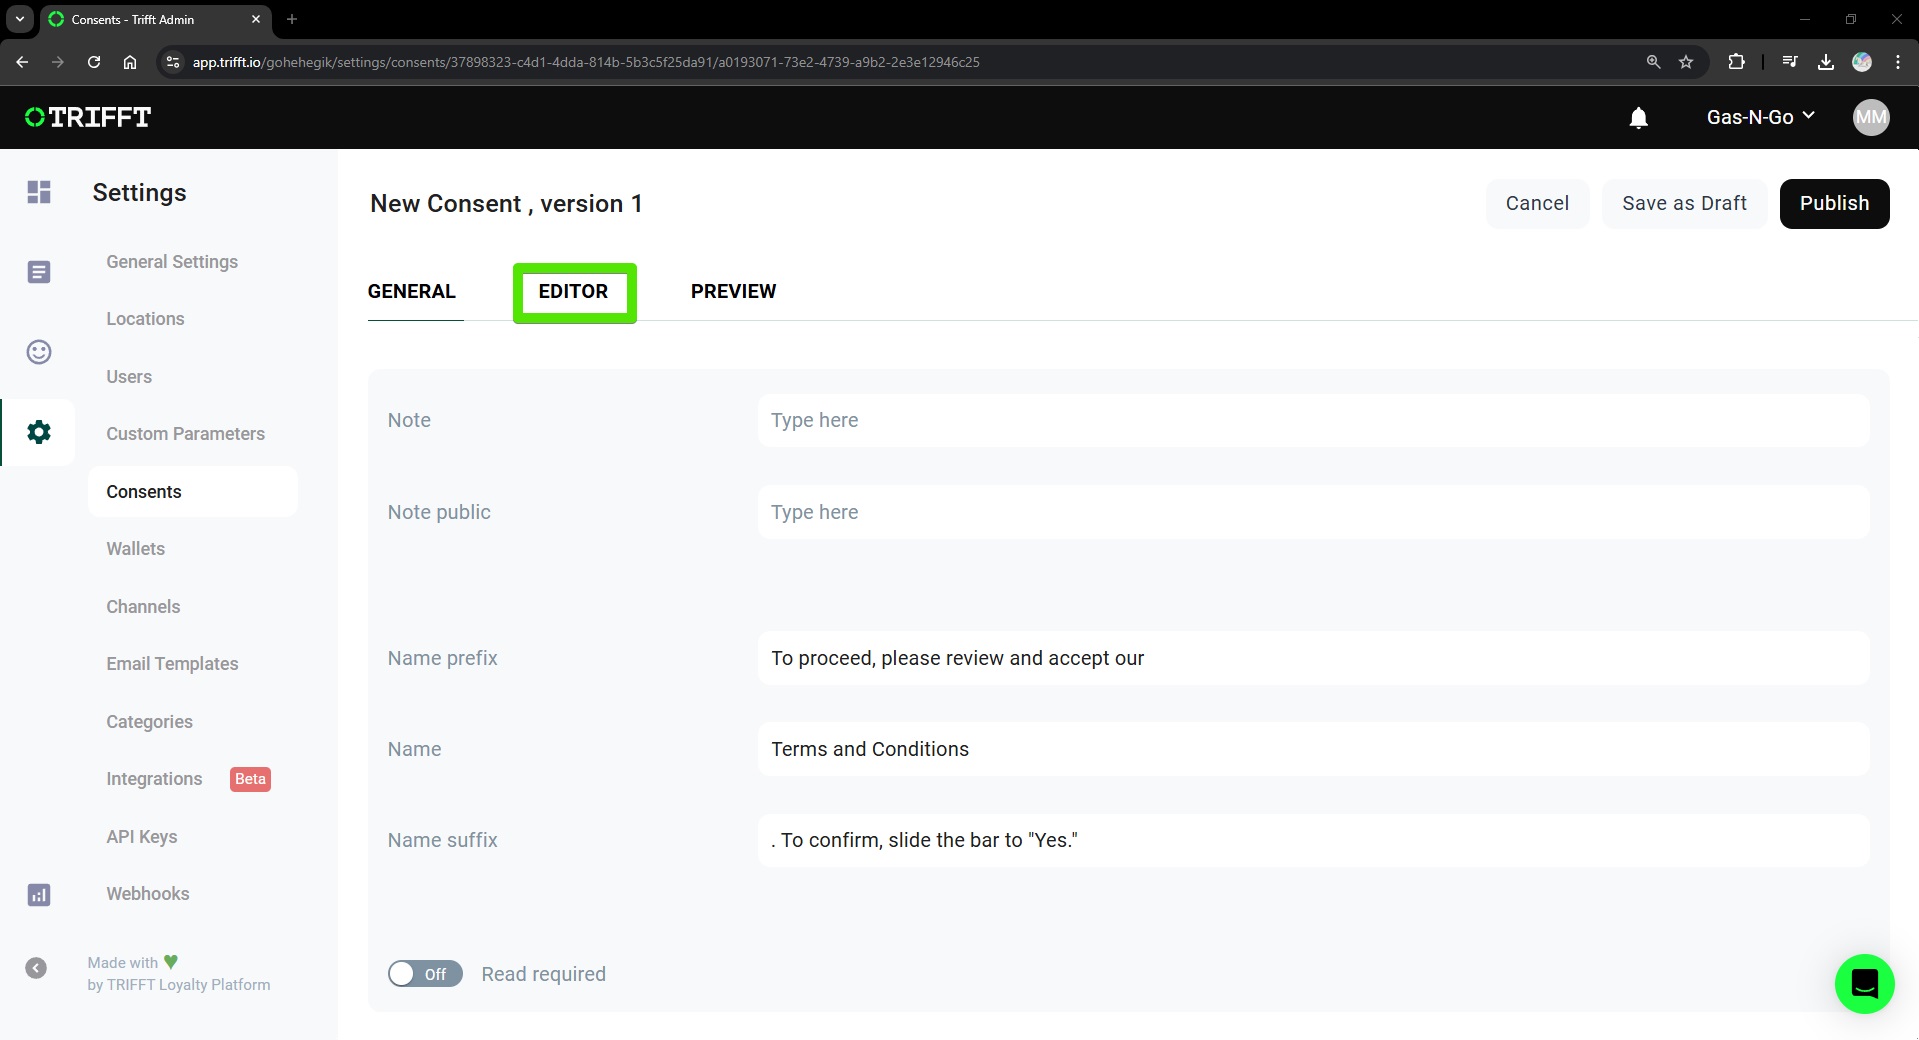
- Name
Names Explained
Name Prefix: Text before consent link (incl. spaces)
Name: Consent hyperlink to see consent detail
Name Suffix: Text after Consent link (incl. spaces)

- Read required
Requires users to open and view the full consent before it can be accepted.
Example
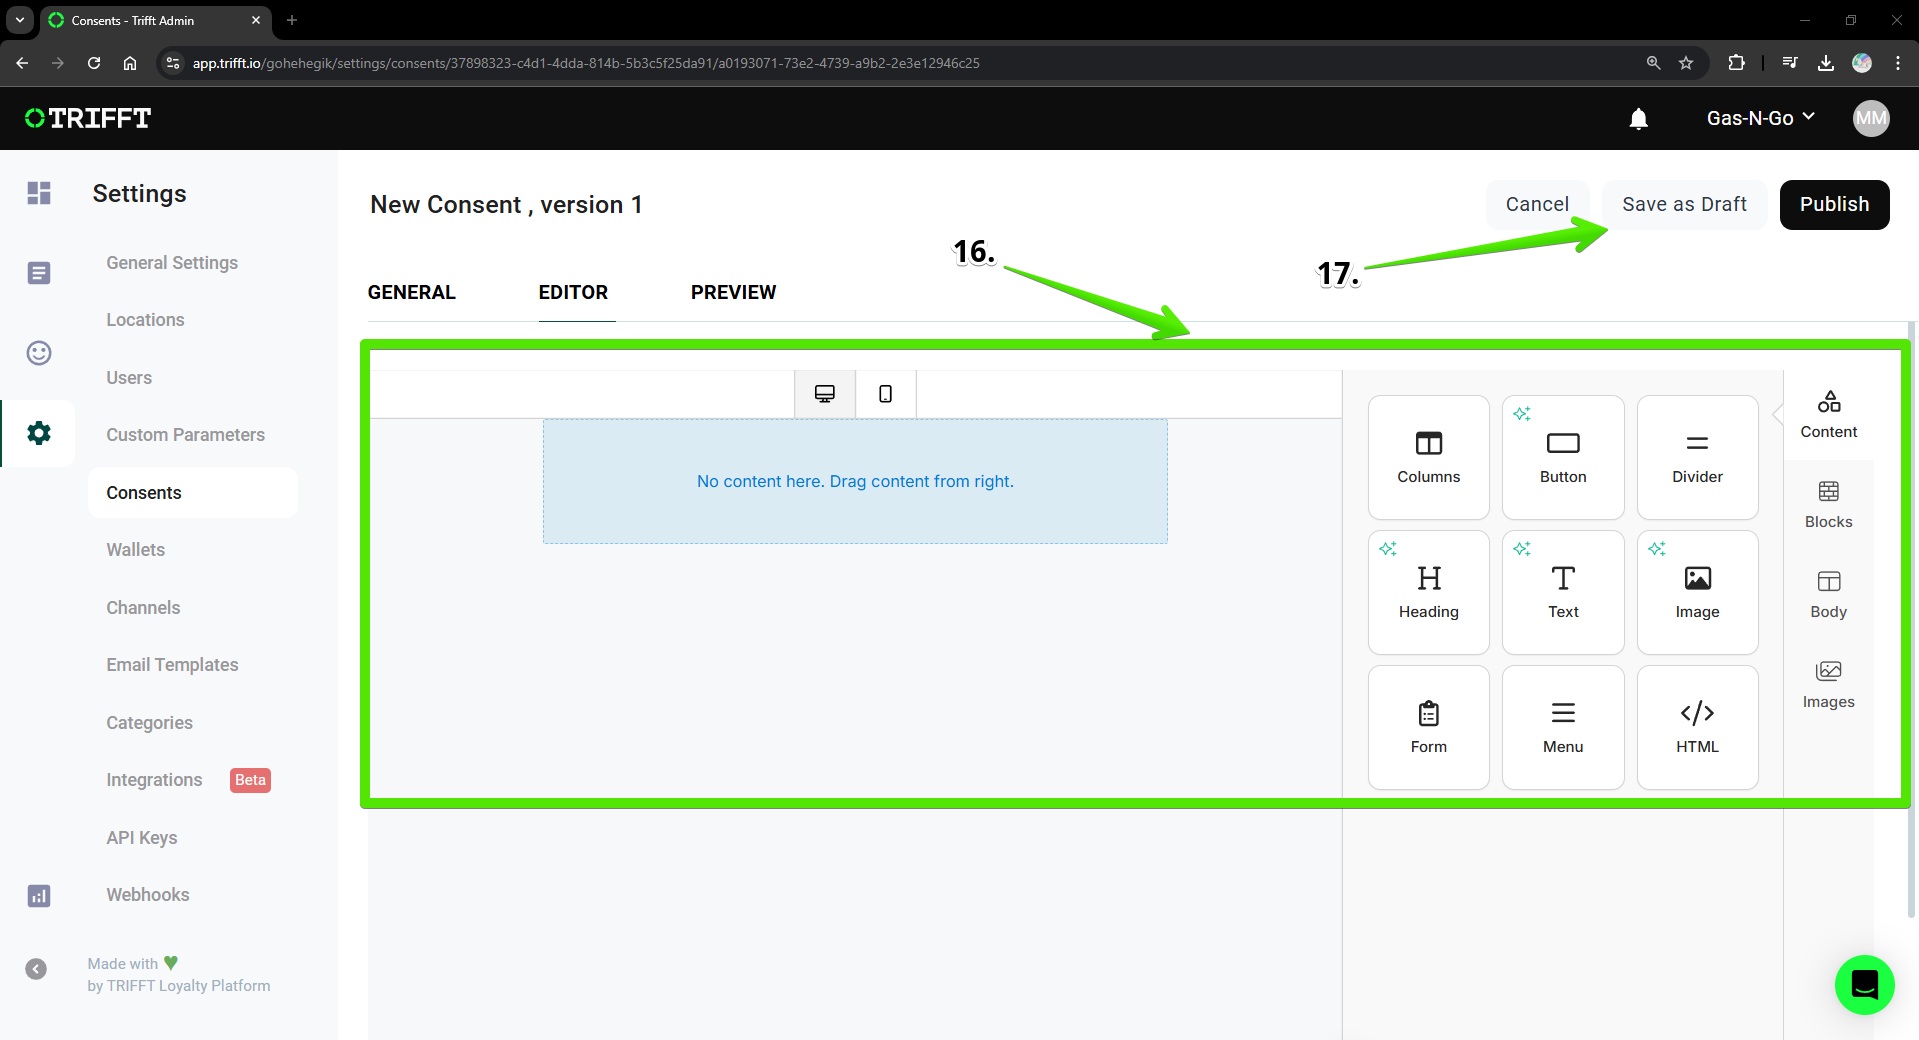
- Click on Editor
- Editor
Here you can edit the text of your consent that the user can agree to.
- Save as Draft
After you will be satisfied with your text click on Save as Draft.
- Click on Save
- Click on your new consent
- Click on Versions
- Click on Version that you want to Publish/Edit
- Click on Publish
Once the consent is published, the wording can only be changed by creating a new version.
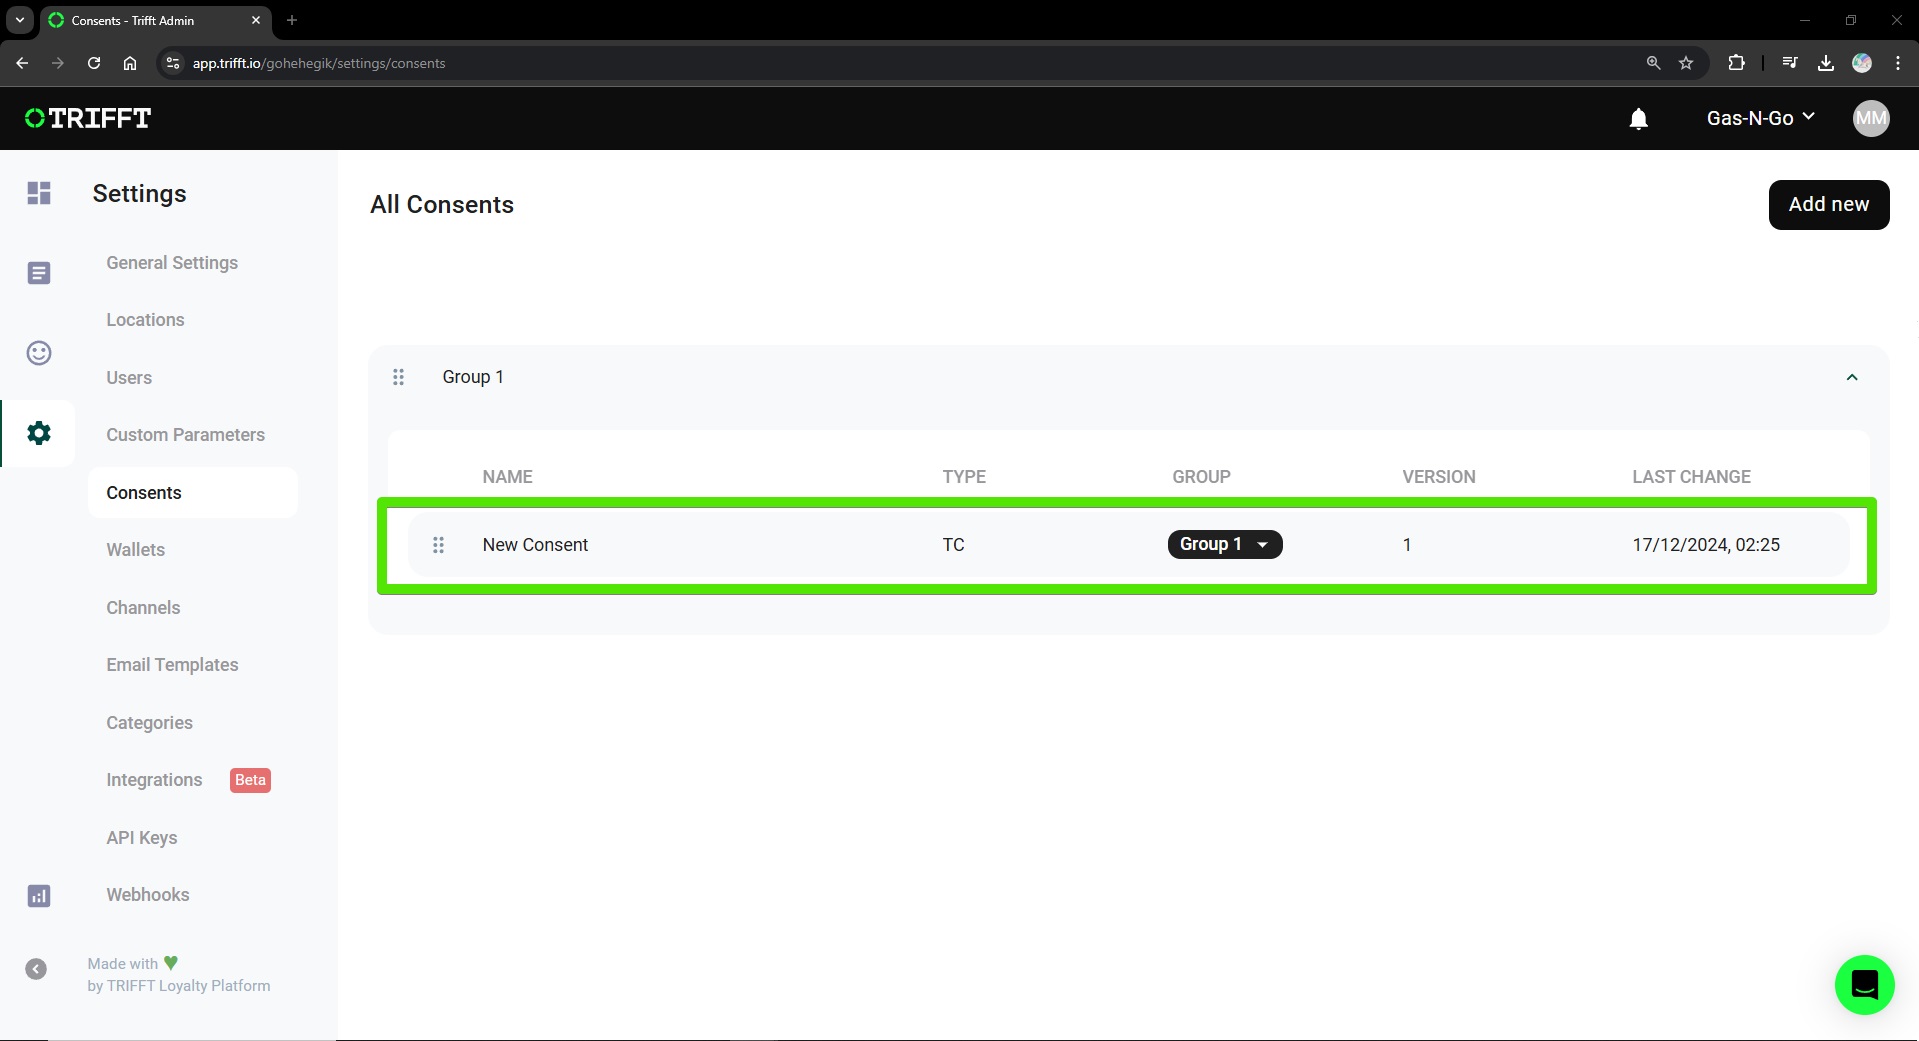
Consent Grouping
If you want to combine 2 consents into 1, you can use consent grouping.
- Click on Group
- Select the group to which you want to add consent
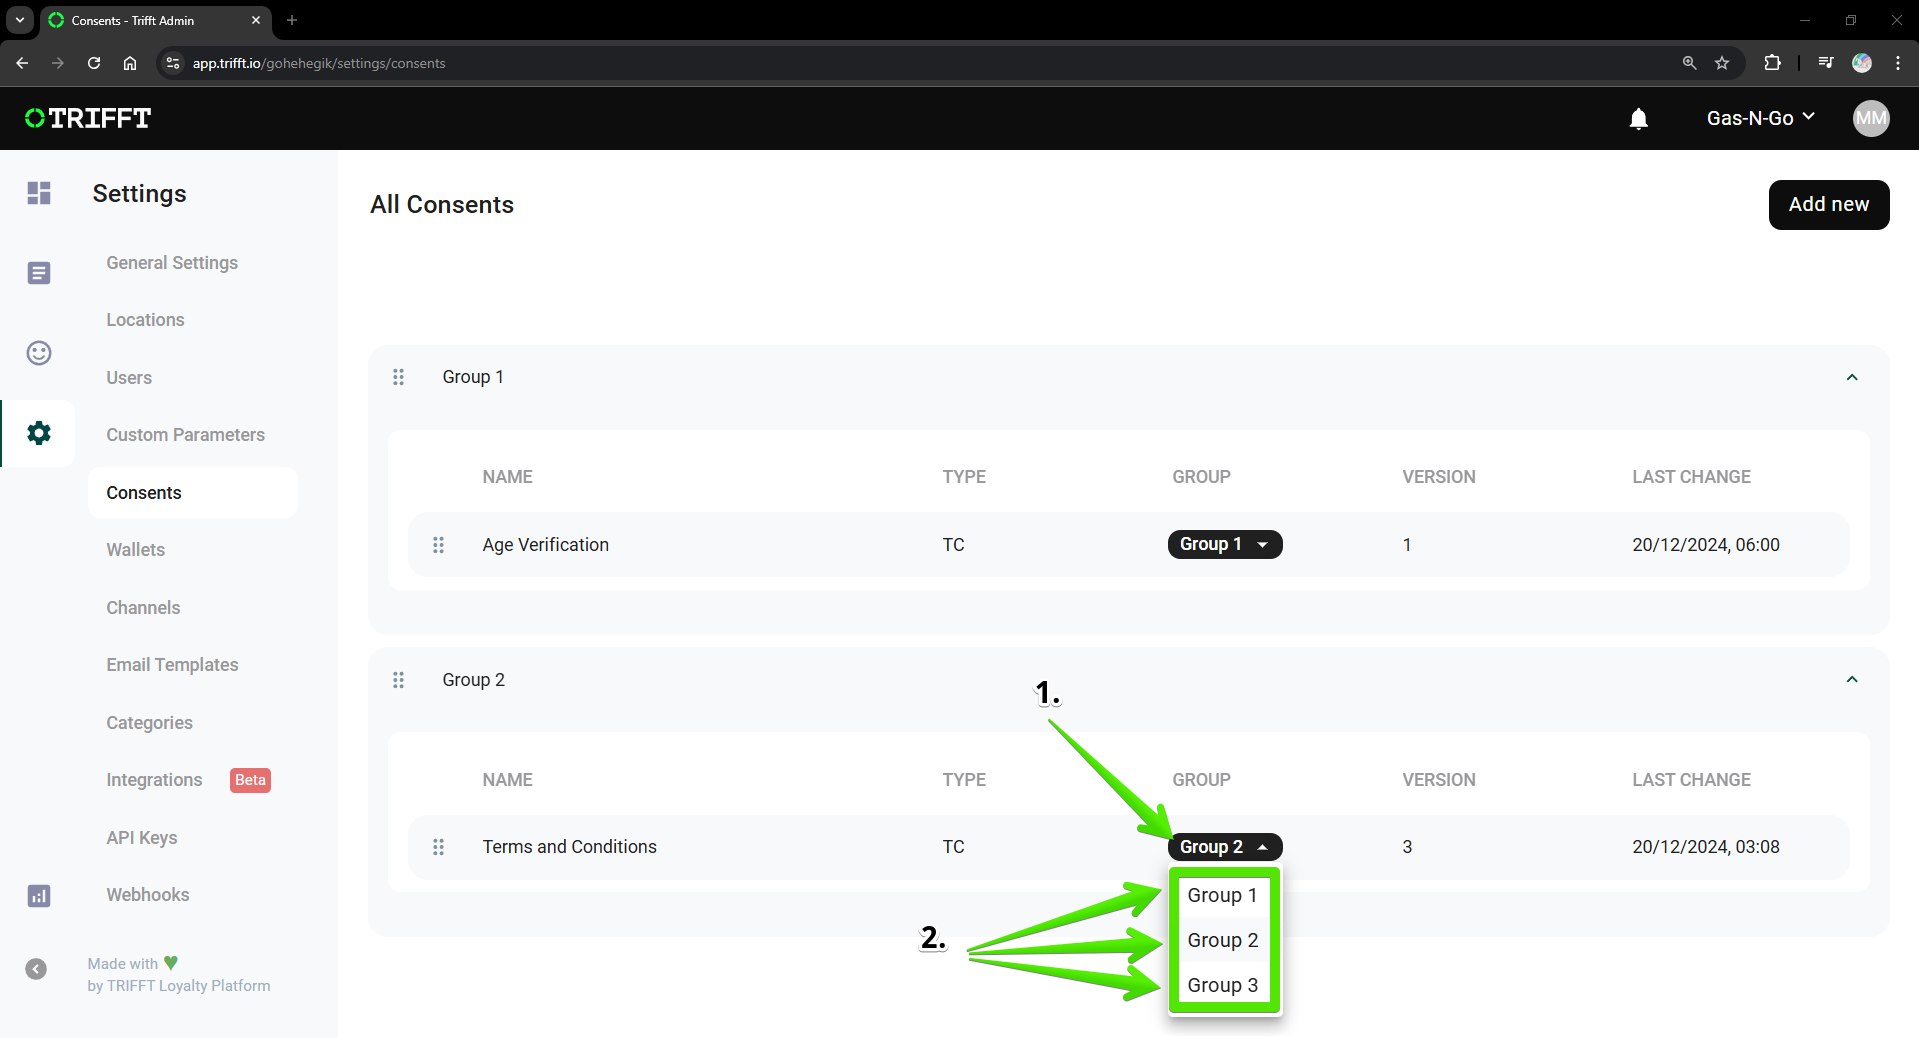
Еxample
How to Create a new version of consent
- Click on Consents
- Click on any consent where you want to create a new version
- Click on versions
- Click on plus icon
- Select whether you want to create a complex or simple consent
- After these steps continue like if you would create a new consent
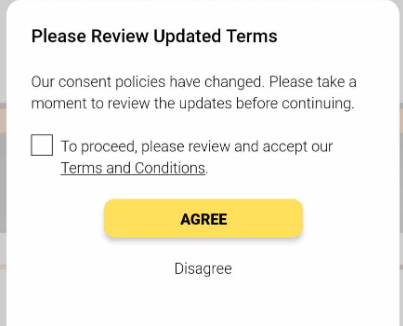
- After you create a new version of the consent, users will receive a notification inside their app that there has been an update to the consents, as shown in the picture below.
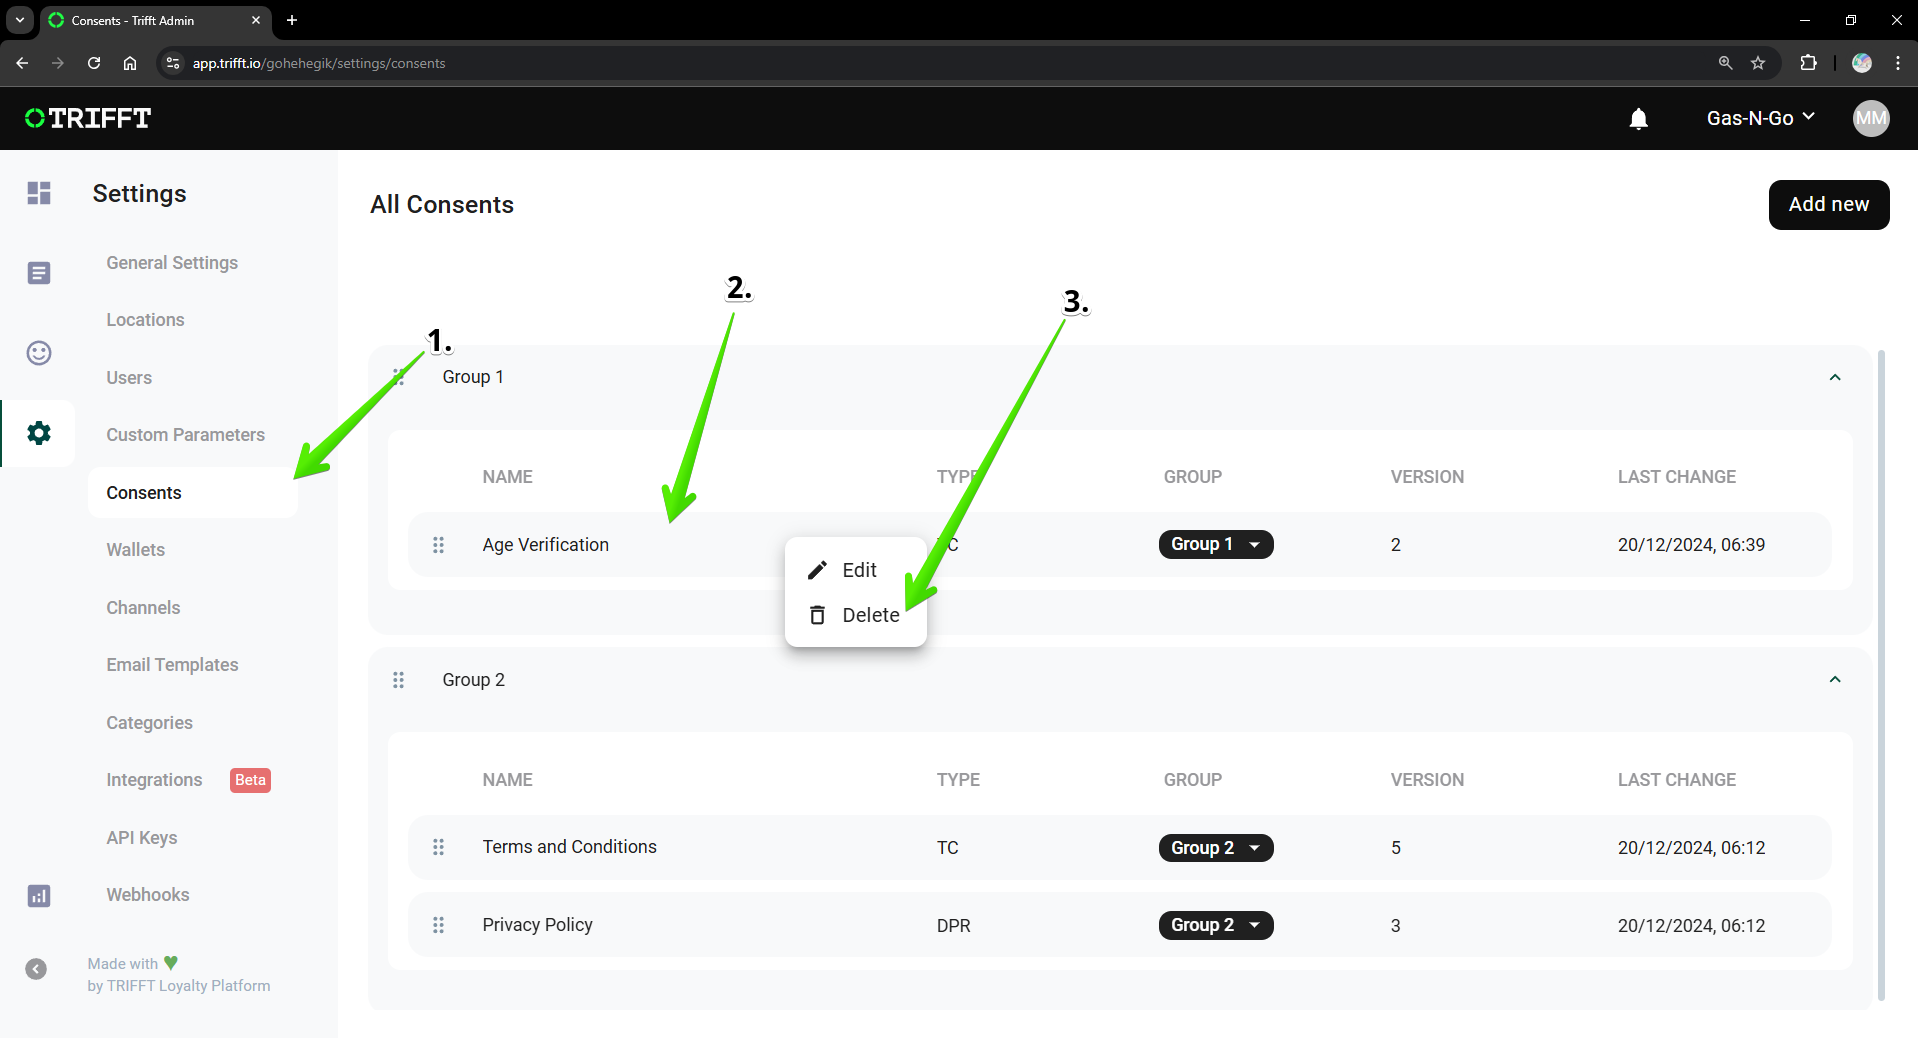
How to delete a consent
- Click on Consents
- Right-Click on consent that you want to delete
- Click on Delete
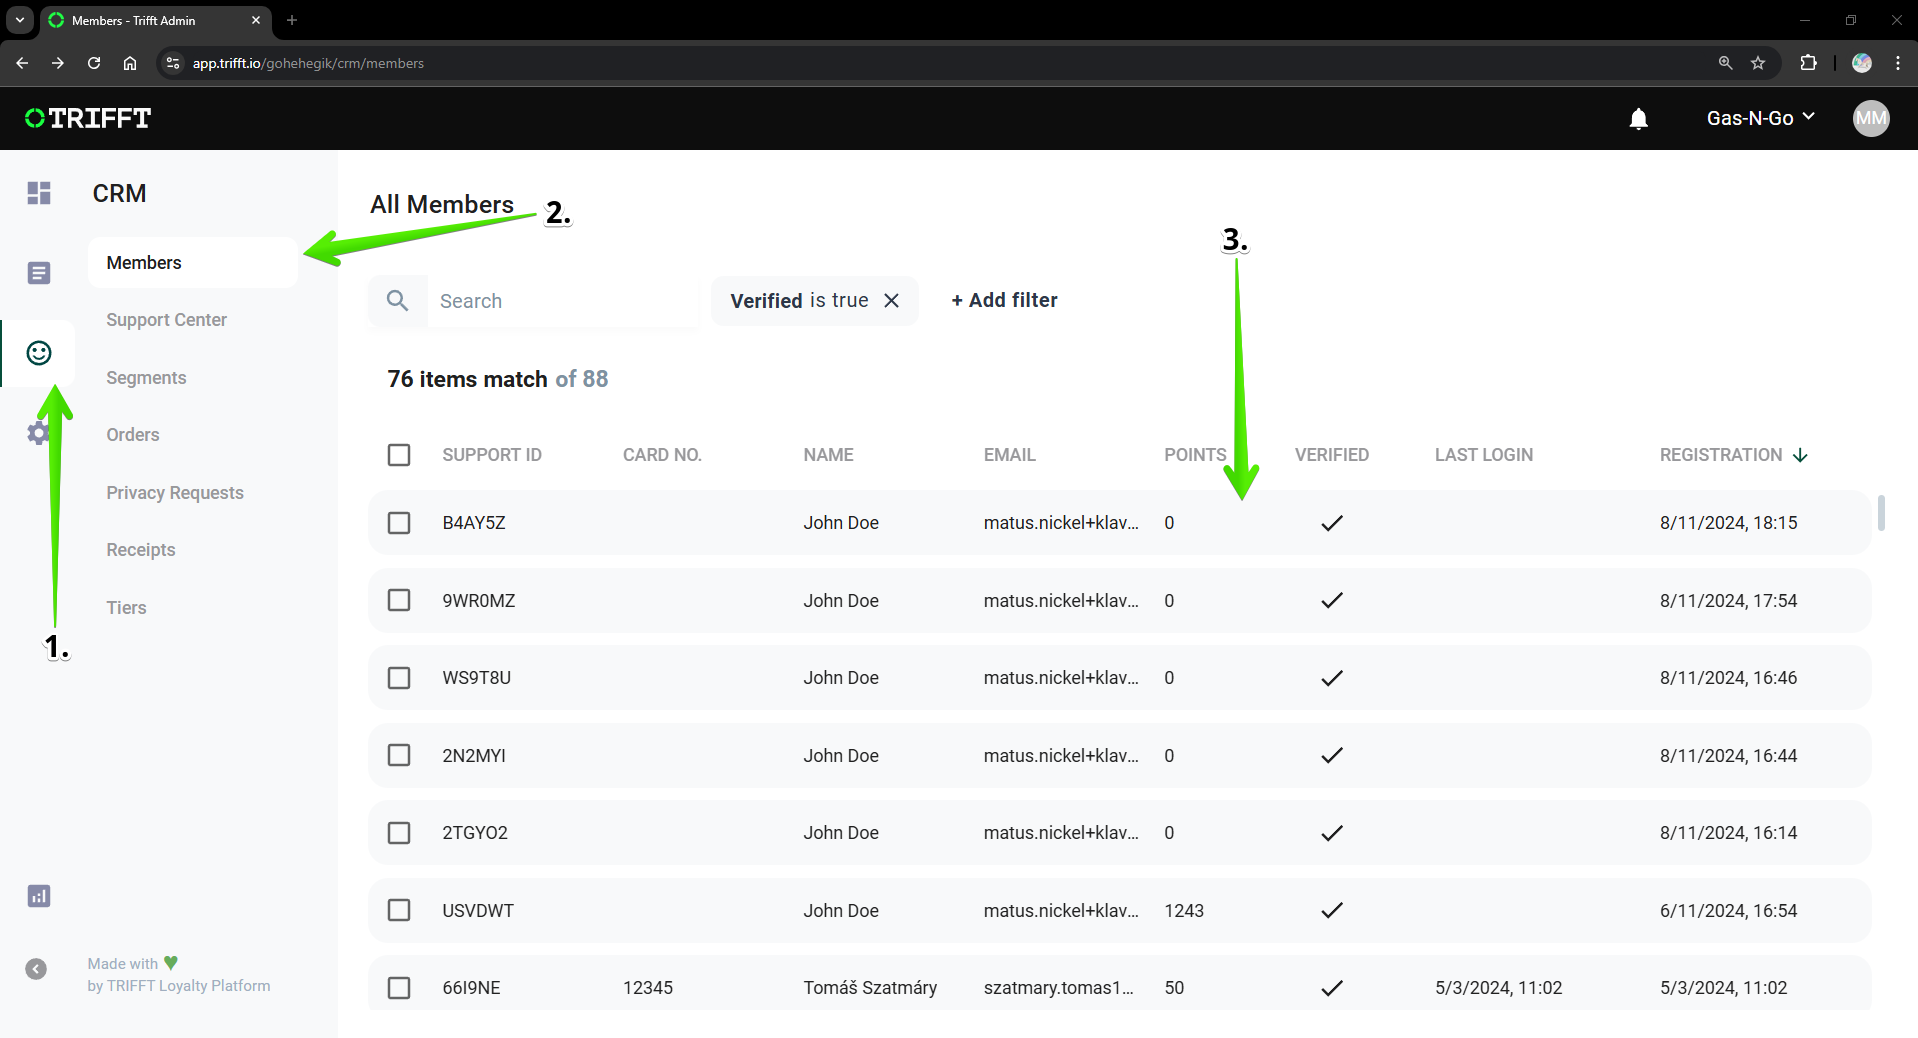
Accessing consent information
Consent can only be checked individually, as TRIFFT currently does not support viewing a list of people with approved consents en masse.
To check consents individually, follow these steps:
- Click on CRM
- Click on Members
- Select individual Member
-
Click on Activity Overview and manually look for an activity with the following message: "The member signed the contractual consent."
Updated 14 days ago