
Creating Survey
This guide walks you through the process of creating a survey step by step.
Create a new survey
- Navigate to the
Content (1)and selectSurveys (2). - You will see a list of all Surveys saved in your project.
- To create a new Survey, click the
Add New (3)button located in the top-right corner of the page.
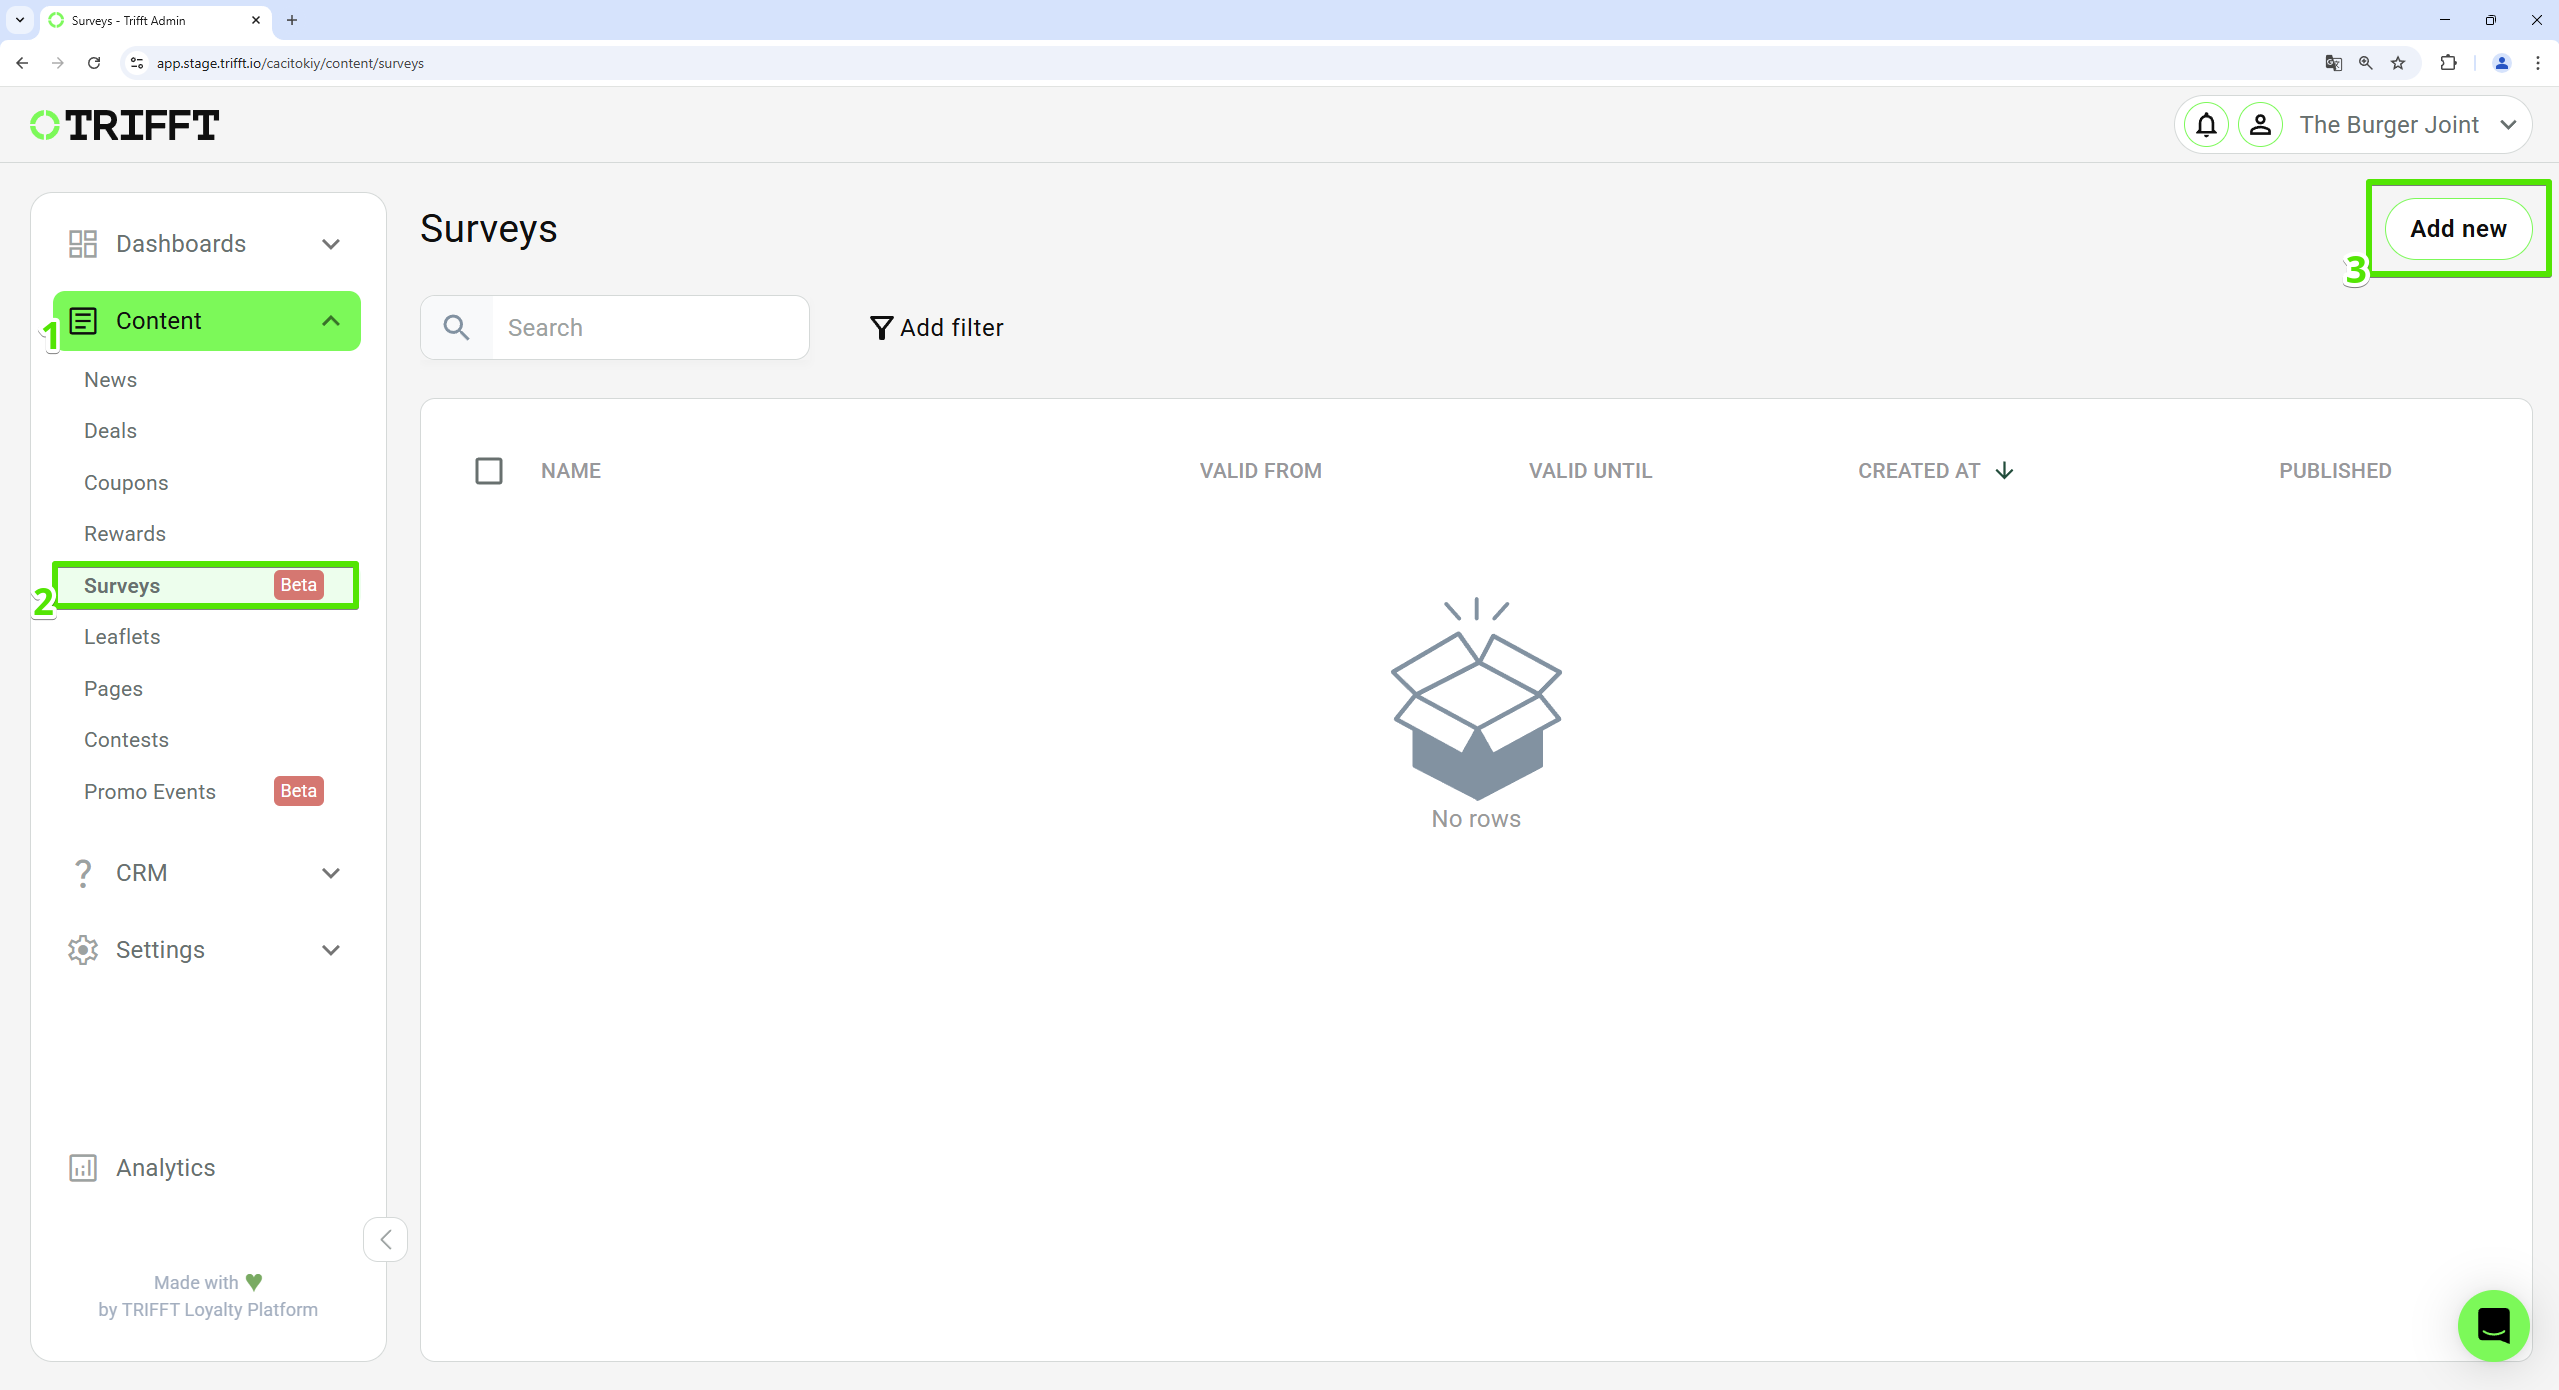
Create a new survey
Setup the basics
In the next step setup the basic information:
- Enter a
namefor the survey. - Provide a
descriptionof the survey’s purpose. Description will help you to identify the purpose of the survey in a future. - Set the
startandenddate for when the survey will be available. - Click
Saveto proceed to the design phase.
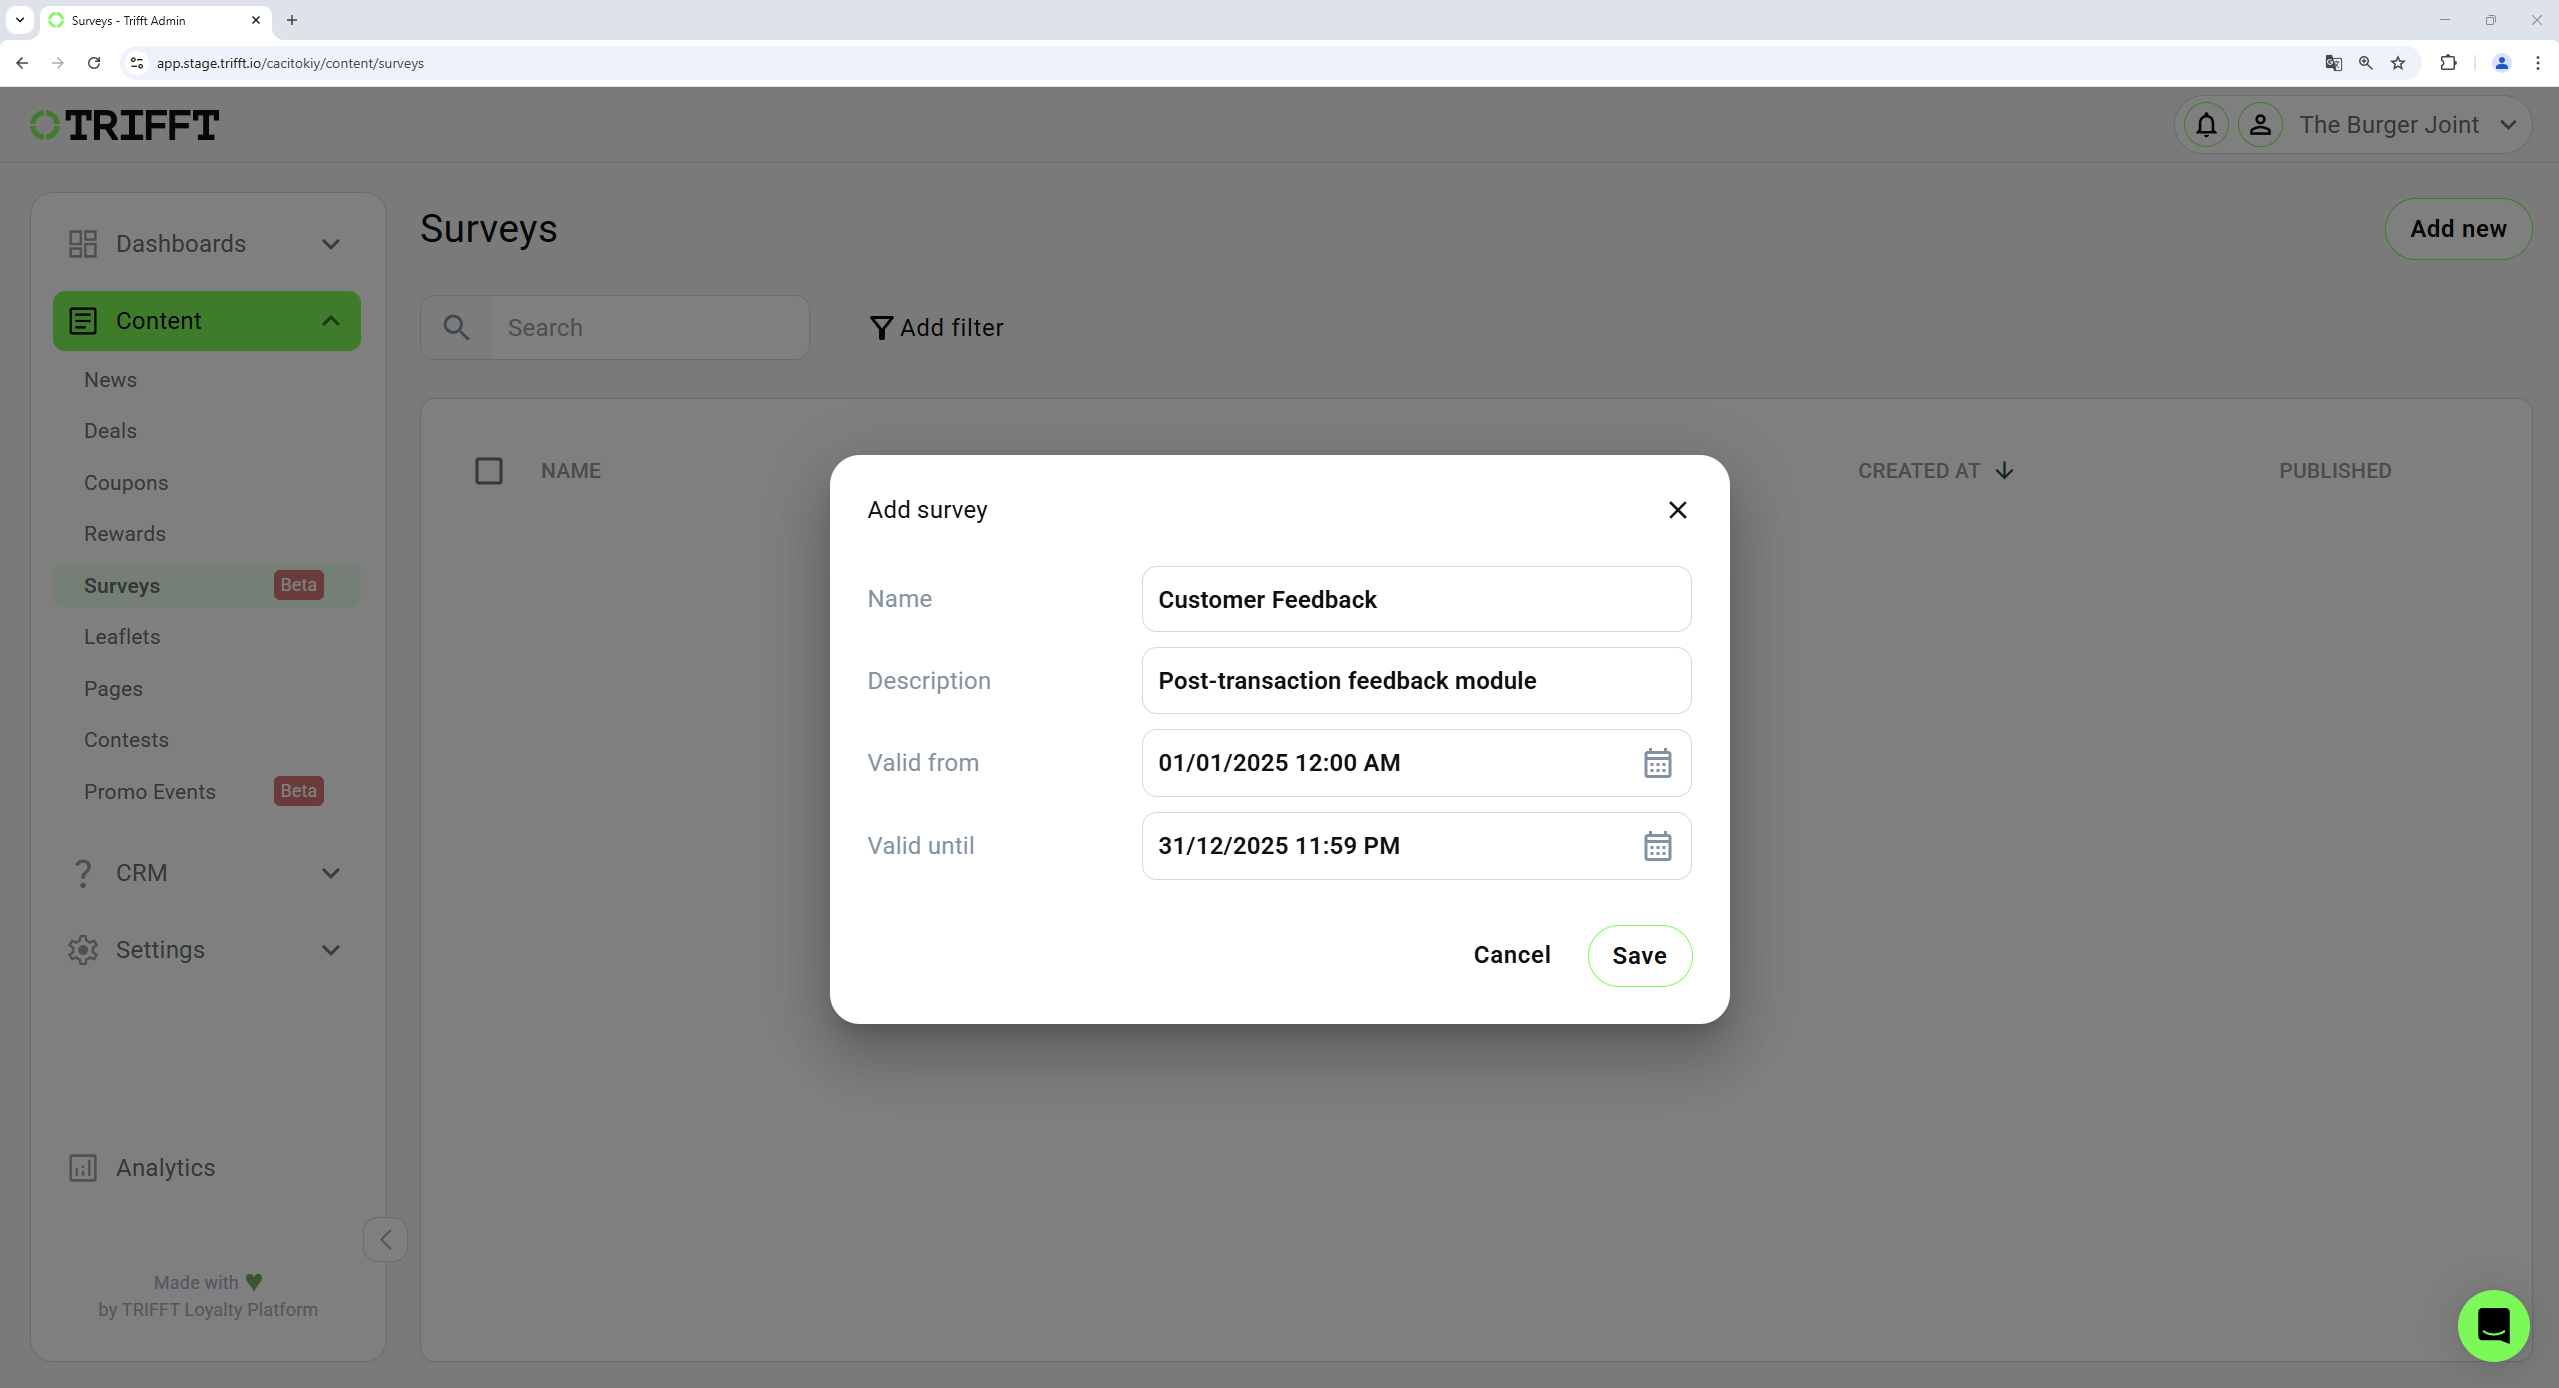
Setup the basics
Setup the visual elements
After saving, the detail of the given Survey will open.
On the Preview (1) tab, it is necessary to set the design of the Survey header, body, and buttons.
- Header – Set the survey's header and optionally add an image.
- Body – Set the survey's main content and questions design and optionally add an image.
- Button Colors – Customize button colors to align with your brand.
On the picture below you can see an example of the settings:
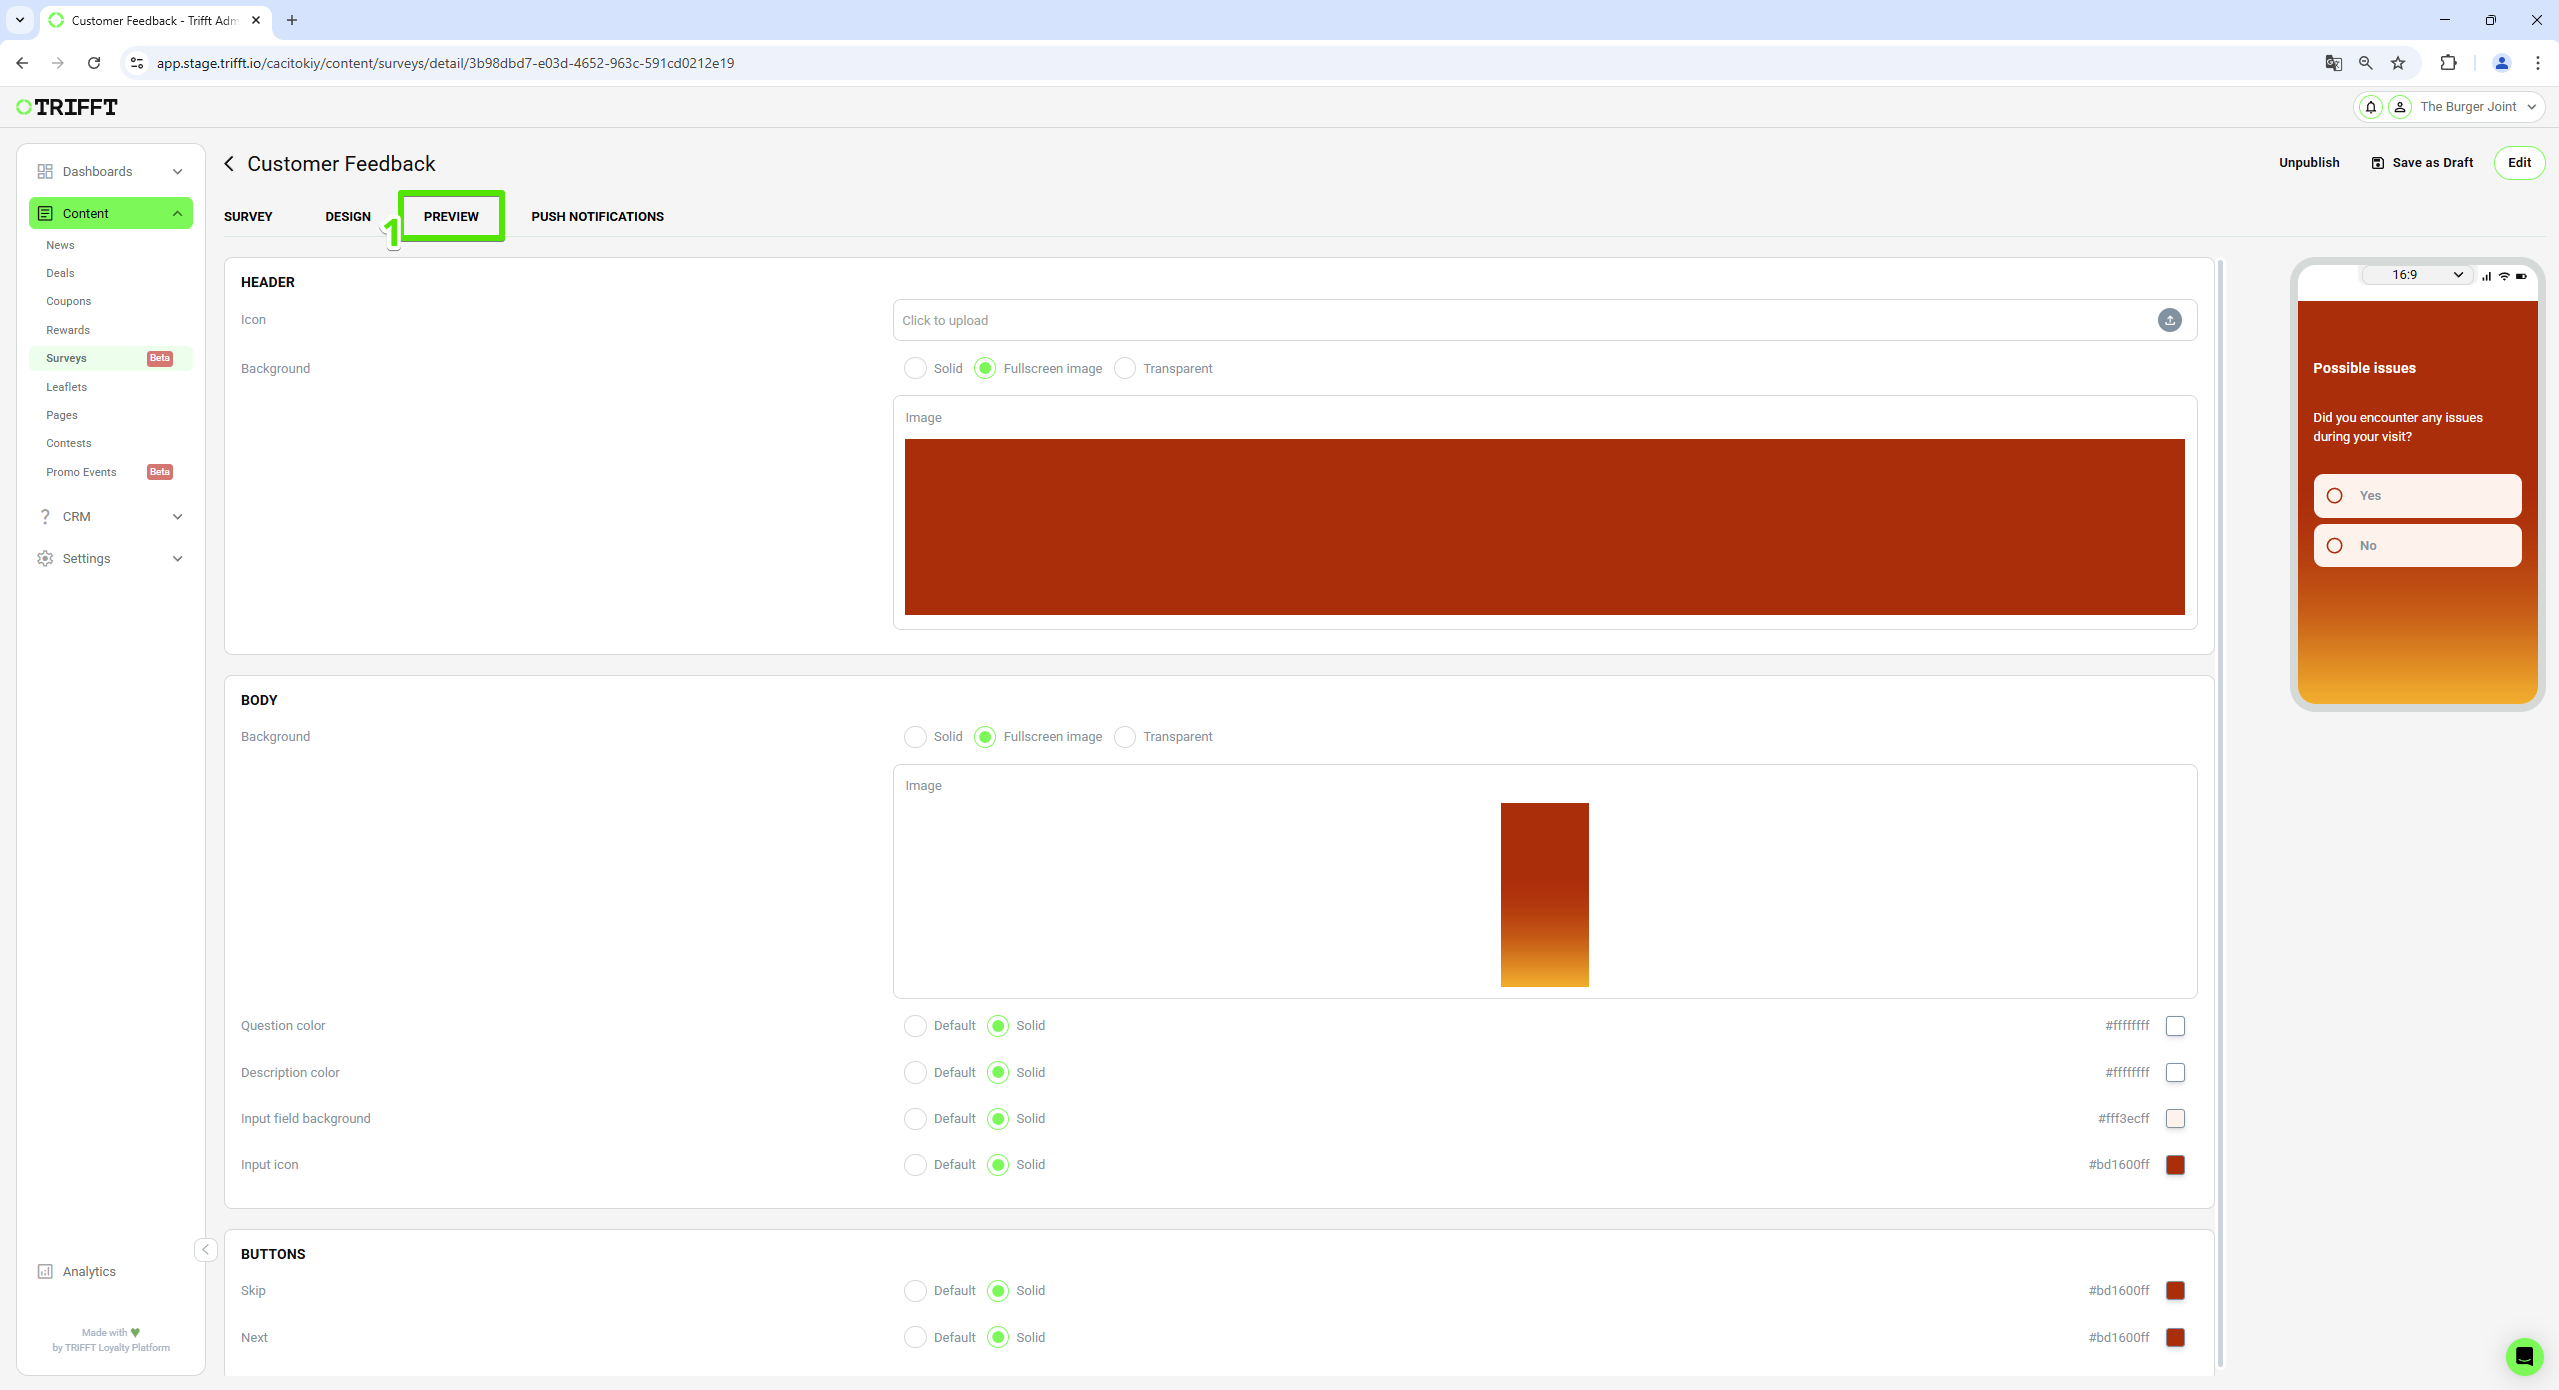
Setup the visual elements
Drag & Drop Survey Builder
The Drag & Drop Survey Builder empowers you to create dynamic surveys effortlessly by dragging and dropping components from the right panel onto the canvas. This intuitive interface allows you to order and connect components to create a seamless survey flow for your users. The starting point of your survey is marked with a special block component, indicated by a play button icon.
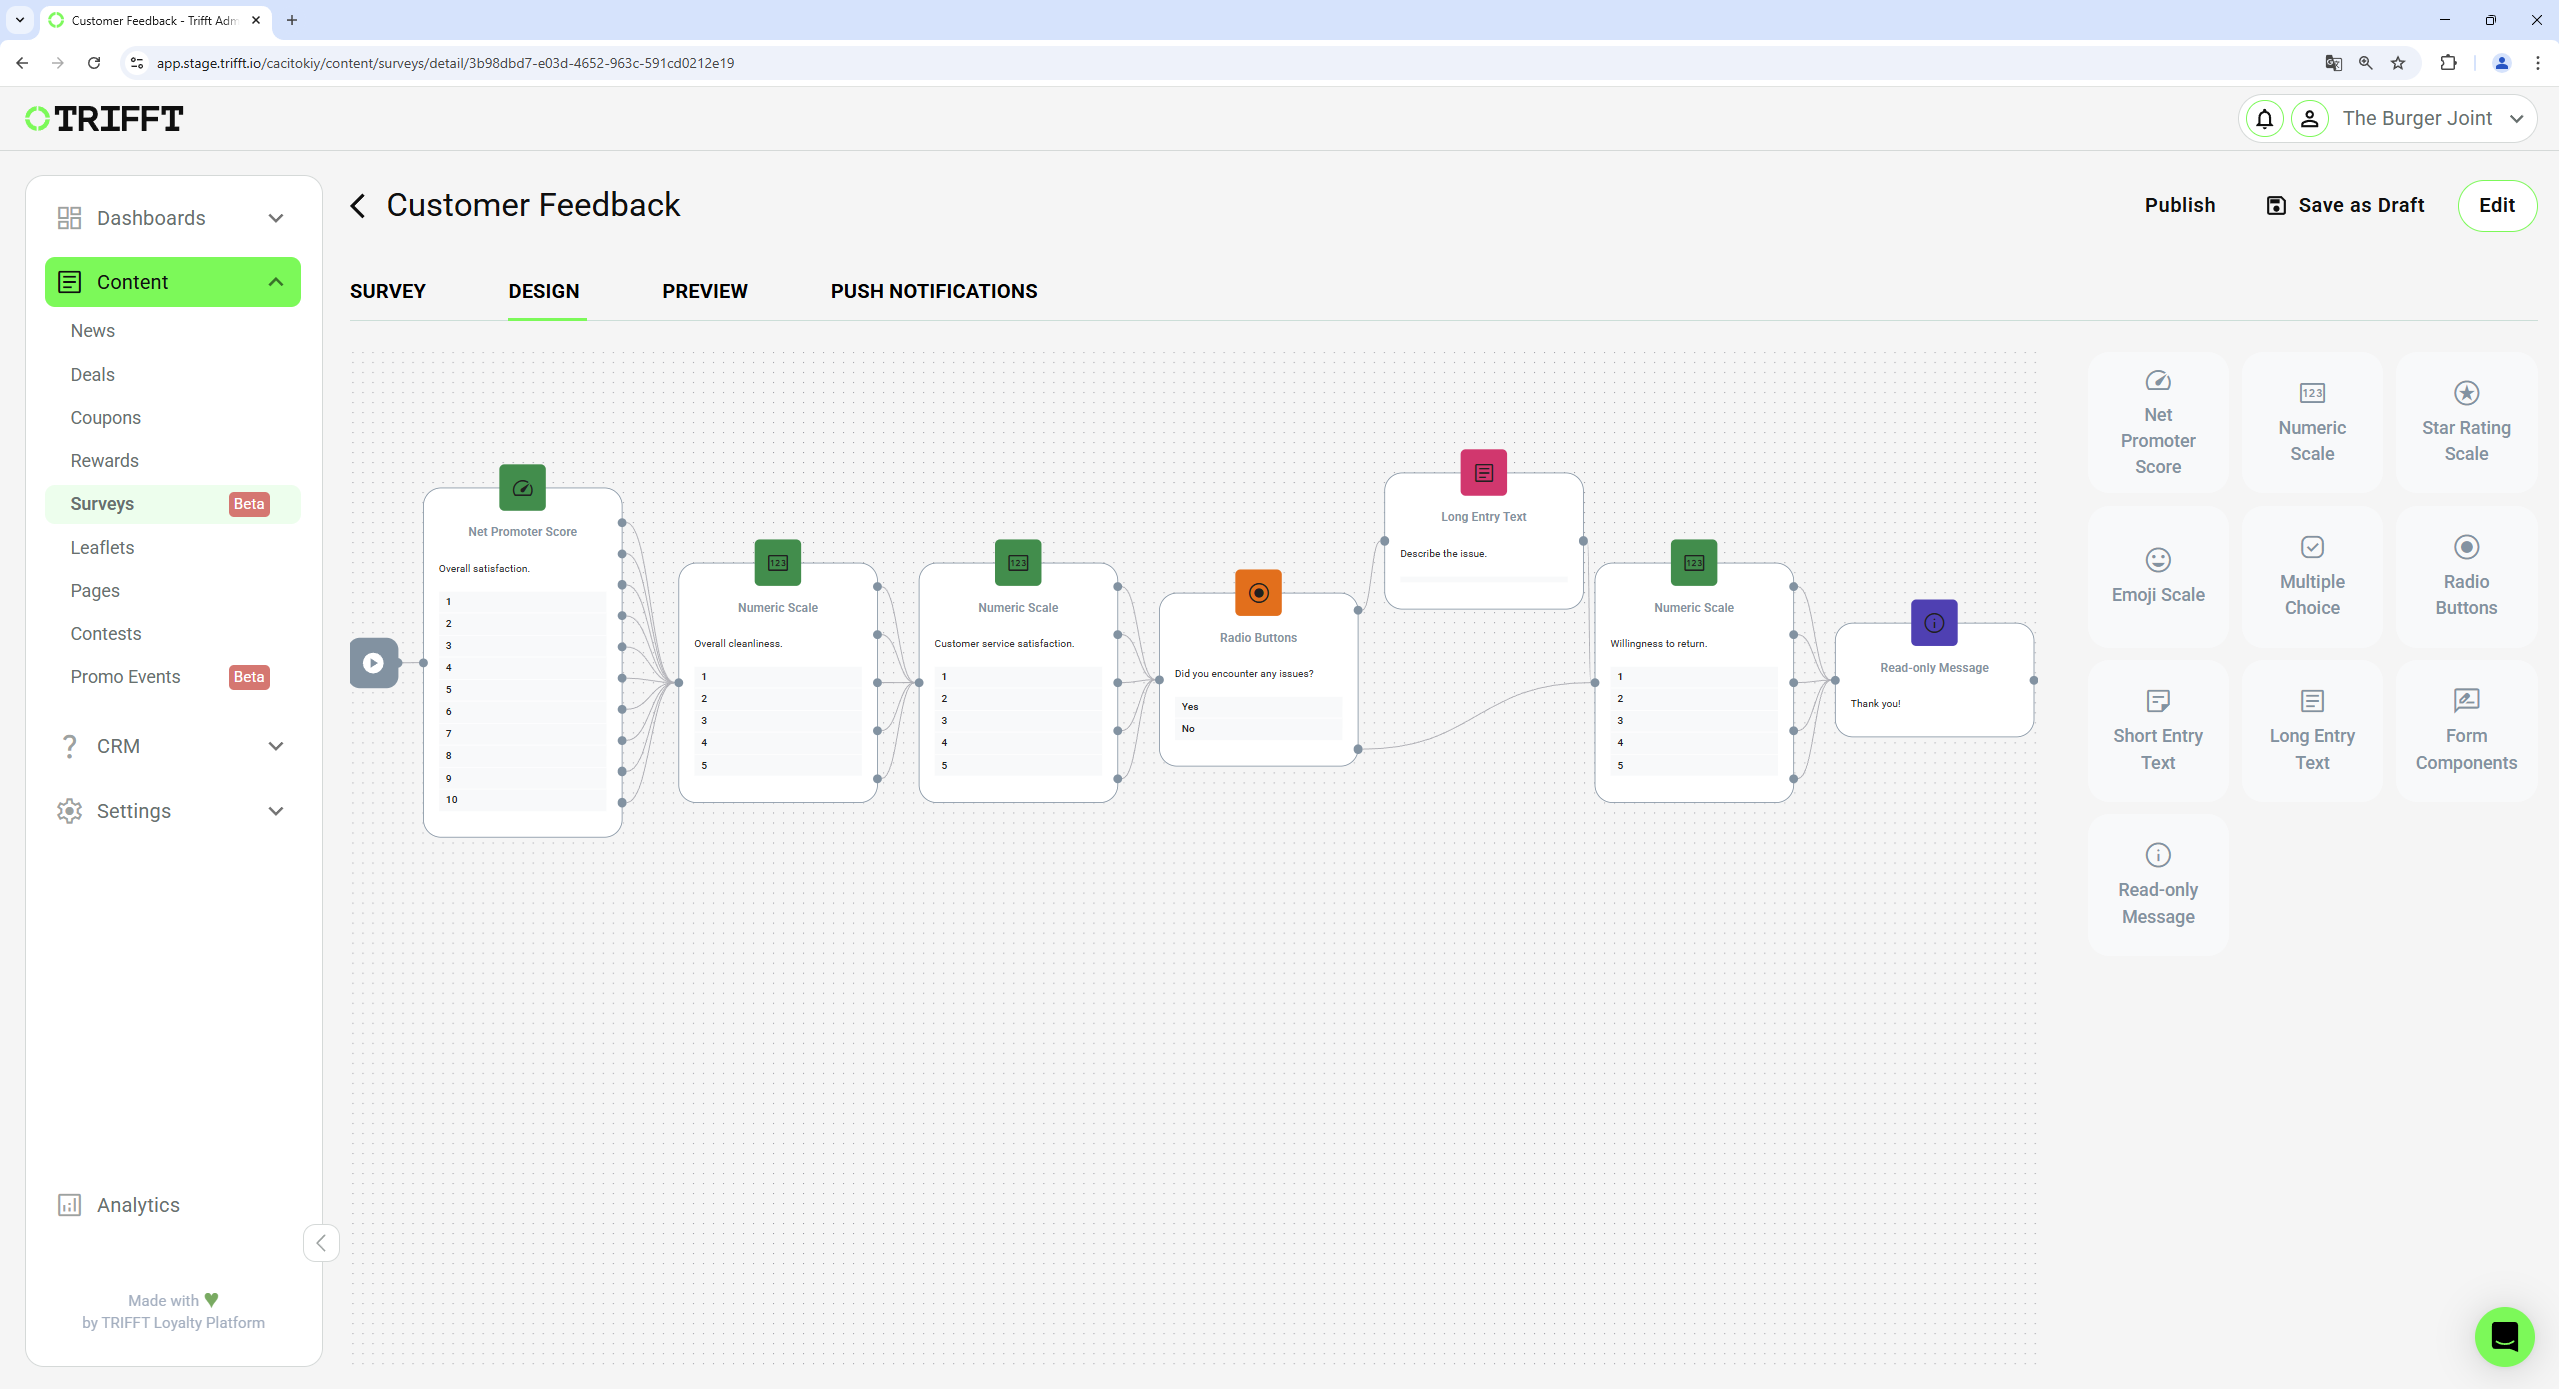
Example of survey with different types of questions and different paths based on user answers.
Designing the Survey Flow
Our advanced linking flow feature lets you customize the progression of the survey based on user responses. Each component has a single input point and either multiple or single output points, depending on the number of different outcomes that users can achieve when answering a question.
-
Add Components: Drag components from the right panel and drop them onto the canvas.
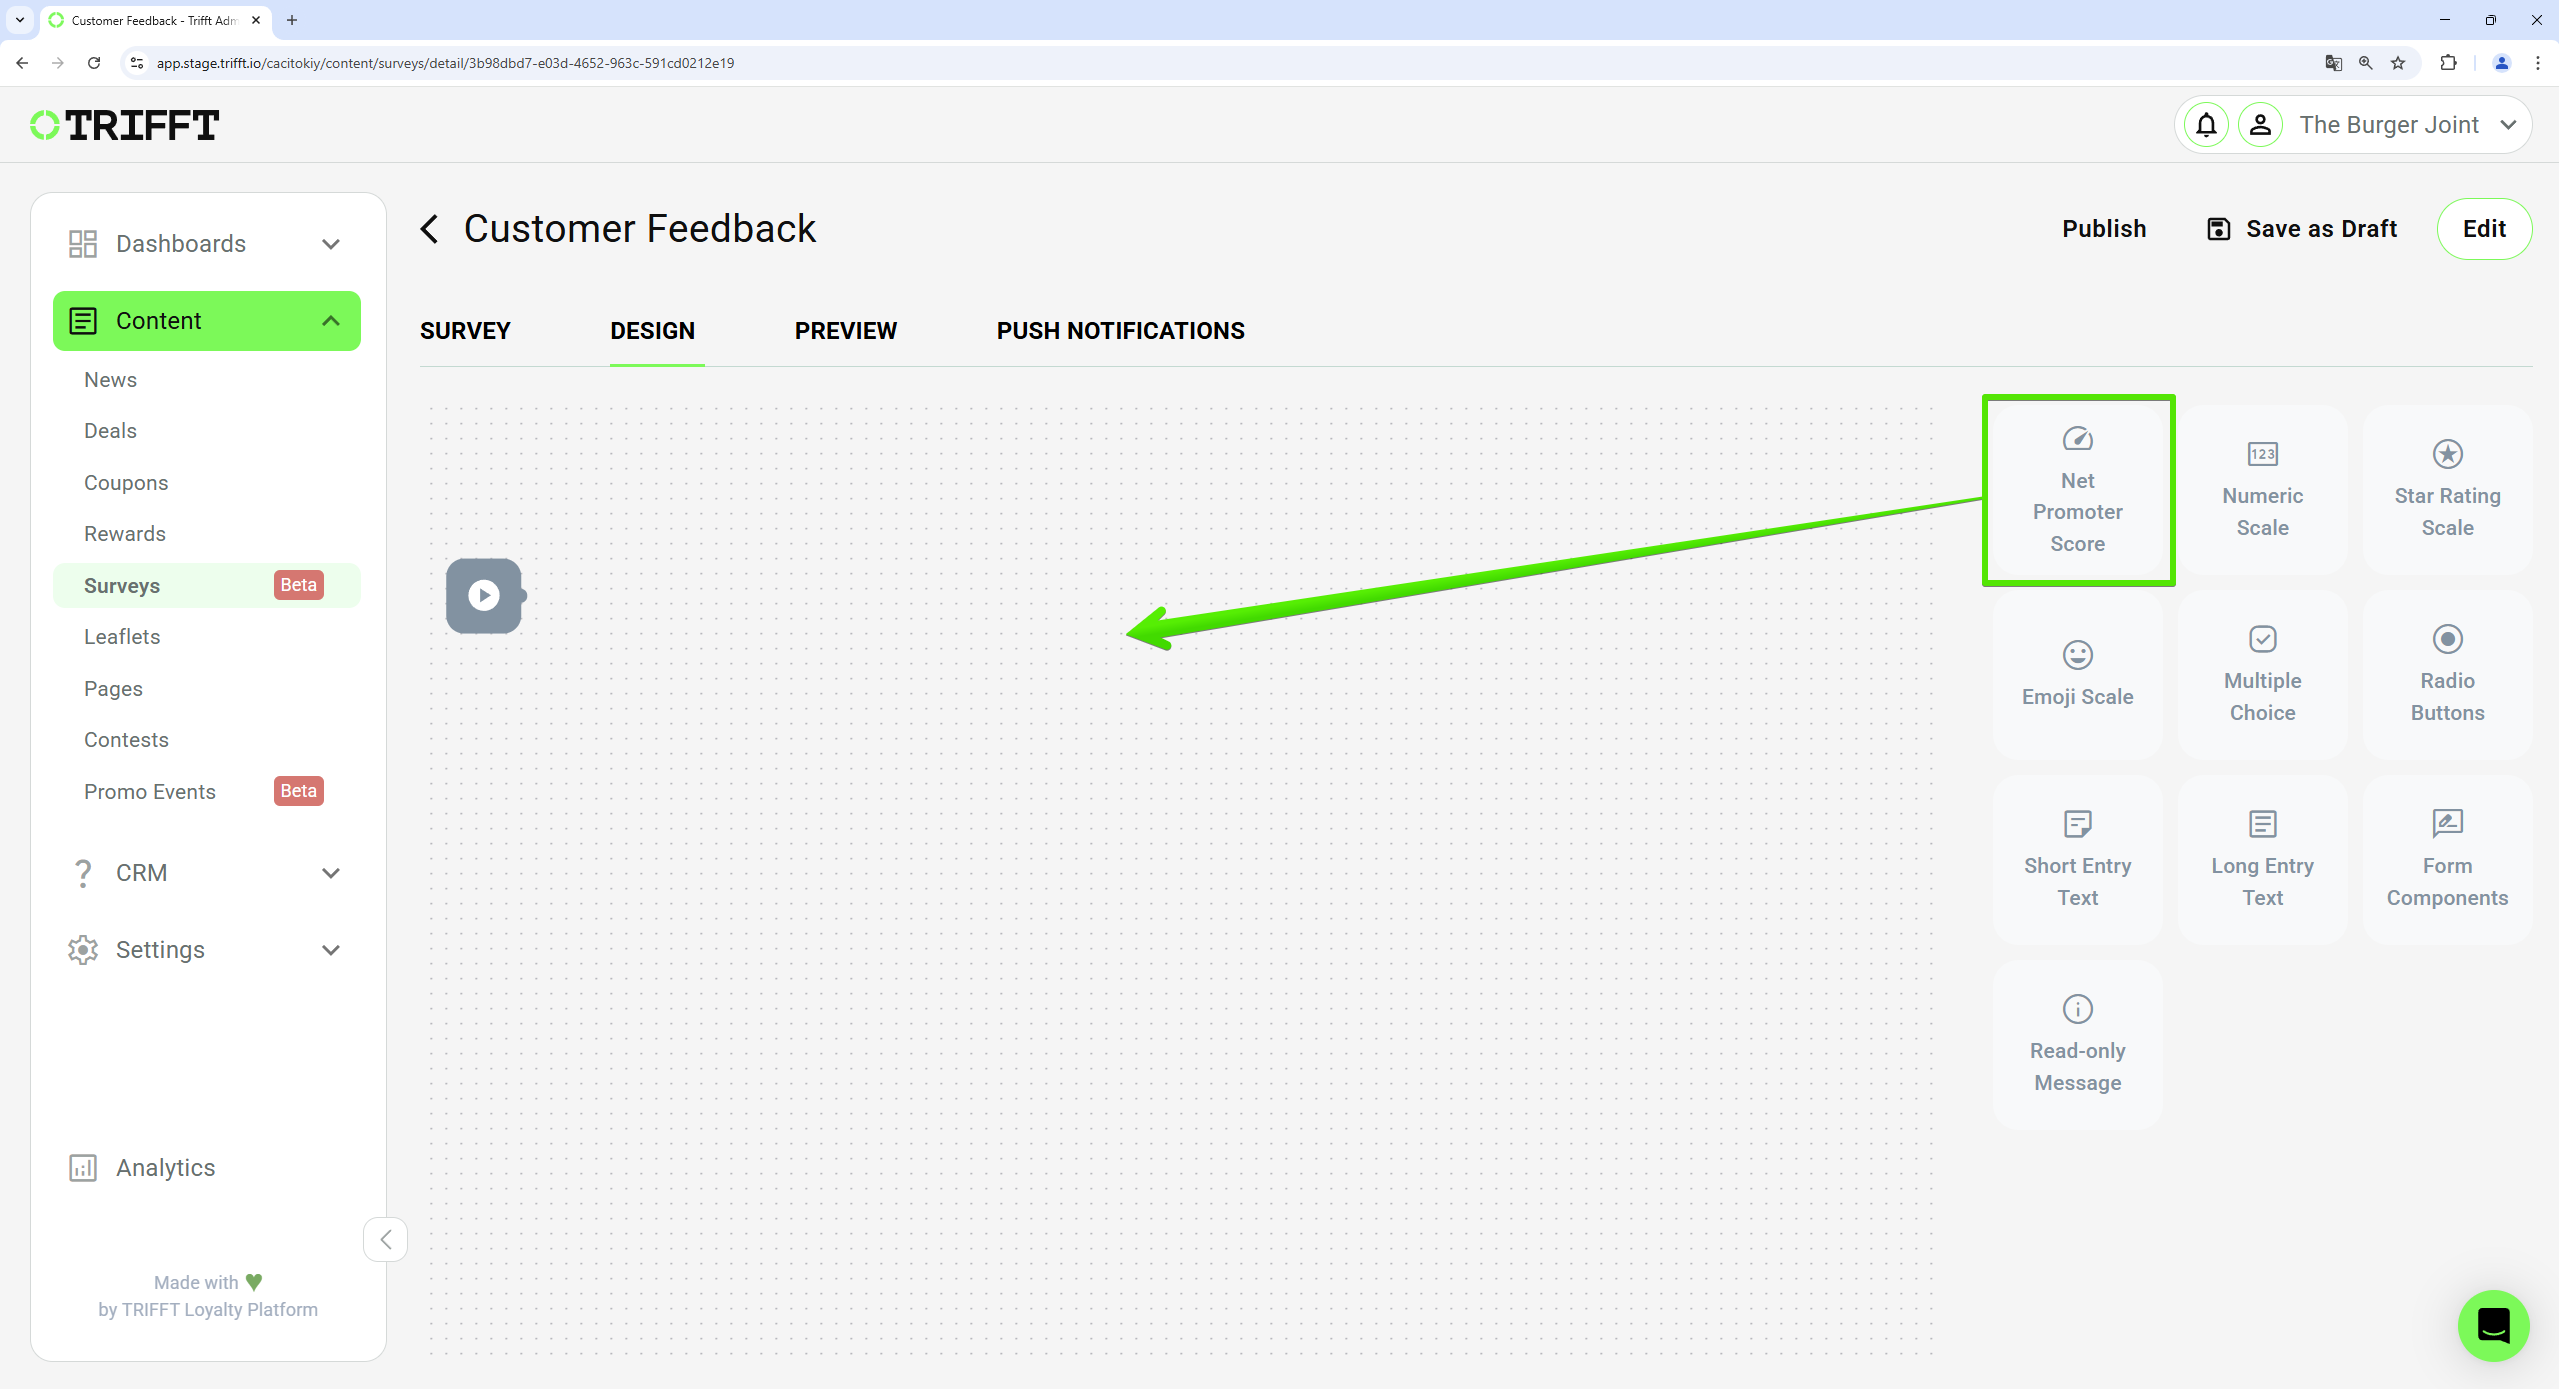
Drag and drop the component of your survey
-
Fill the component details according to the chosen type.
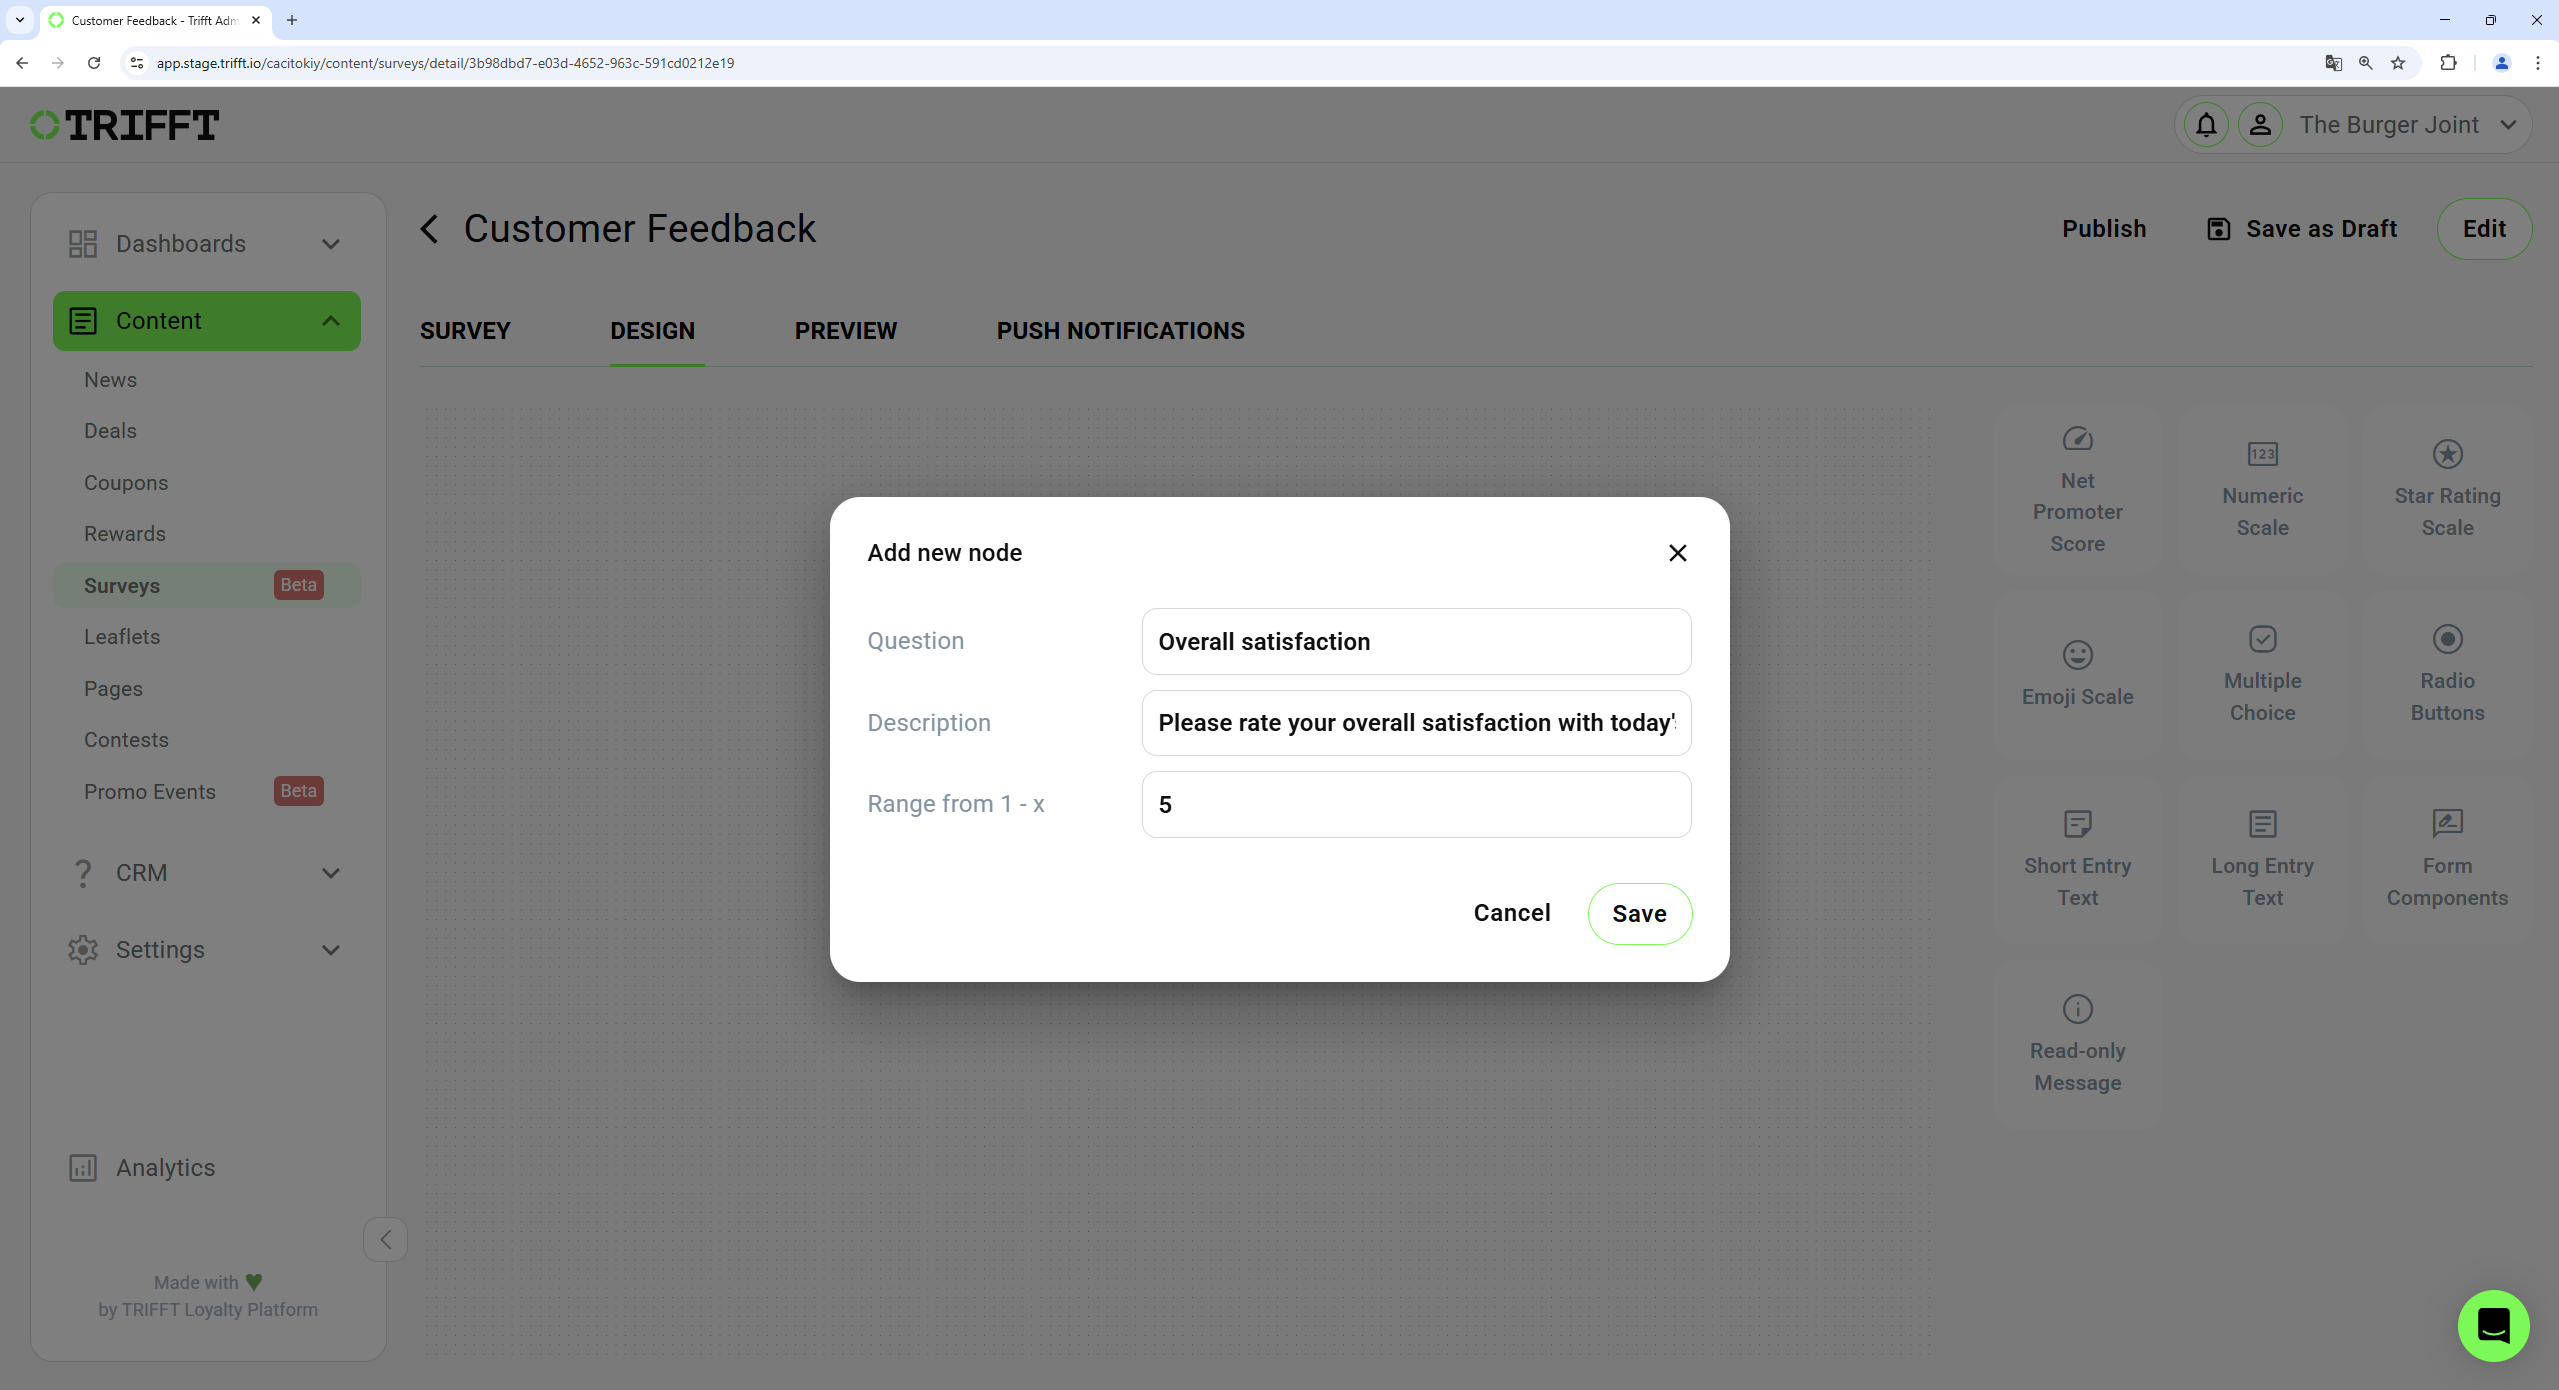
Fill the component details
-
Arrange the components: Place the components in the desired order to outline your survey structure. You can always edit the details of component by selecting the component and clicking on the pencil icon or delete it by clicking on the tray.
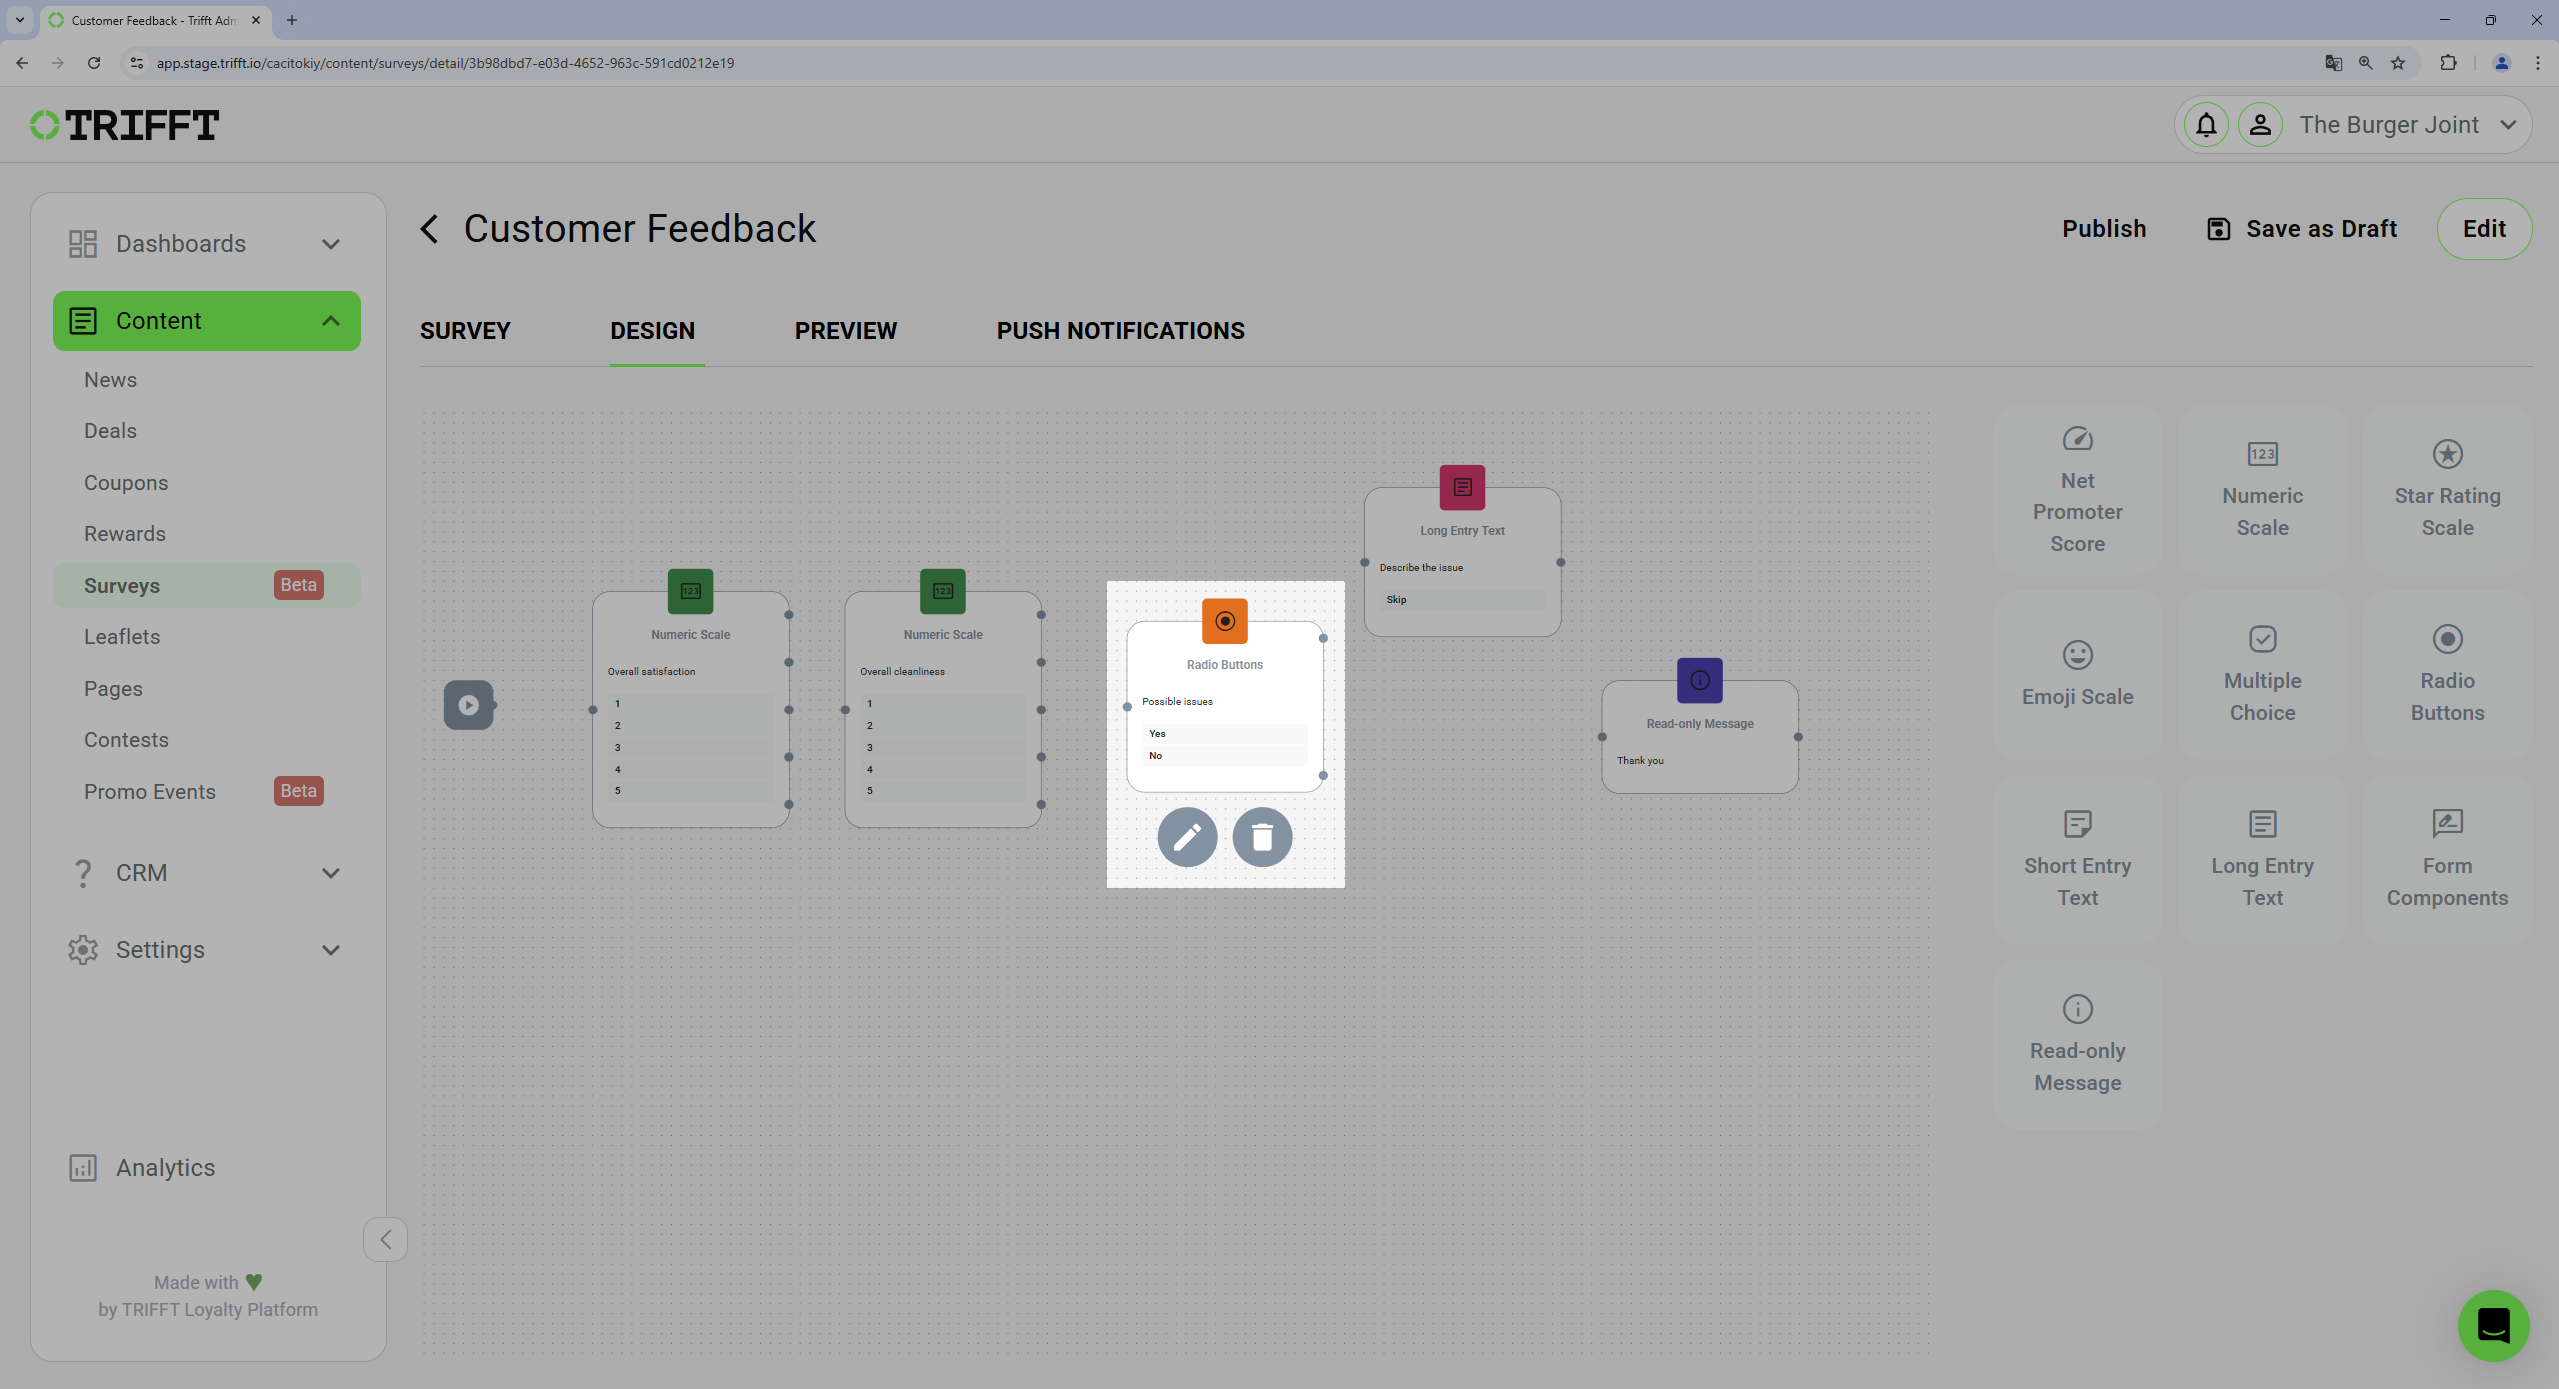
Arrange or edit the components
-
Link Components: To link components together:
o Click and hold one of the output points of a component.
o Drag the connection line to the input point of the next component that should follow.
Link components of the survey
-
Customize Flow: You can create different paths based on user answers, enabling a dynamic survey experience that adapts to individual responses.
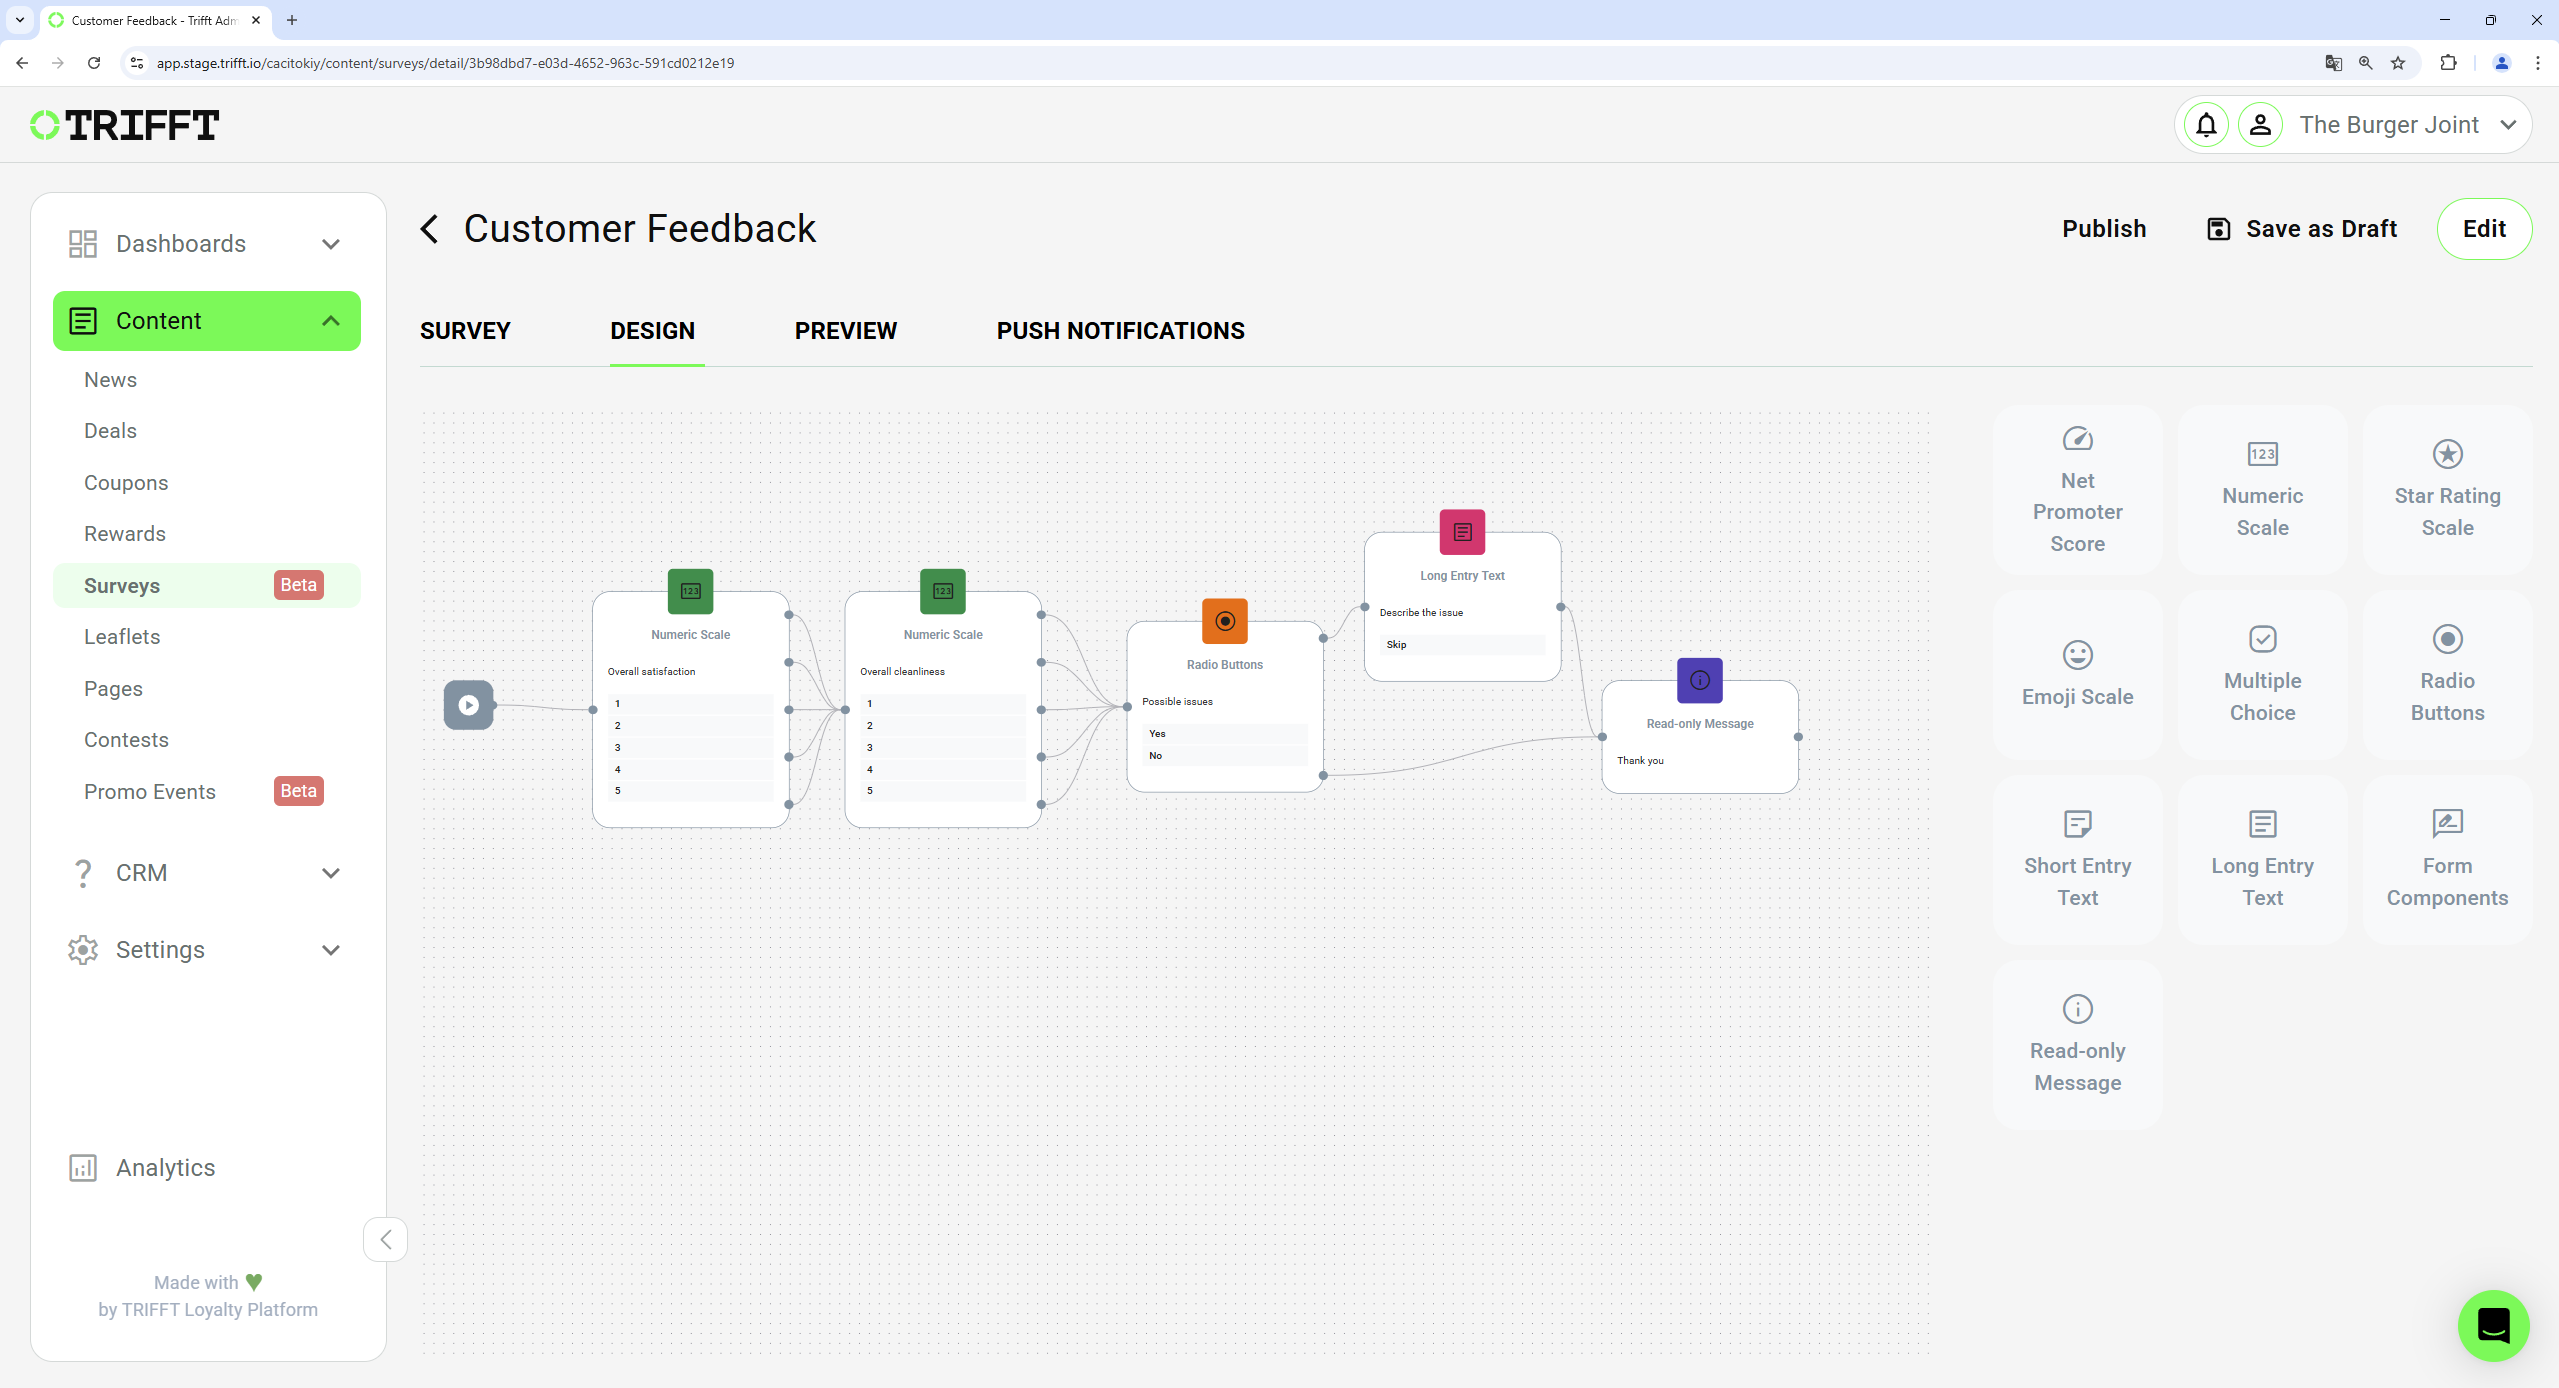
Customize flow and create different paths
Finalizing the Survey
- Once the design is complete, click
Save as a Draft (1)button in the top right corner to save the changes. - Click
Publish (2)to make the survey available to customers.
By following these steps, you can easily create and distribute surveys to collect valuable customer feedback.
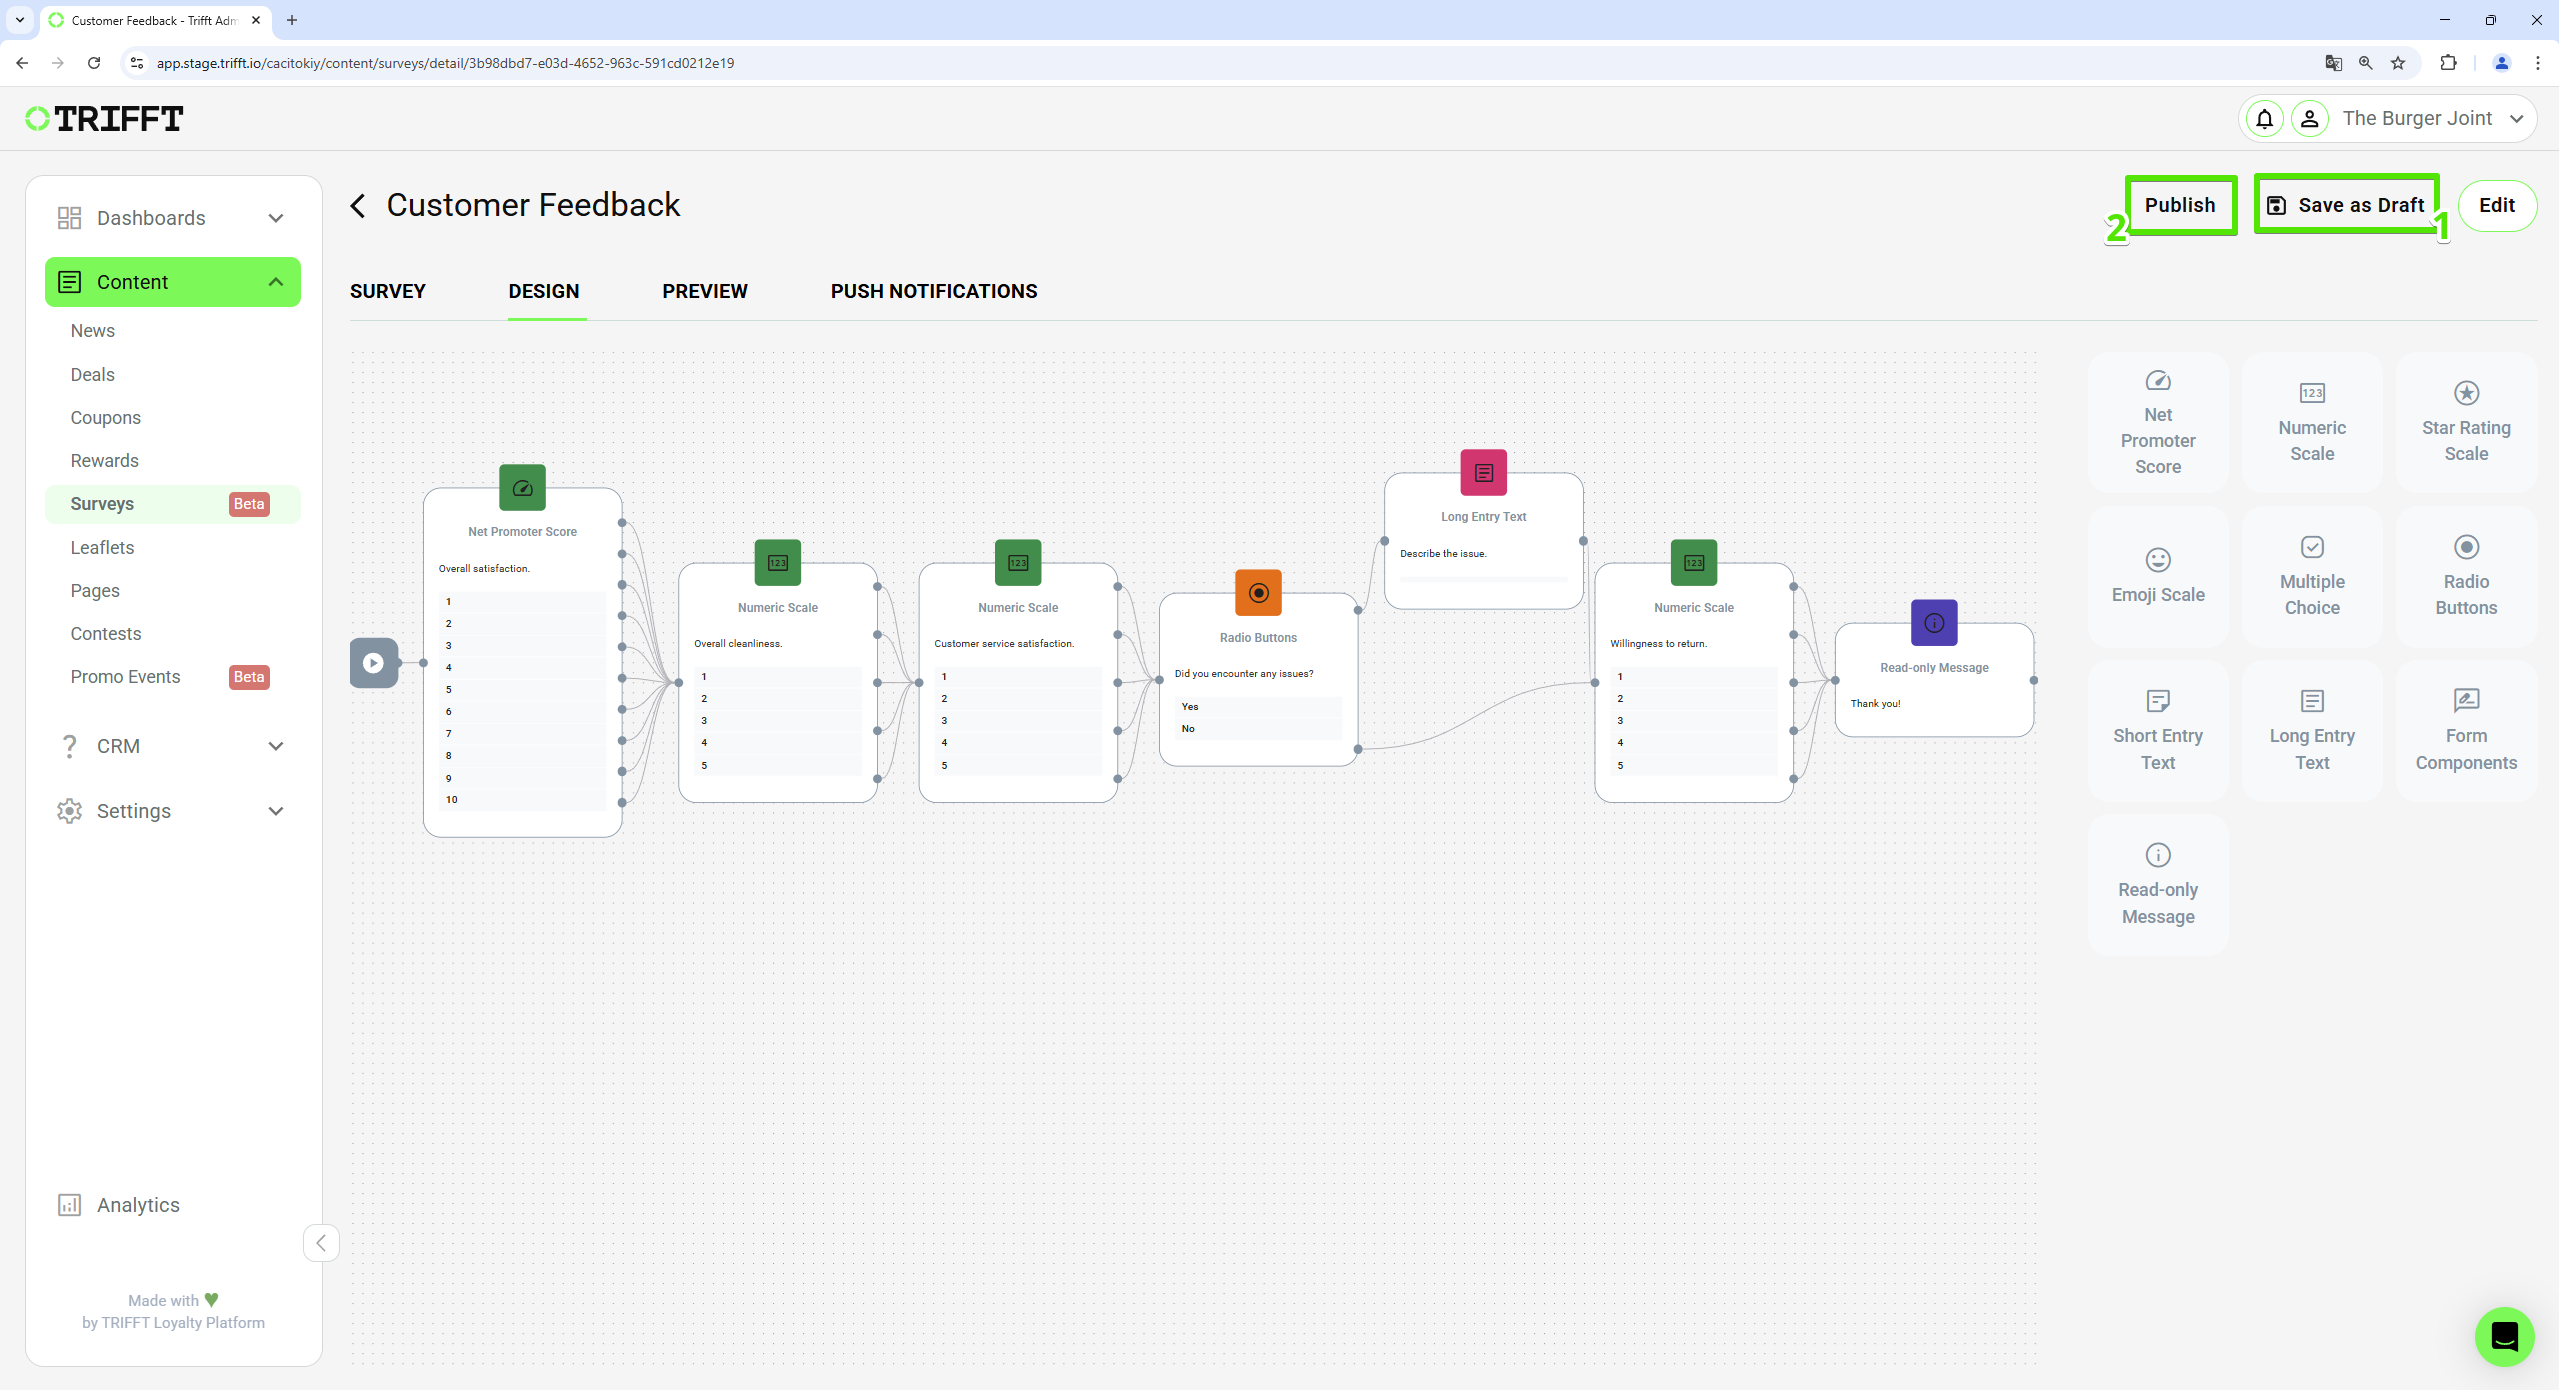
Finalizing the Survey
Updated 25 days ago