Apple digital wallet card
This guide will walk you through setting up an Apple Wallet pass for your loyalty program in the TRIFFT platform.
TRIFFT uses the Store Card type, suitable for loyalty cards, membership cards, and similar use cases. For more details on Apple’s design guidelines for Wallet passes, refer to Apple’s Human Interface Guidelines for Wallet.
Configuring an Apple Digital Wallet Pass
This guide will walk you through setting up an Apple Wallet pass for your loyalty program in the TRIFFT platform. We are using the Store Card type, which is suitable for loyalty cards, membership cards, and similar use cases.
For more details on Apple’s design guidelines for Wallet passes, refer to Apple’s Human Interface Guidelines for Wallet.
Step 1: Create a New Channel
-
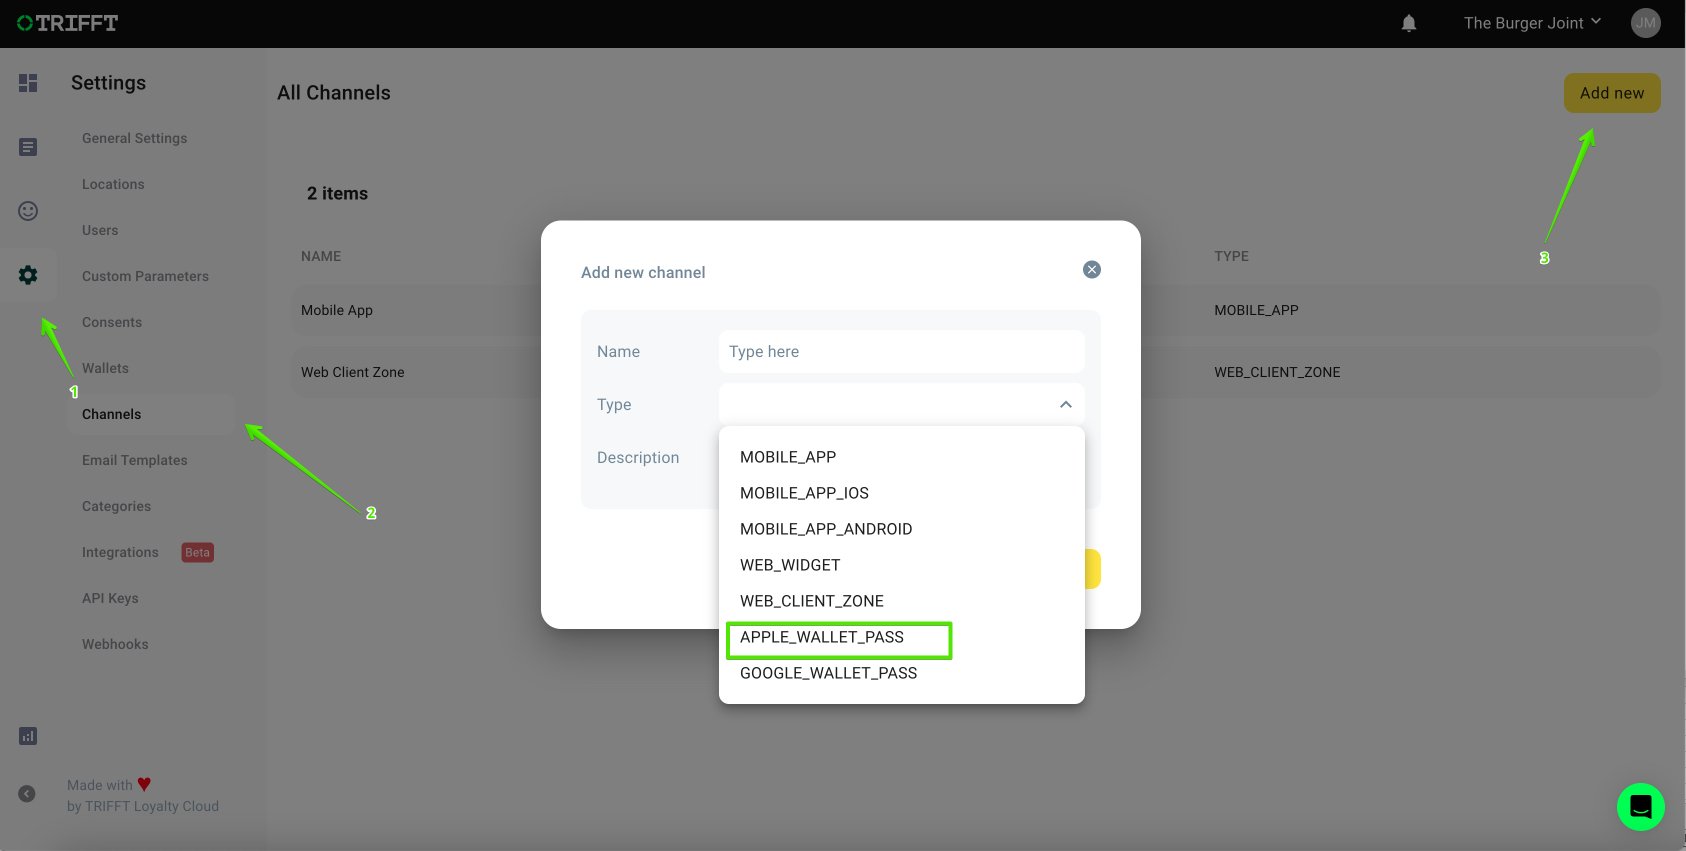
Navigate to Channels Settings
Go to Settings > Channels in the sidebar. -
Add a New Channel
Click on the Add new button in the top right corner. -
Select Apple Wallet Pass
In the pop-up window, fill in the Name field to identify the channel.
Under Type, select APPLE_WALLET_PASS from the dropdown menu.
Optionally, add a Description to provide more context for this channel. -
Save the Channel
After entering the details, click Save to create the channel. You will now see it listed under All Channels.
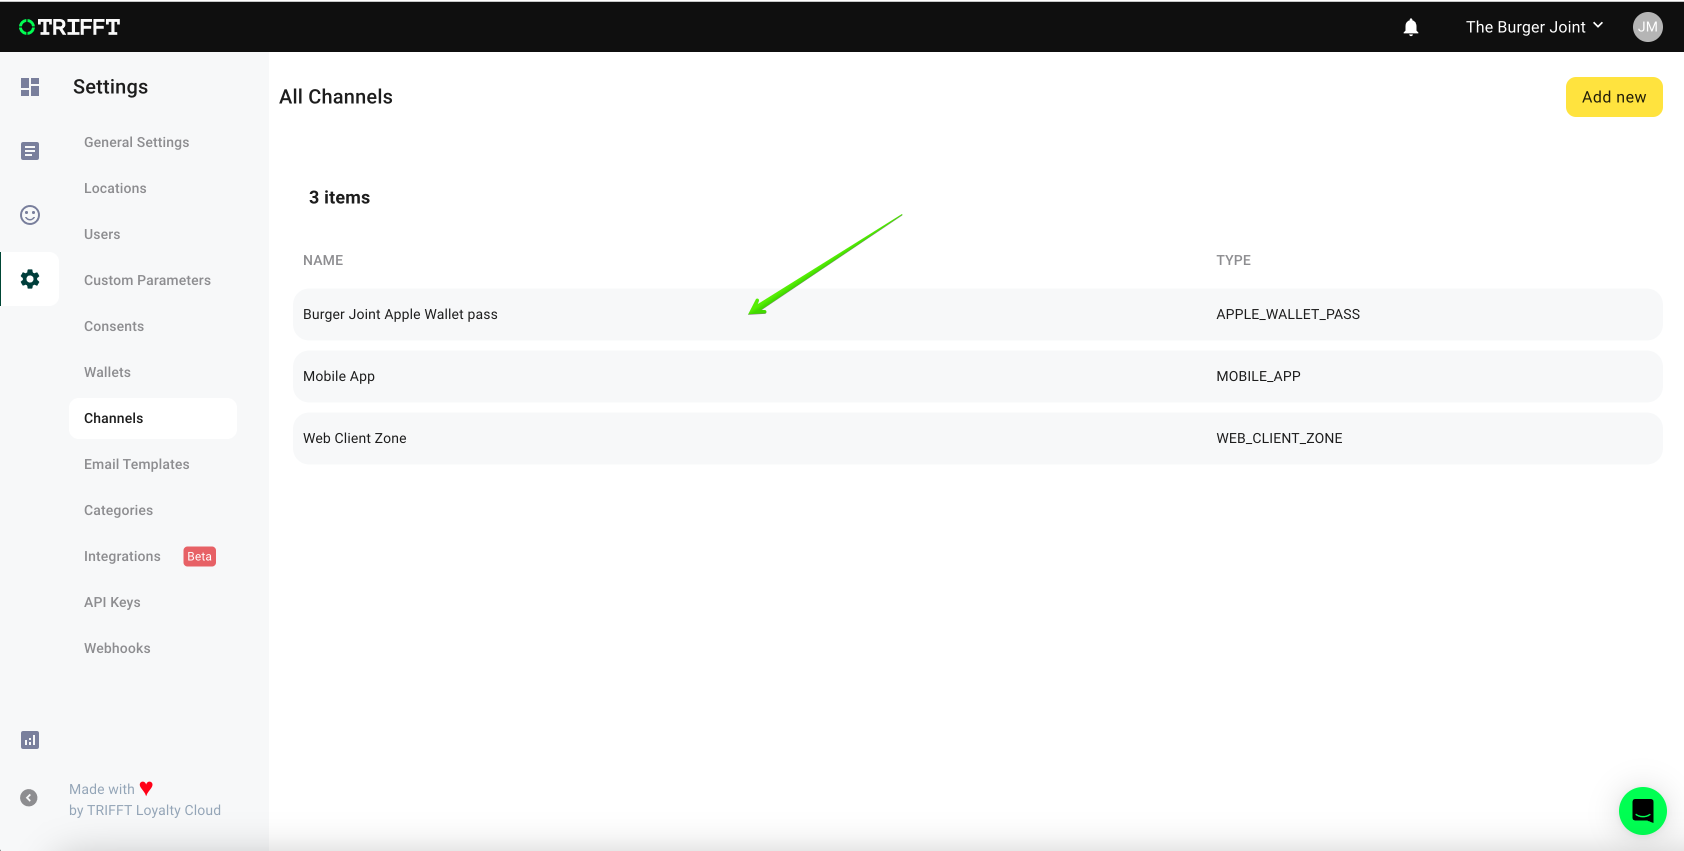
- Open the Apple Wallet
Click on the newly-created Apple Wallet pass channel to open it.
Step 2: Configure the Channel
2.1 Set Up Translations
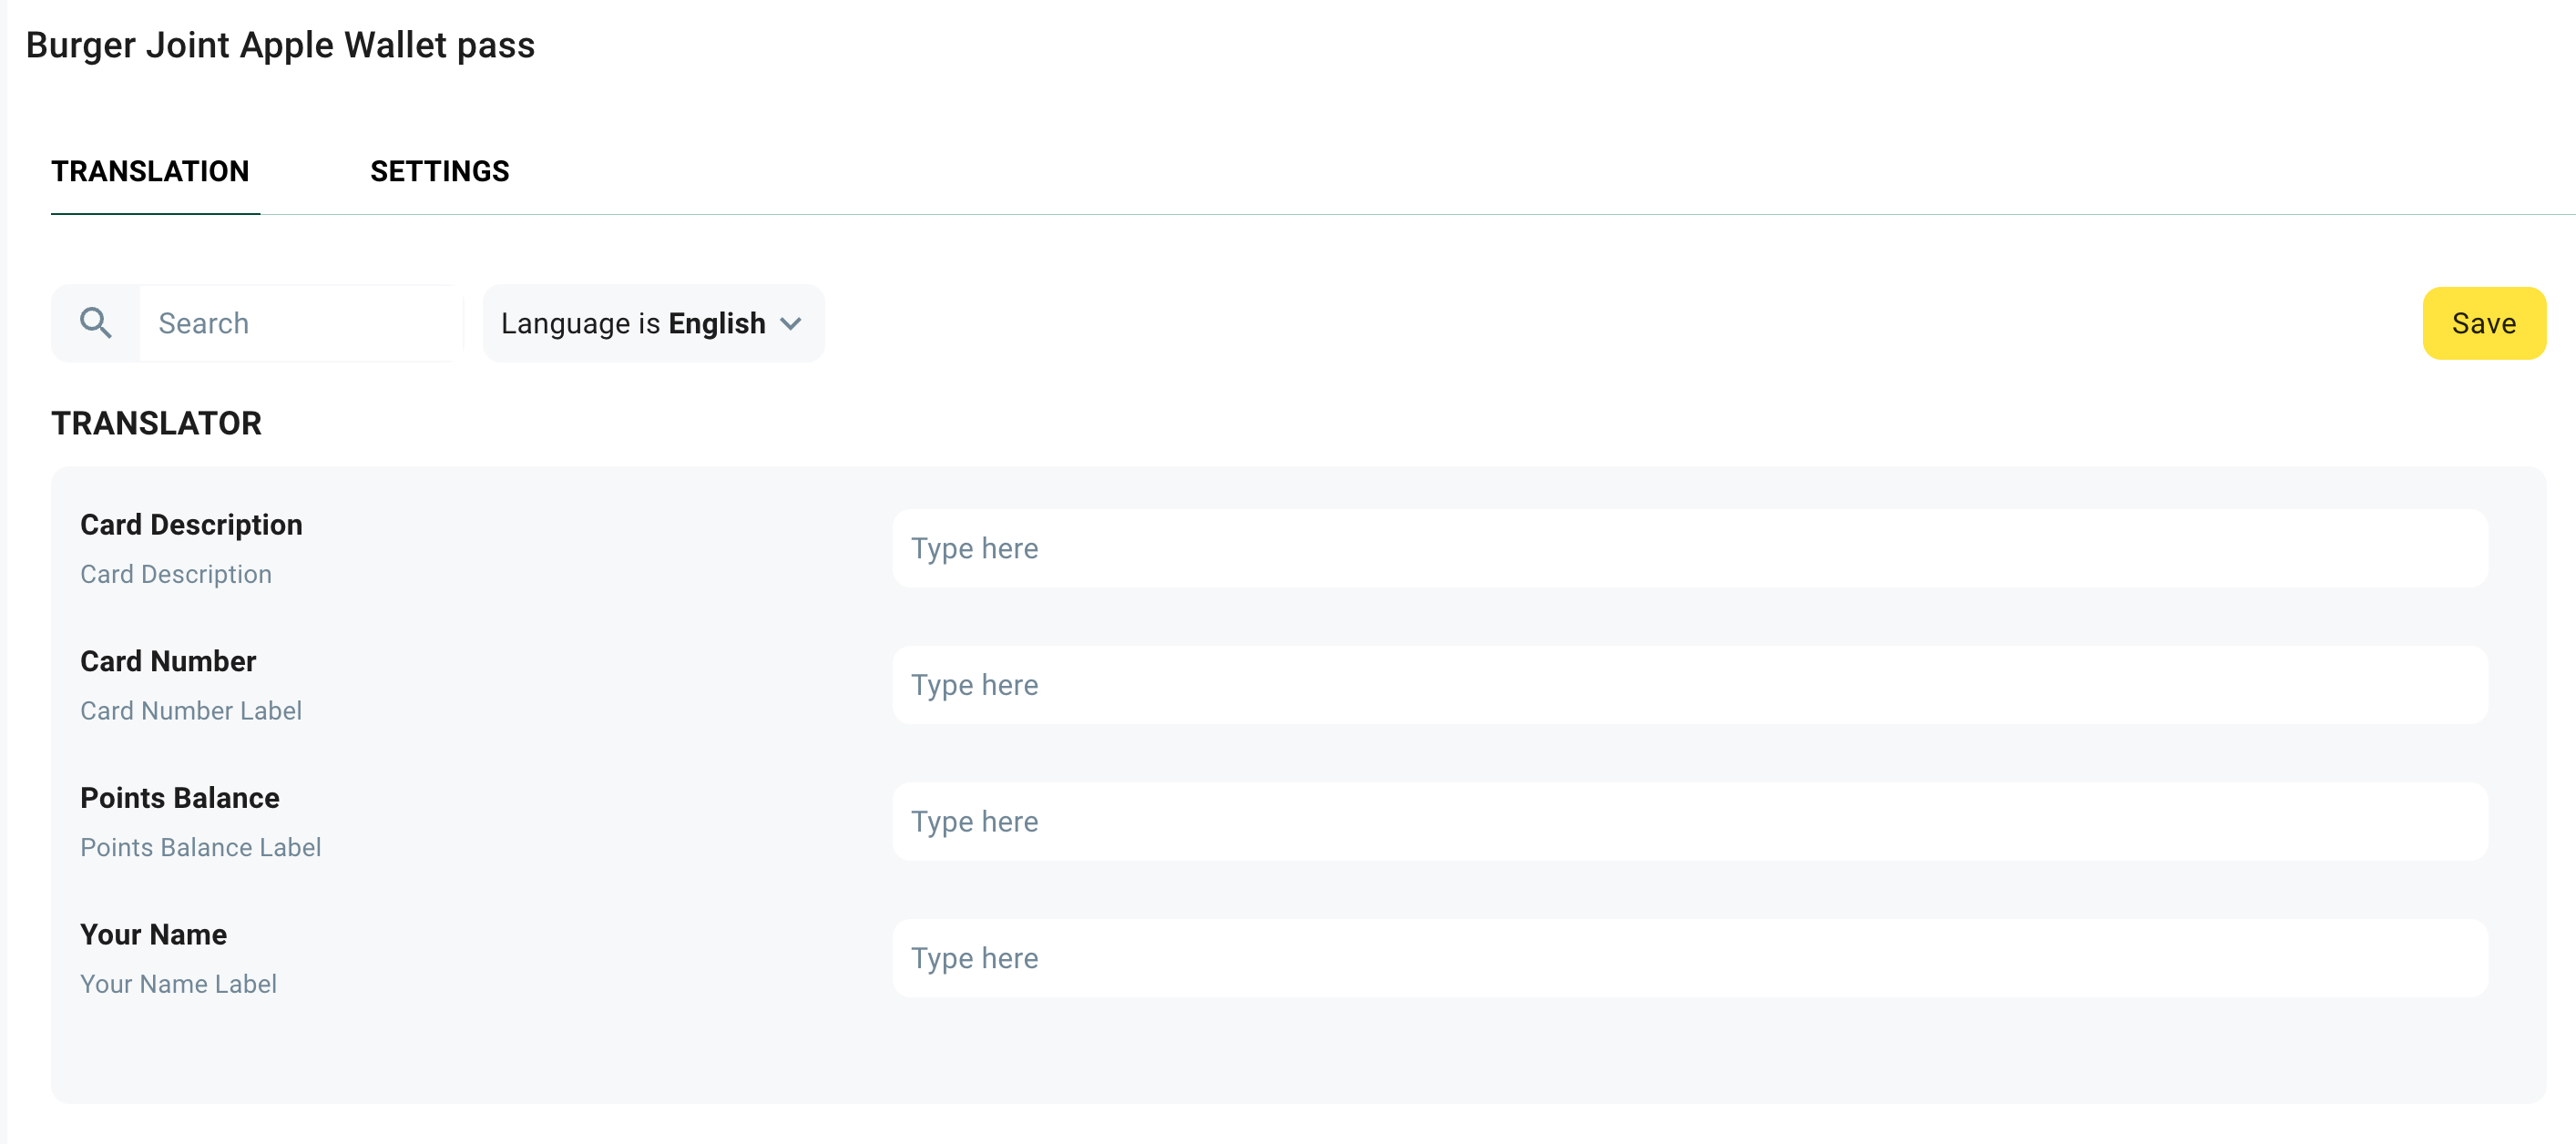
In the Translation tab add text for various fields visible on the pass, ensuring to select the correct language (which is the same as default language of your mobile app):
- Card Description: Enter a description for the card, which will be shown on the pass.
- Card Number: Label for the card number field.
- Points Balance: Label for displaying the points balance or other relevant loyalty metrics.
- Your Name: Field for displaying the user's name on the pass.
This step ensures that the pass information is clearly labeled and tailored to your program’s needs.
2.2 Configure General Settings
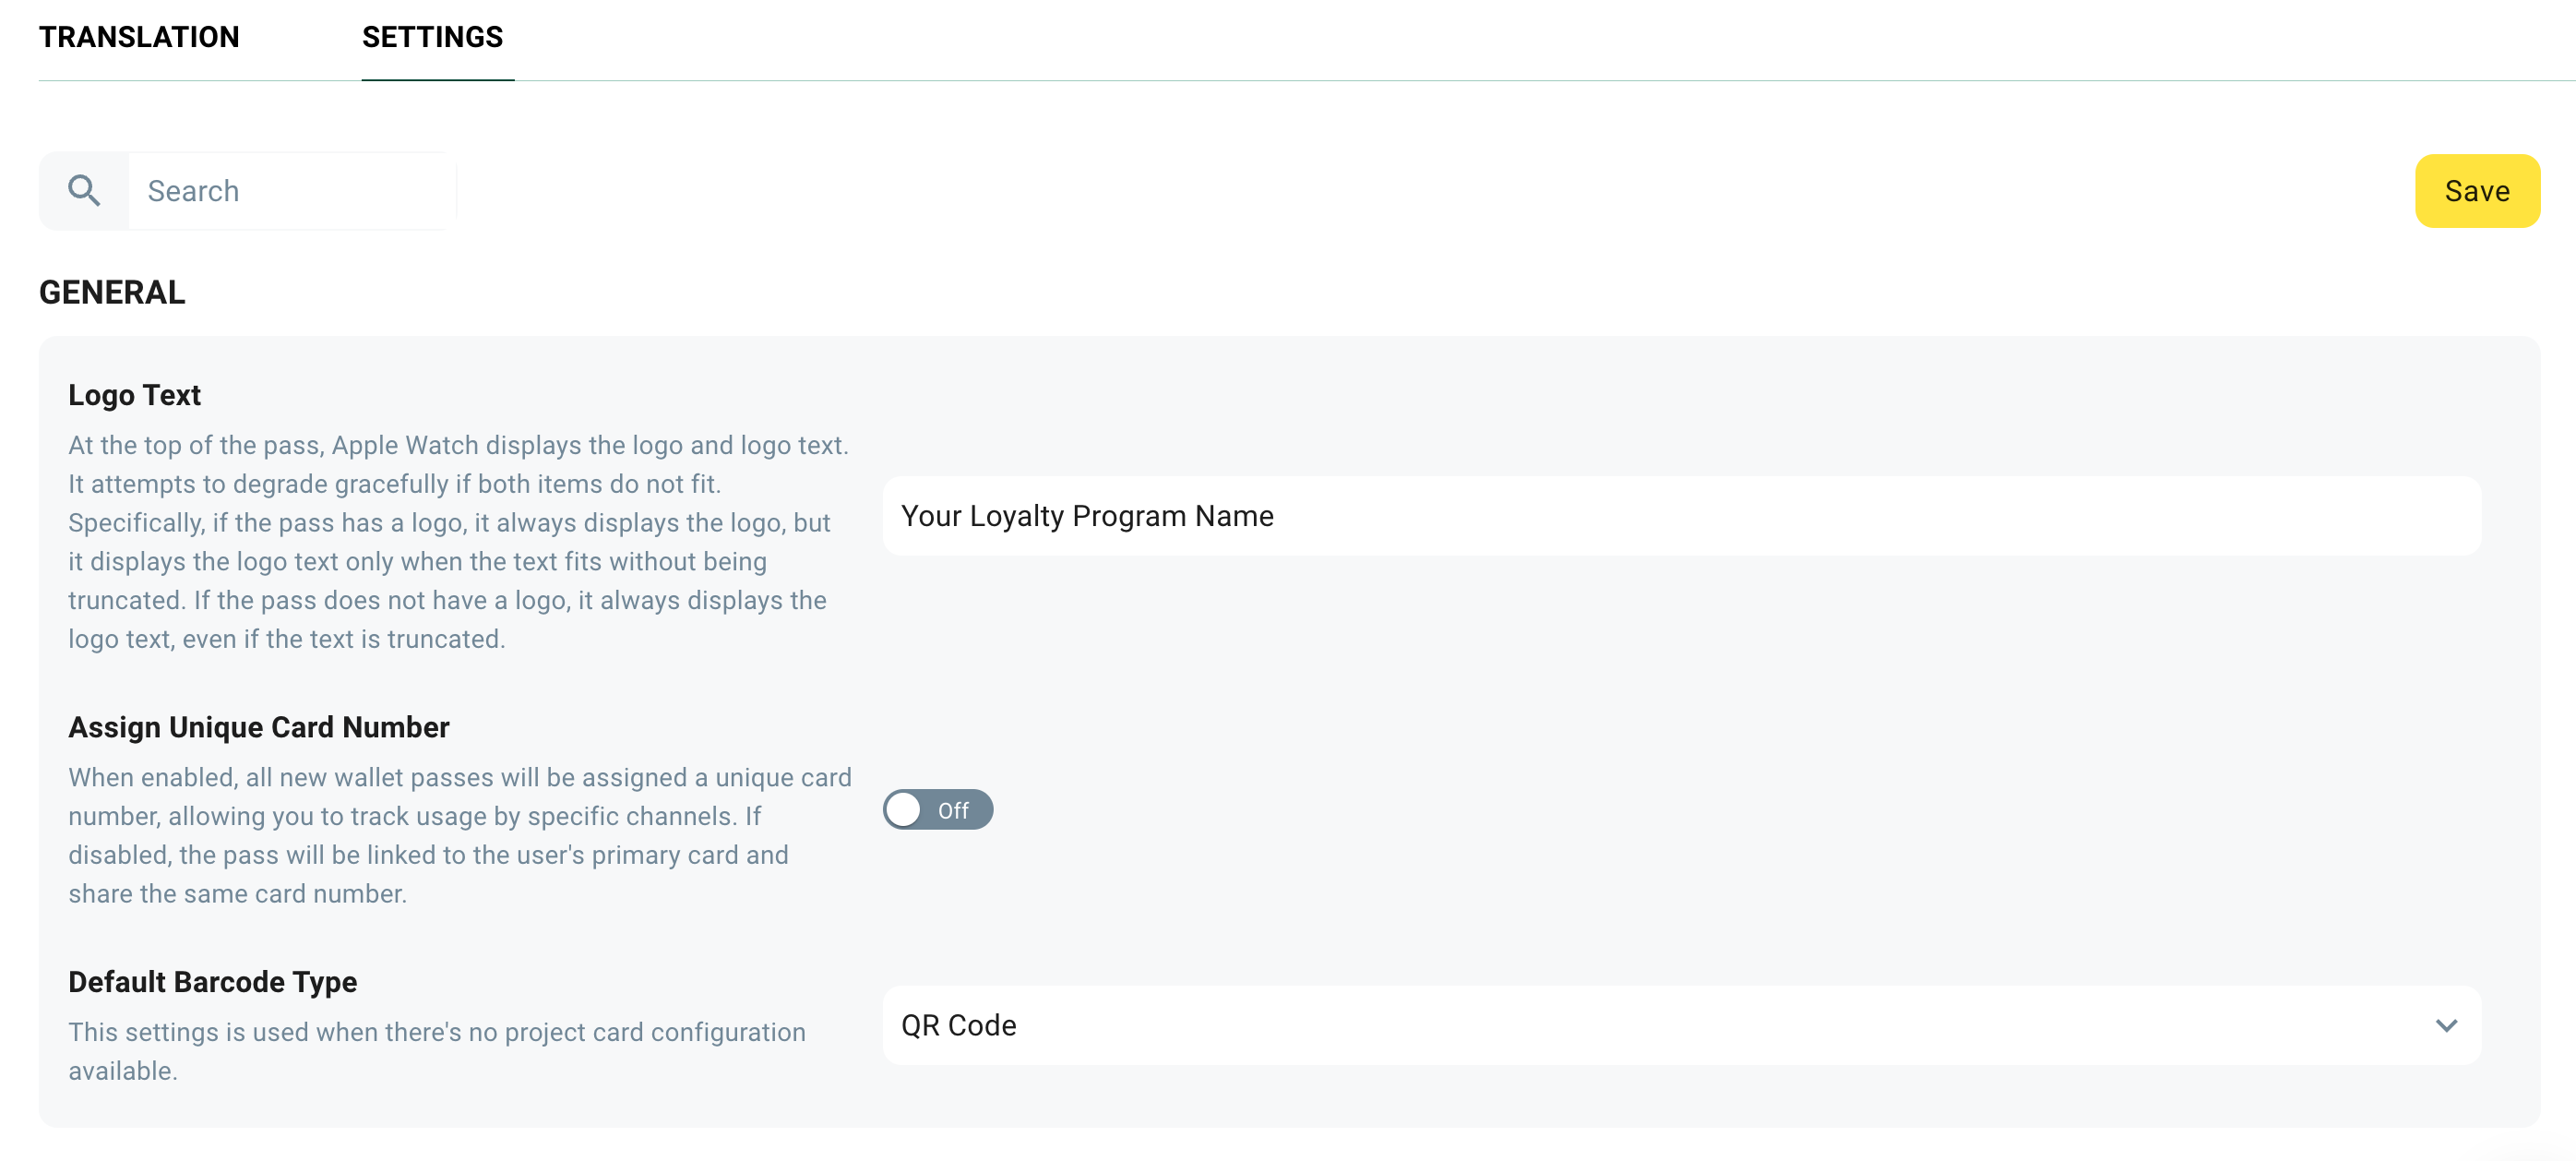
Switch to the Settings tab, fill in additional options under General:
- Logo Text: Enter the name or text to be displayed alongside the logo at the top of the pass.
- Assign Unique Card Number: Toggle on/off to assign a unique card number for each pass. Enabling this feature allows tracking by specific channels.
- Default Barcode Type: Select the default barcode type (e.g., QR Code) from the dropdown.
These settings provide further customization for how the pass is displayed and tracked.
2.3 Set Visual Attributes
Configure the appearance of the pass under Visual:

- Display Logo Text: Toggle on/off to show or hide the logo text.
- Background Color: Click to choose a background color for the pass.
- Foreground Color: Select a color for field values.
- Label Color: Choose a color for labels on the pass.
These settings help you align the pass design with your brand’s visual identity.
2.4 Upload Visual Assets
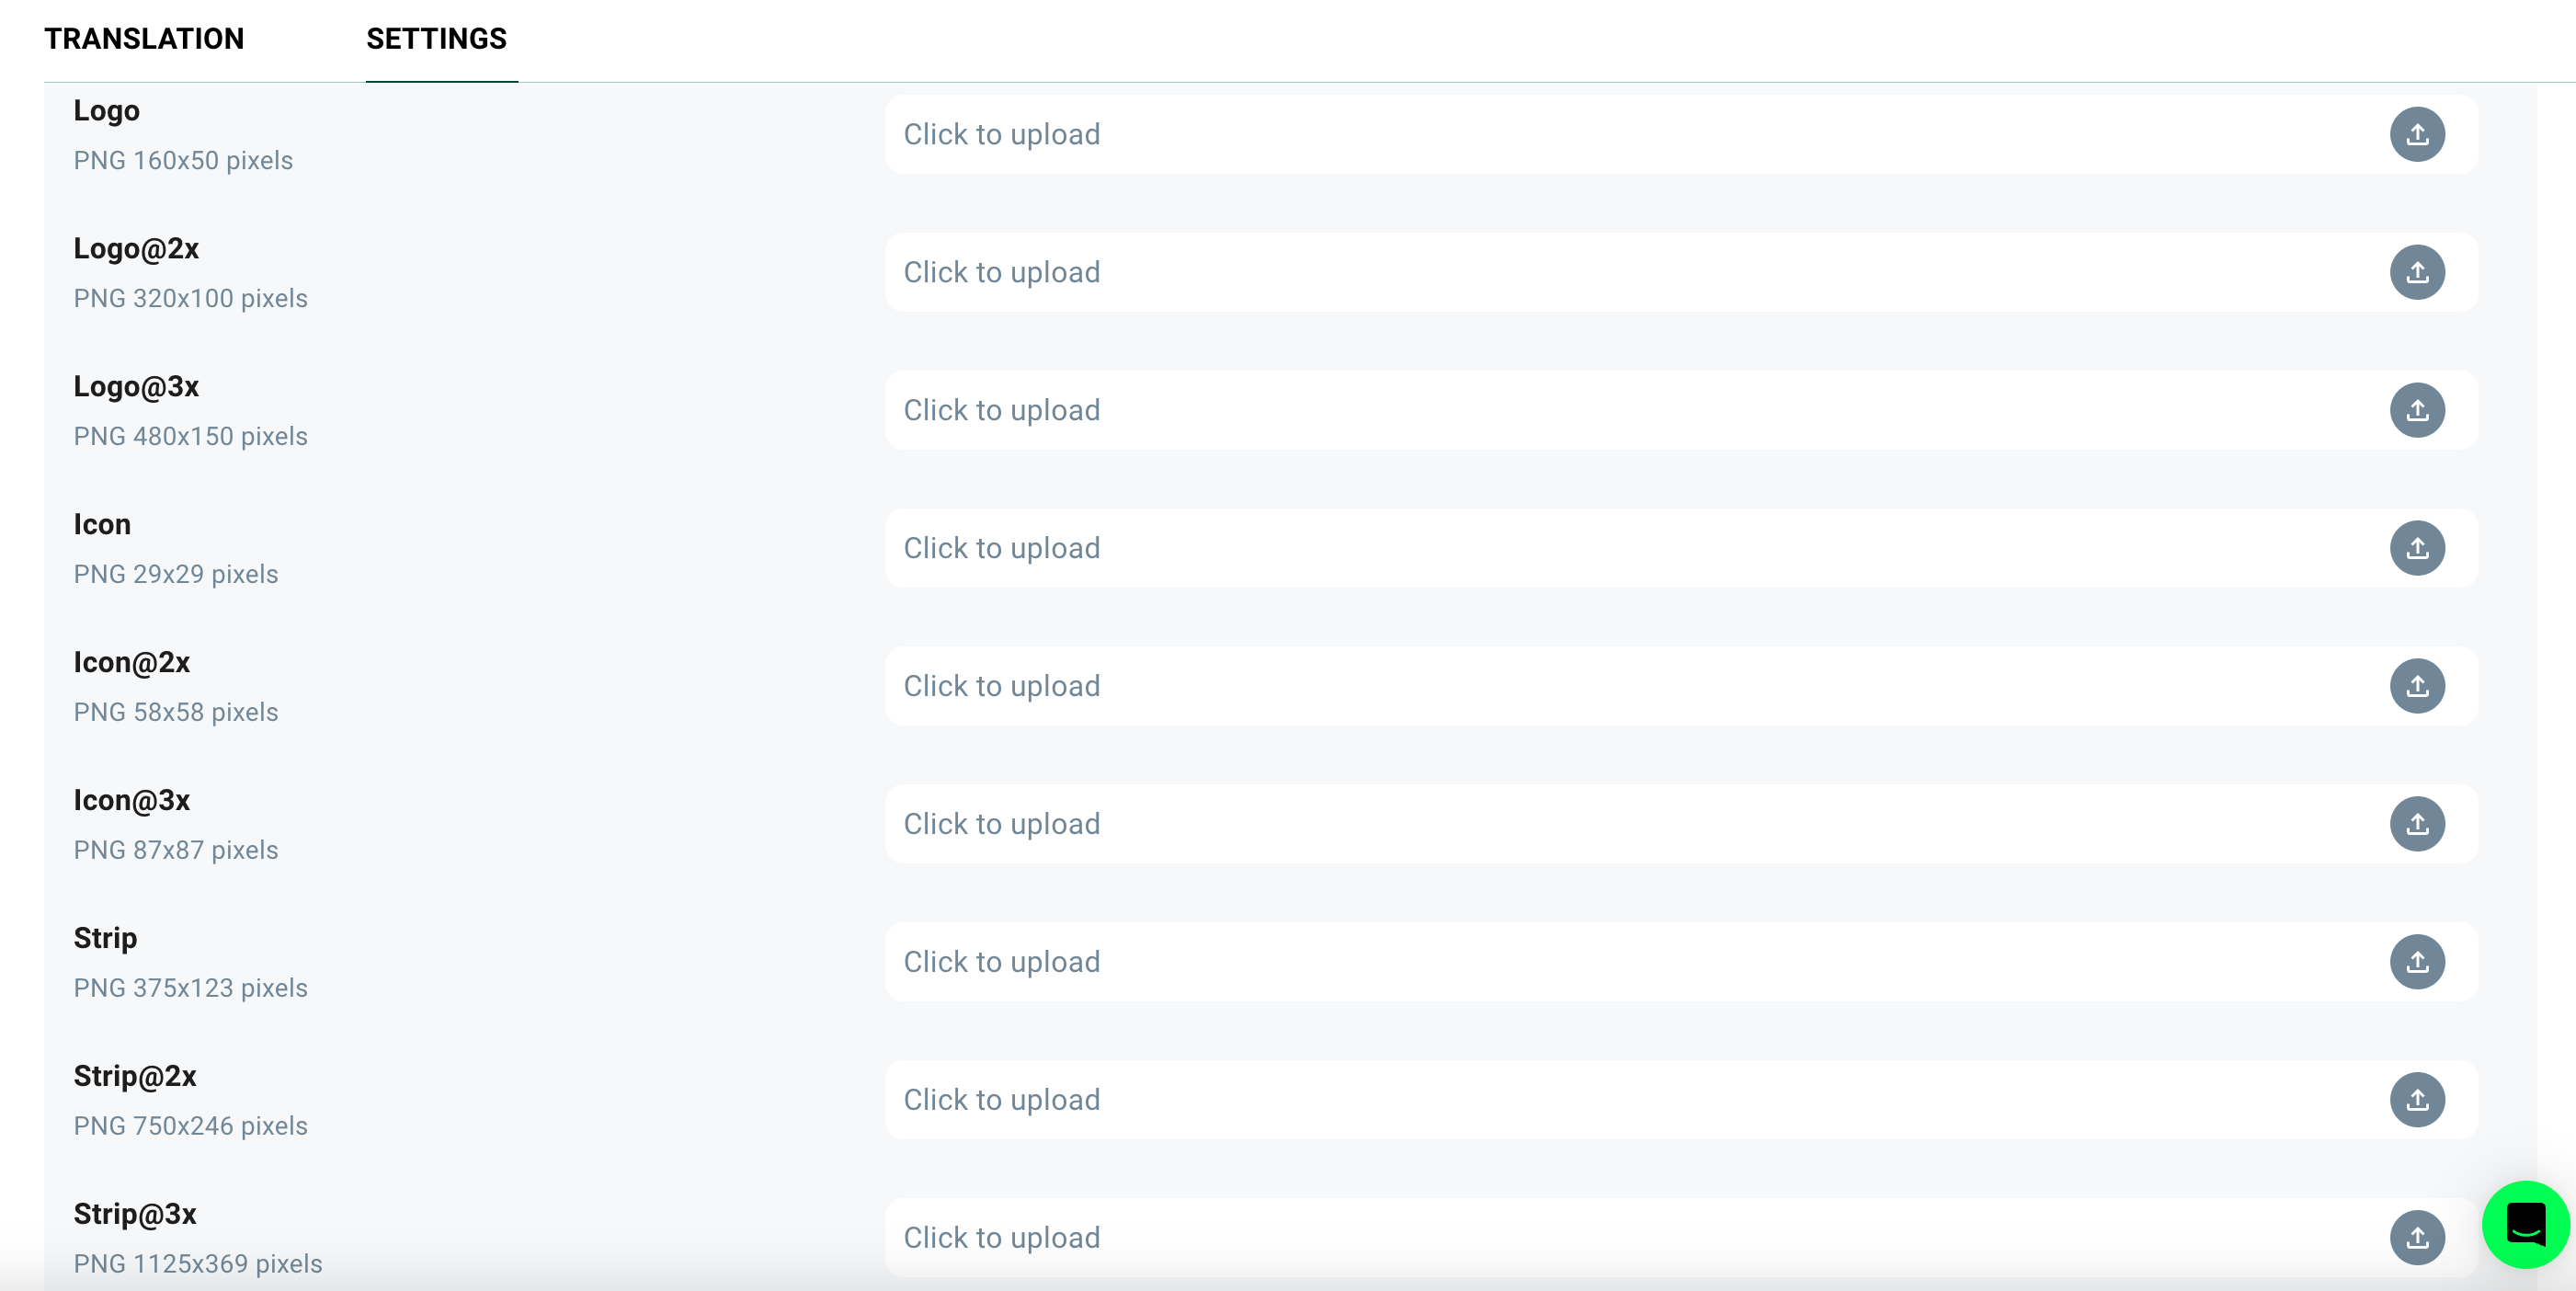
In the Settings tab of the Apple Wallet pass, you’ll find fields to upload various visual assets at different resolutions. Click on each “Click to upload” button to add the appropriate PNG file in the specified dimensions:
- Logo: 160x50 px, 320x100 px (2x), 480x150 px (3x)
- Icon: 29x29 px, 58x58 px (2x), 87x87 px (3x)
- Strip: 375x123 px, 750x246 px (2x), 1125x369 px (3x)
These images will be used to visually customize the pass for your brand.
Step 3: Save the Configuration
Once you have completed the fields in both Settings and Translation tabs, click the Save button to save your changes. Your Apple Wallet pass is now ready for distribution.
Visual Examples
Below are some examples of Apple Wallet passes created in TRIFFT. These examples showcase different configurations and visual elements, allowing you to see how your pass could look in practice.
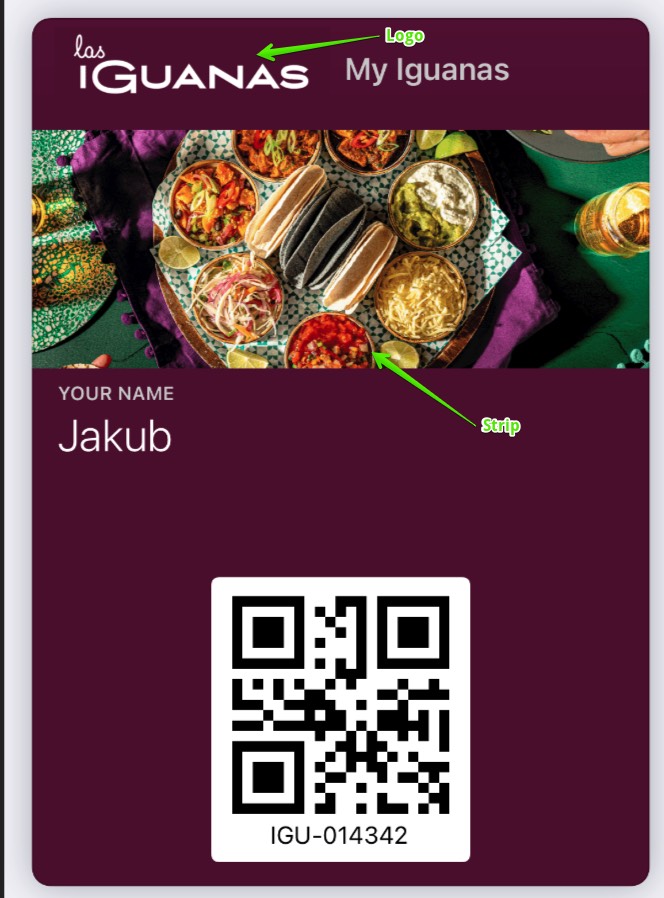
This completes the setup process for creating and customizing an Apple Wallet pass in TRIFFT. For additional guidance, refer to Apple’s Human Interface Guidelines for Wallet.
Updated 25 days ago