
Creating and working with segments
In this guide you will learn how to create the Segment in the system and how to add or remove the members from the Segment.
Create a new Segment
- Navigate to the
CRM (1)and selectSegments (2). - You will see a list of all Segments saved in your project.
- To create a new Segment, click the
Add New (3)button located in the top-right corner of the page.
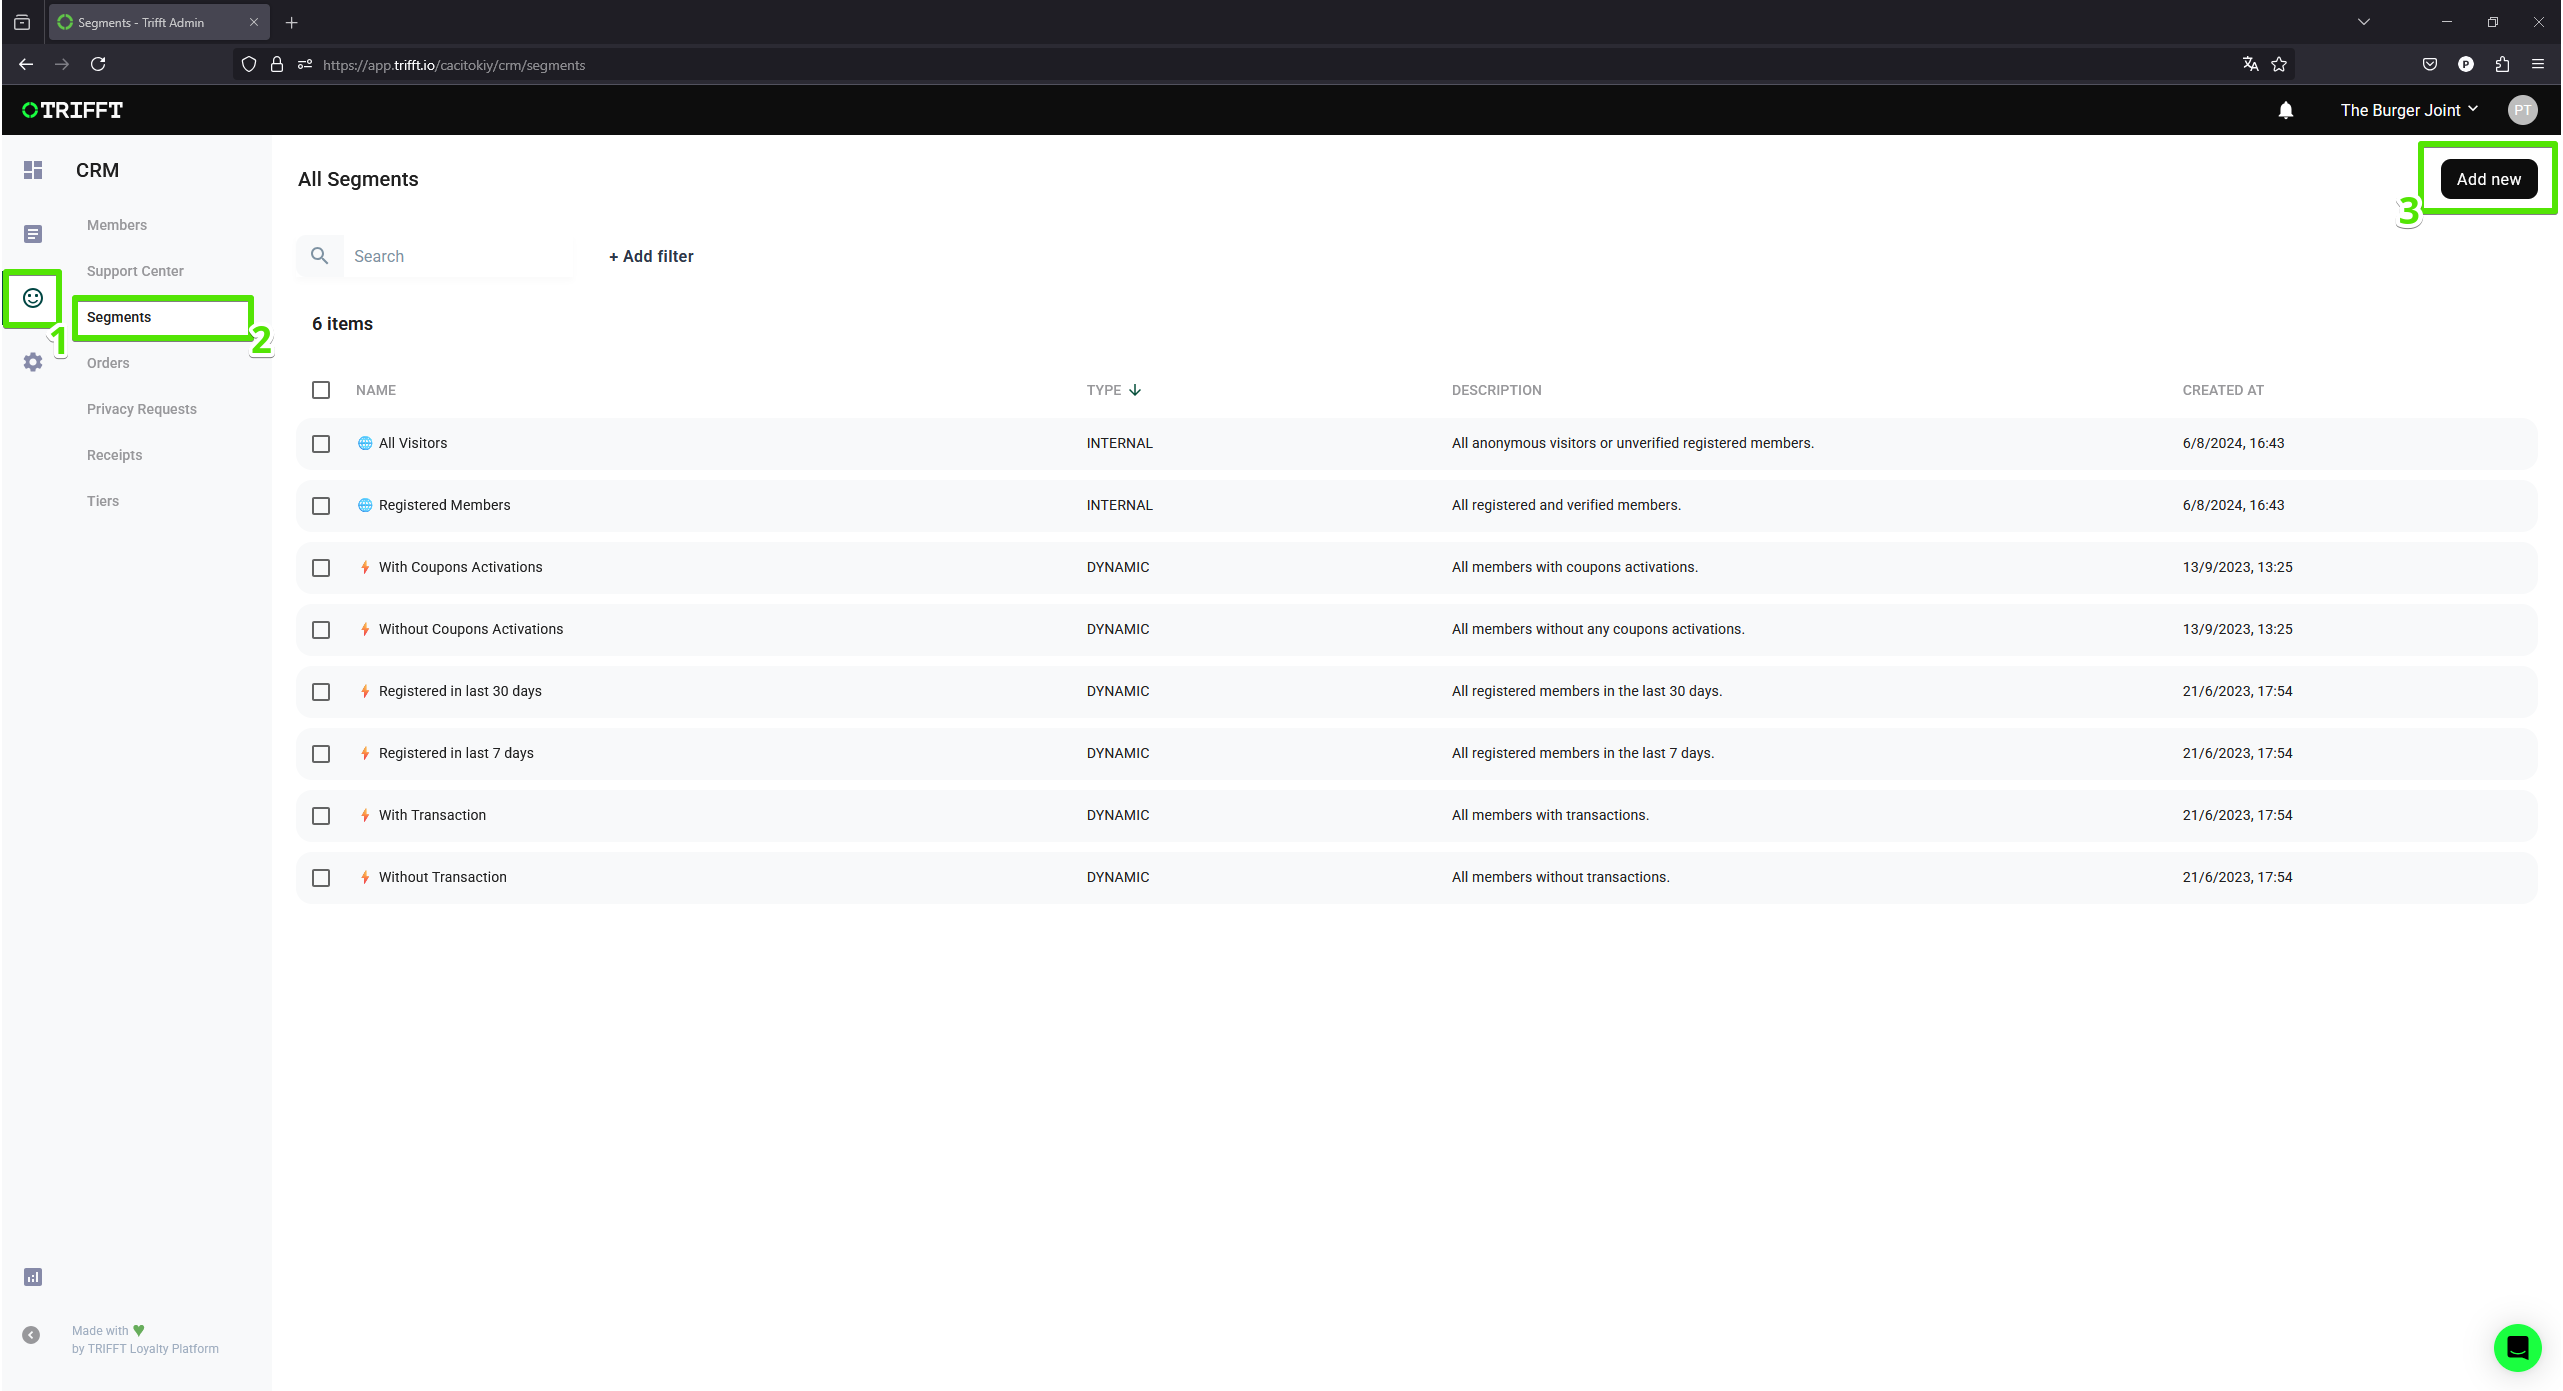
Create a new Segment
Setup the Segment
- Set a
name (1)for the segment. When assigning the segment, you will find it by this name. - Set a
description (2)for the segment. This description will only be visible in the list of all segments. - Click on
Save (3)button. - Public (optional): Switch the toggle
PUBLICif you wish to make the segment public. Public segments are visible to members in app/on the web and Members can self-register to these Segments. You can find more information in the article public segments.
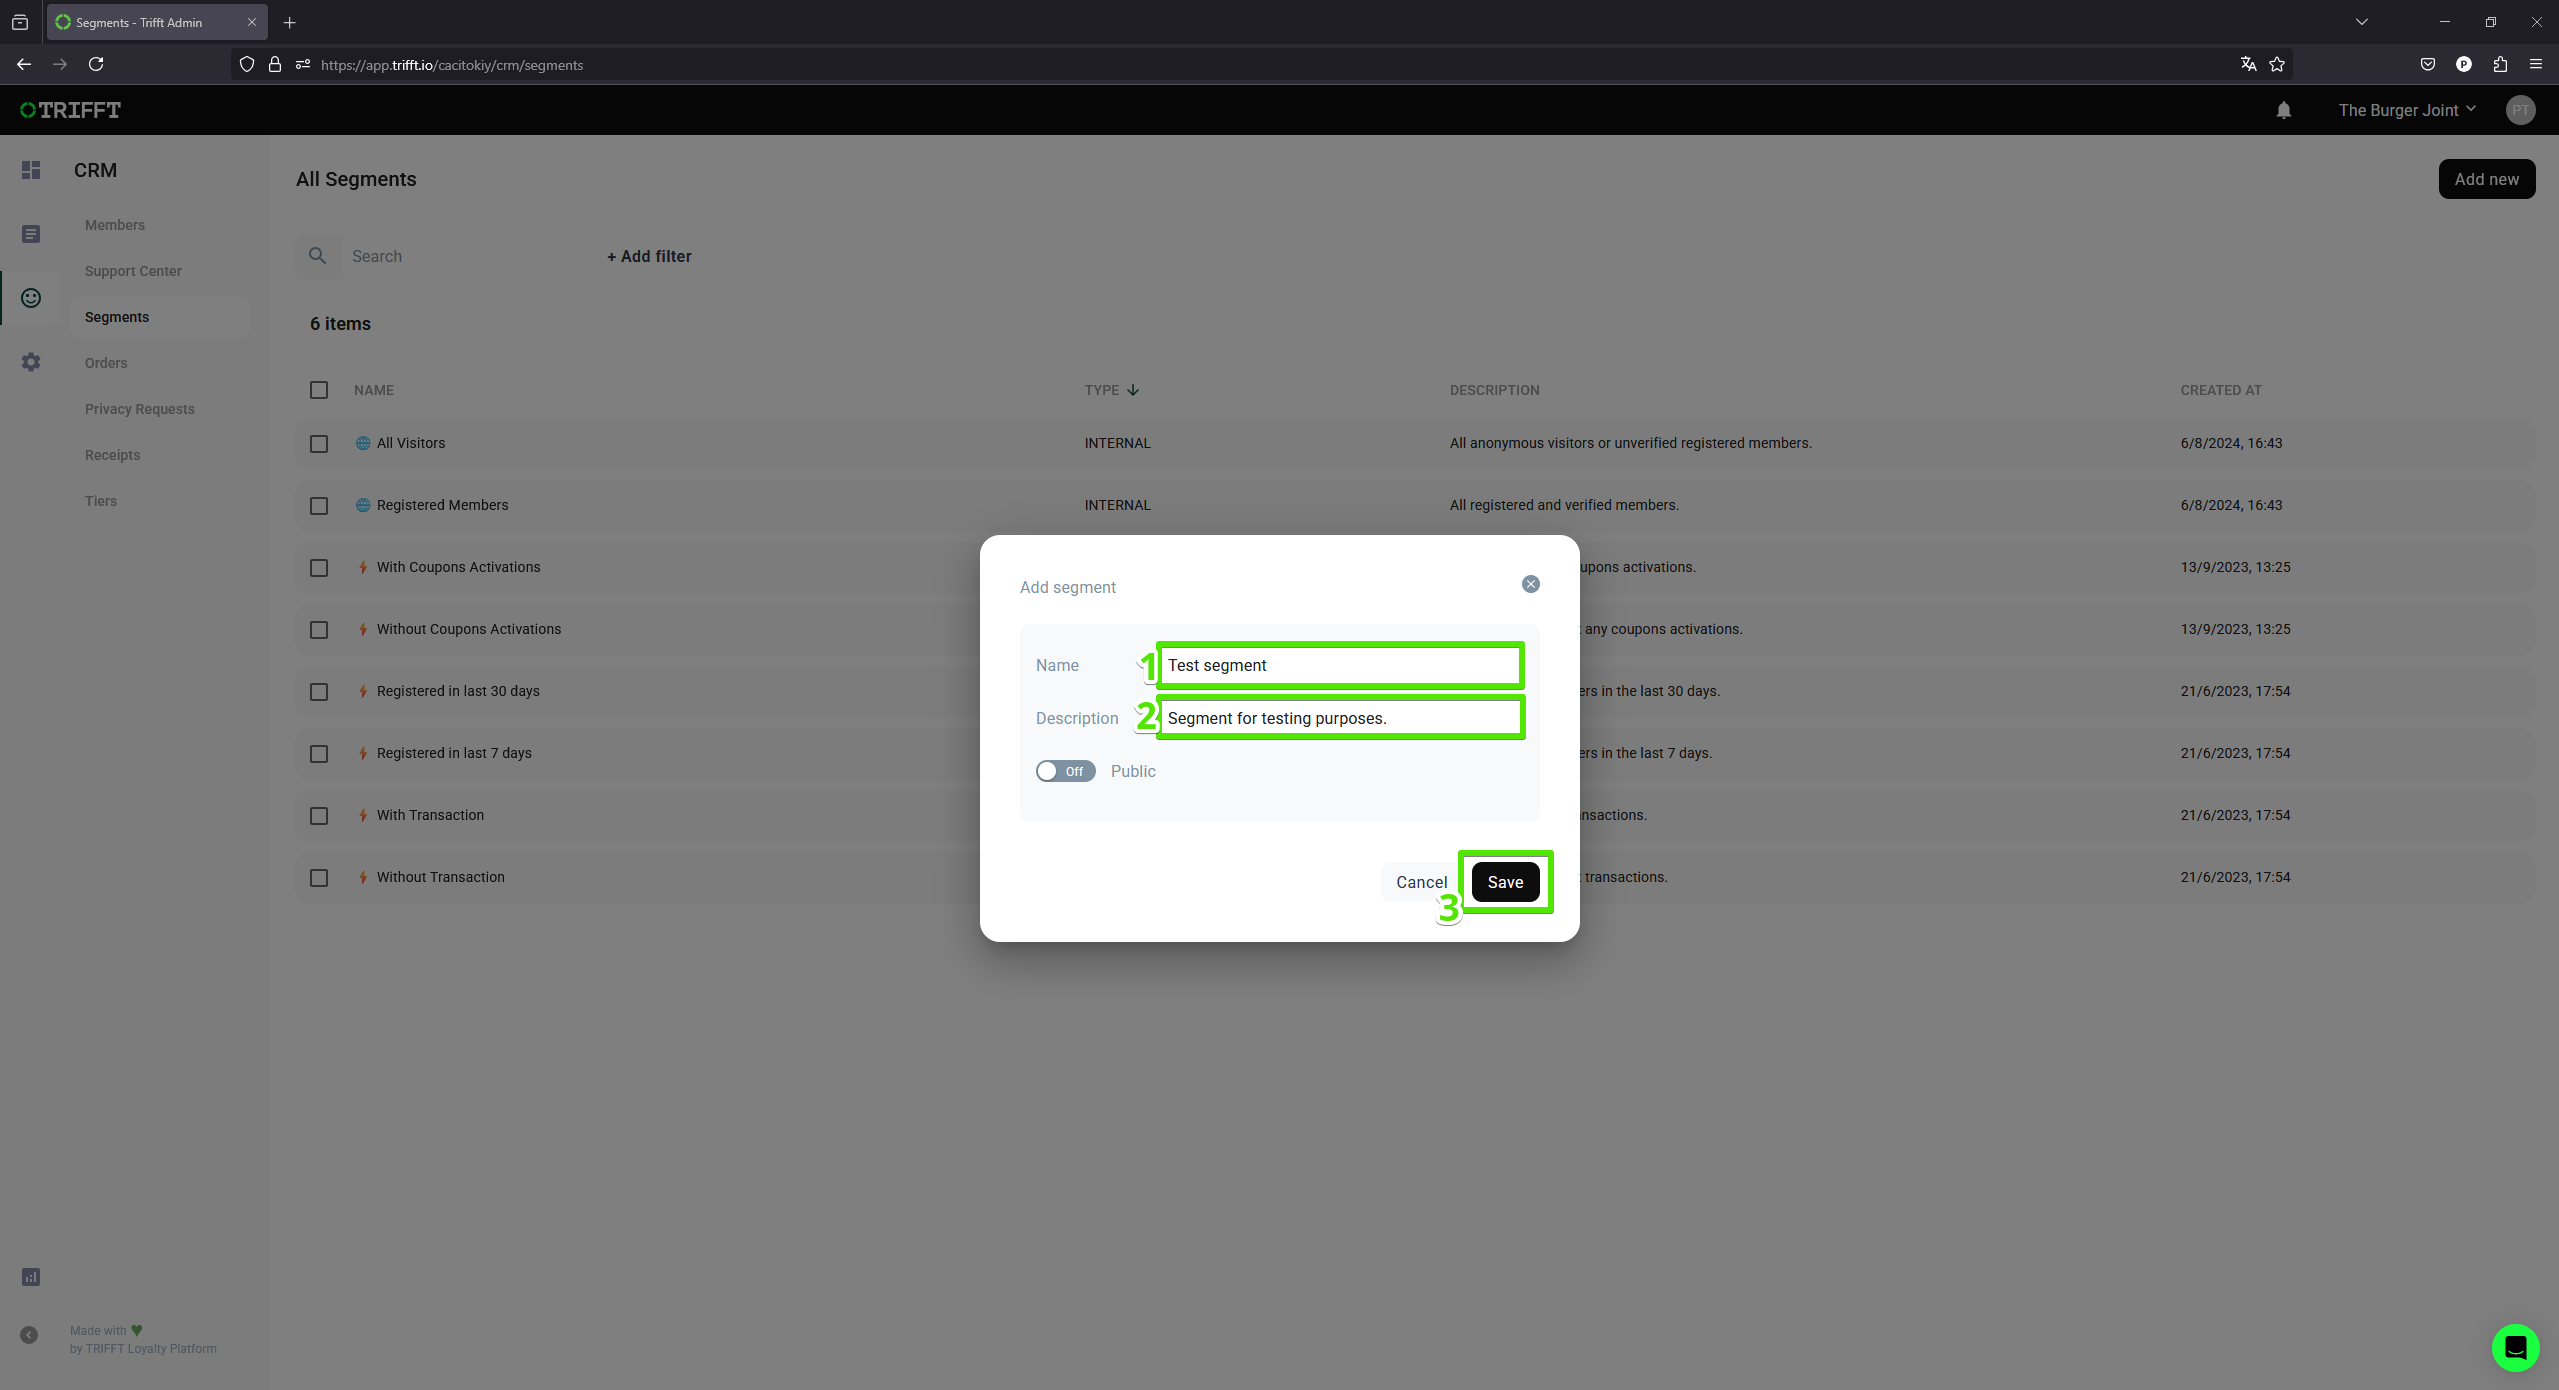
Setup the name and description of your segment.
Add members
- Once the new segment is created it will automatically open on the Settings Overview tab.
- Open the
Members Overview (1)tab and then click on theAdd members (2)button in the top right corner to access the list of all members.
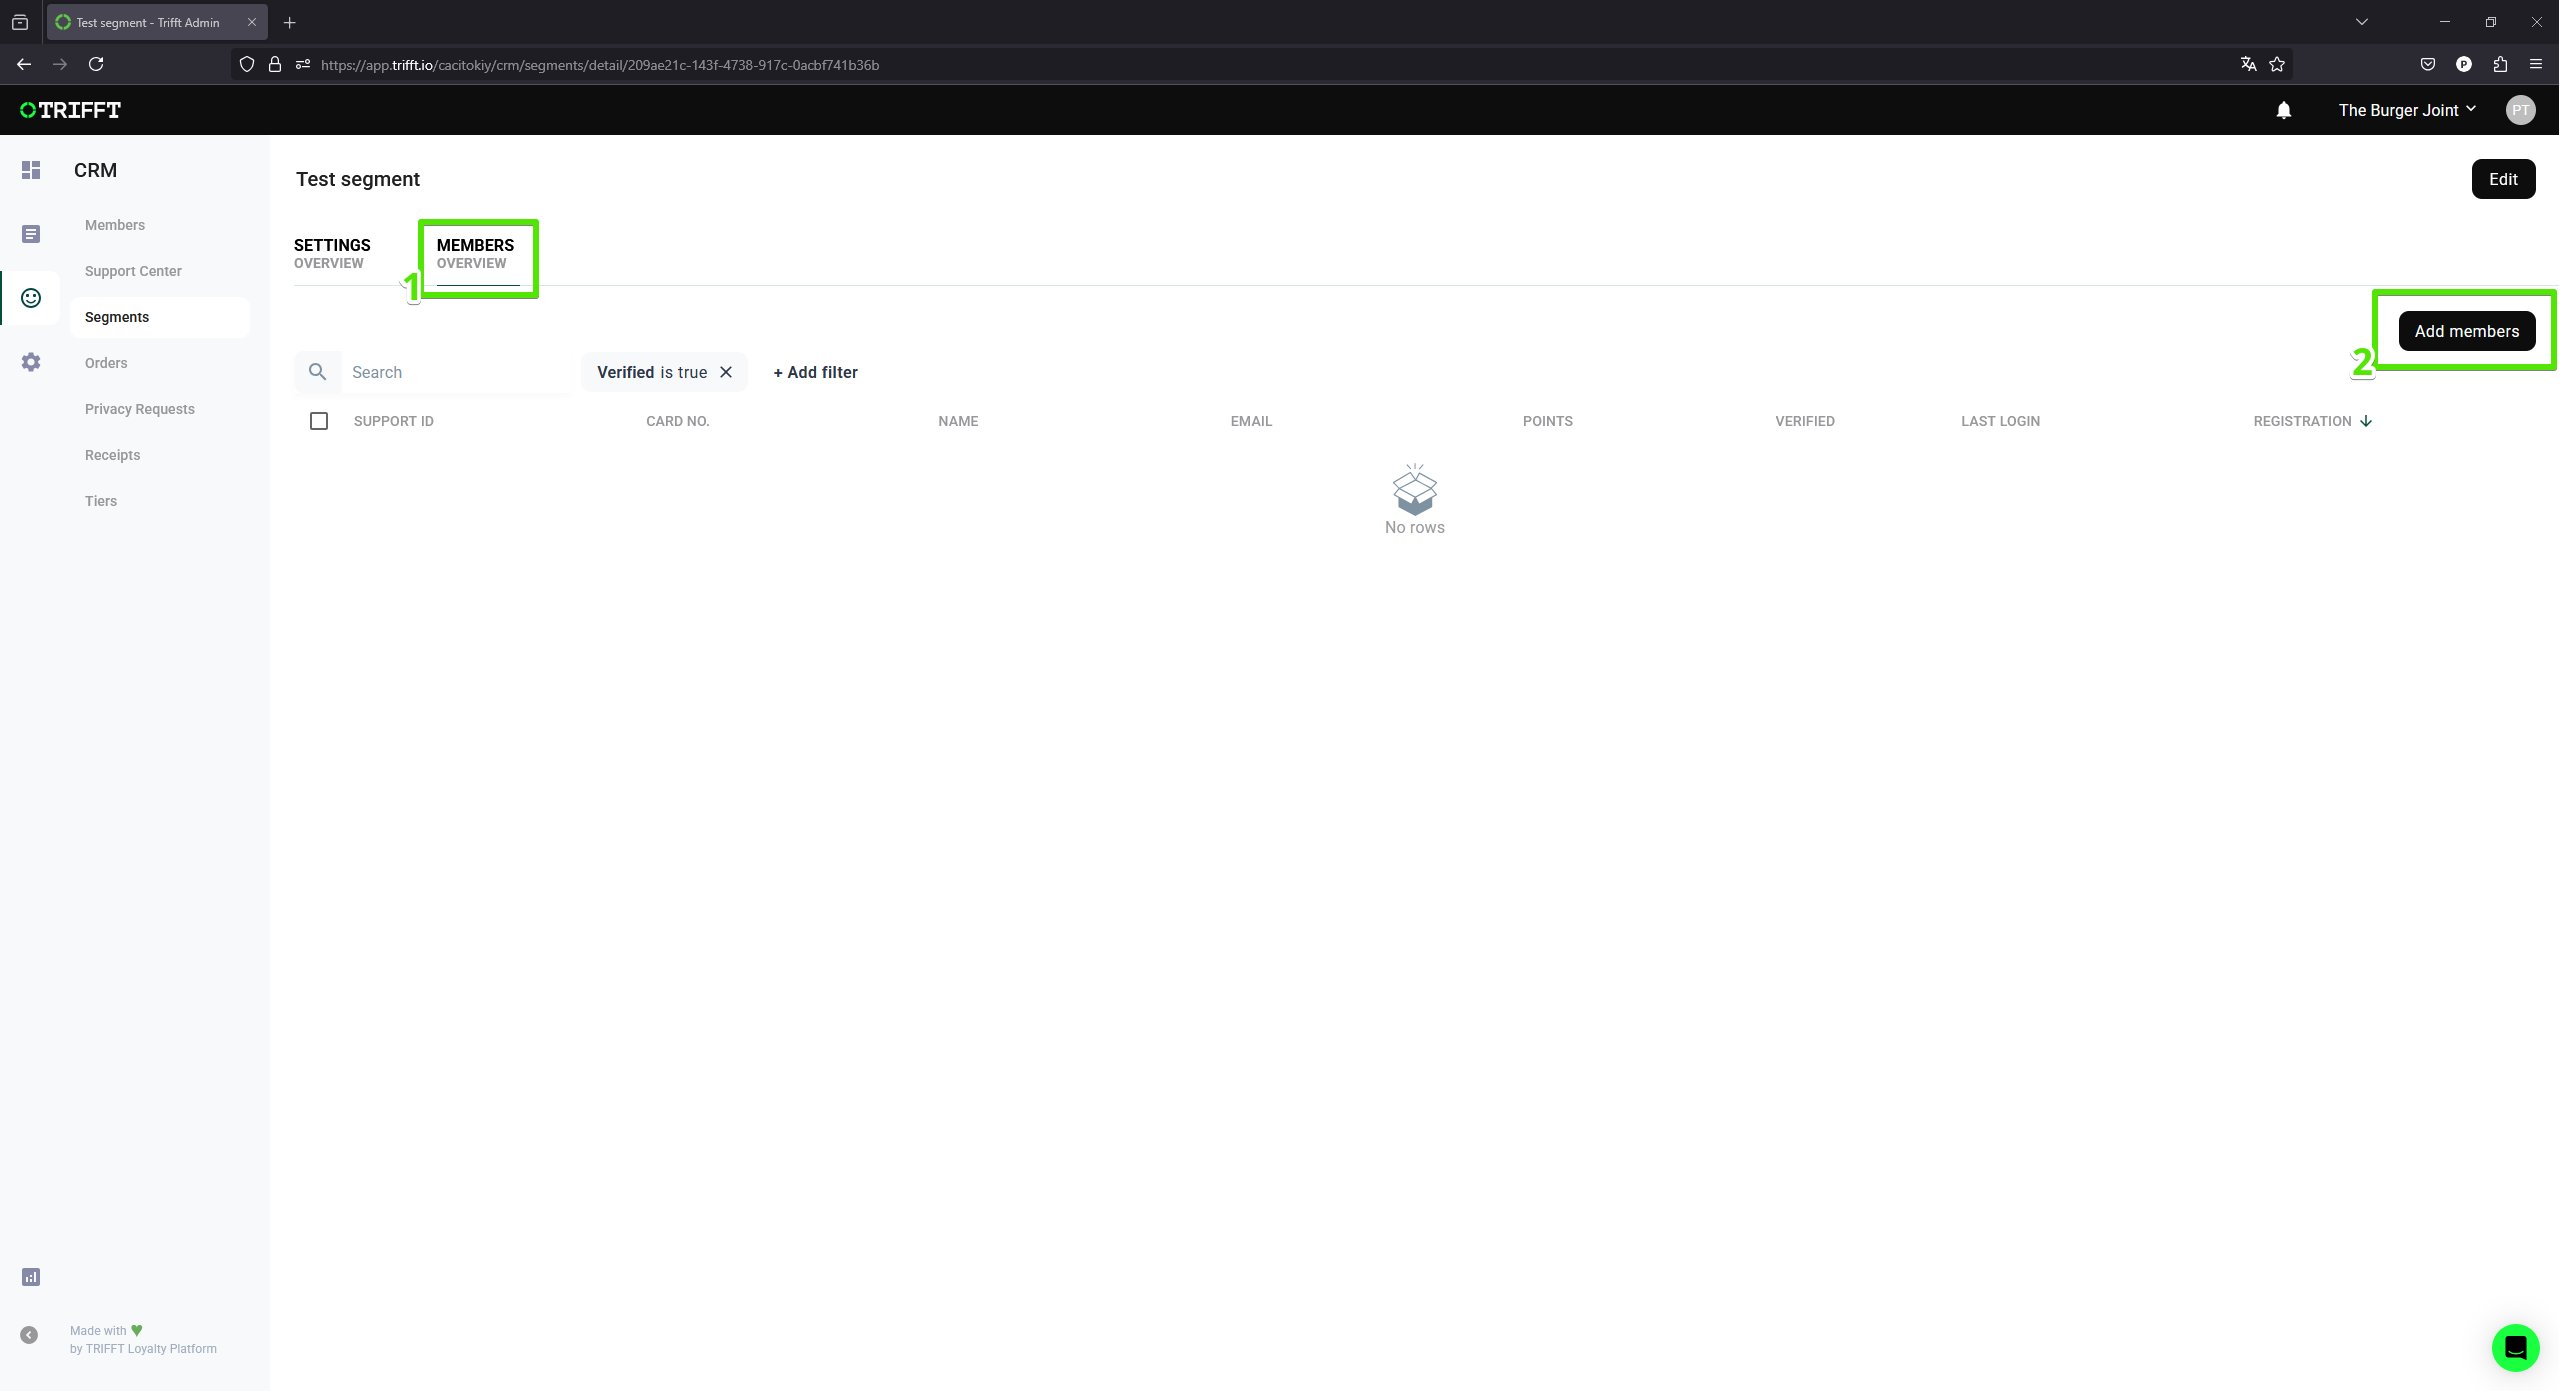
Add members - step 1
- Find the
member (3)you want to add to the segment, right-click on them, and select theAdd (4)option. - Once all members are added just close the window with the
close (5)button.
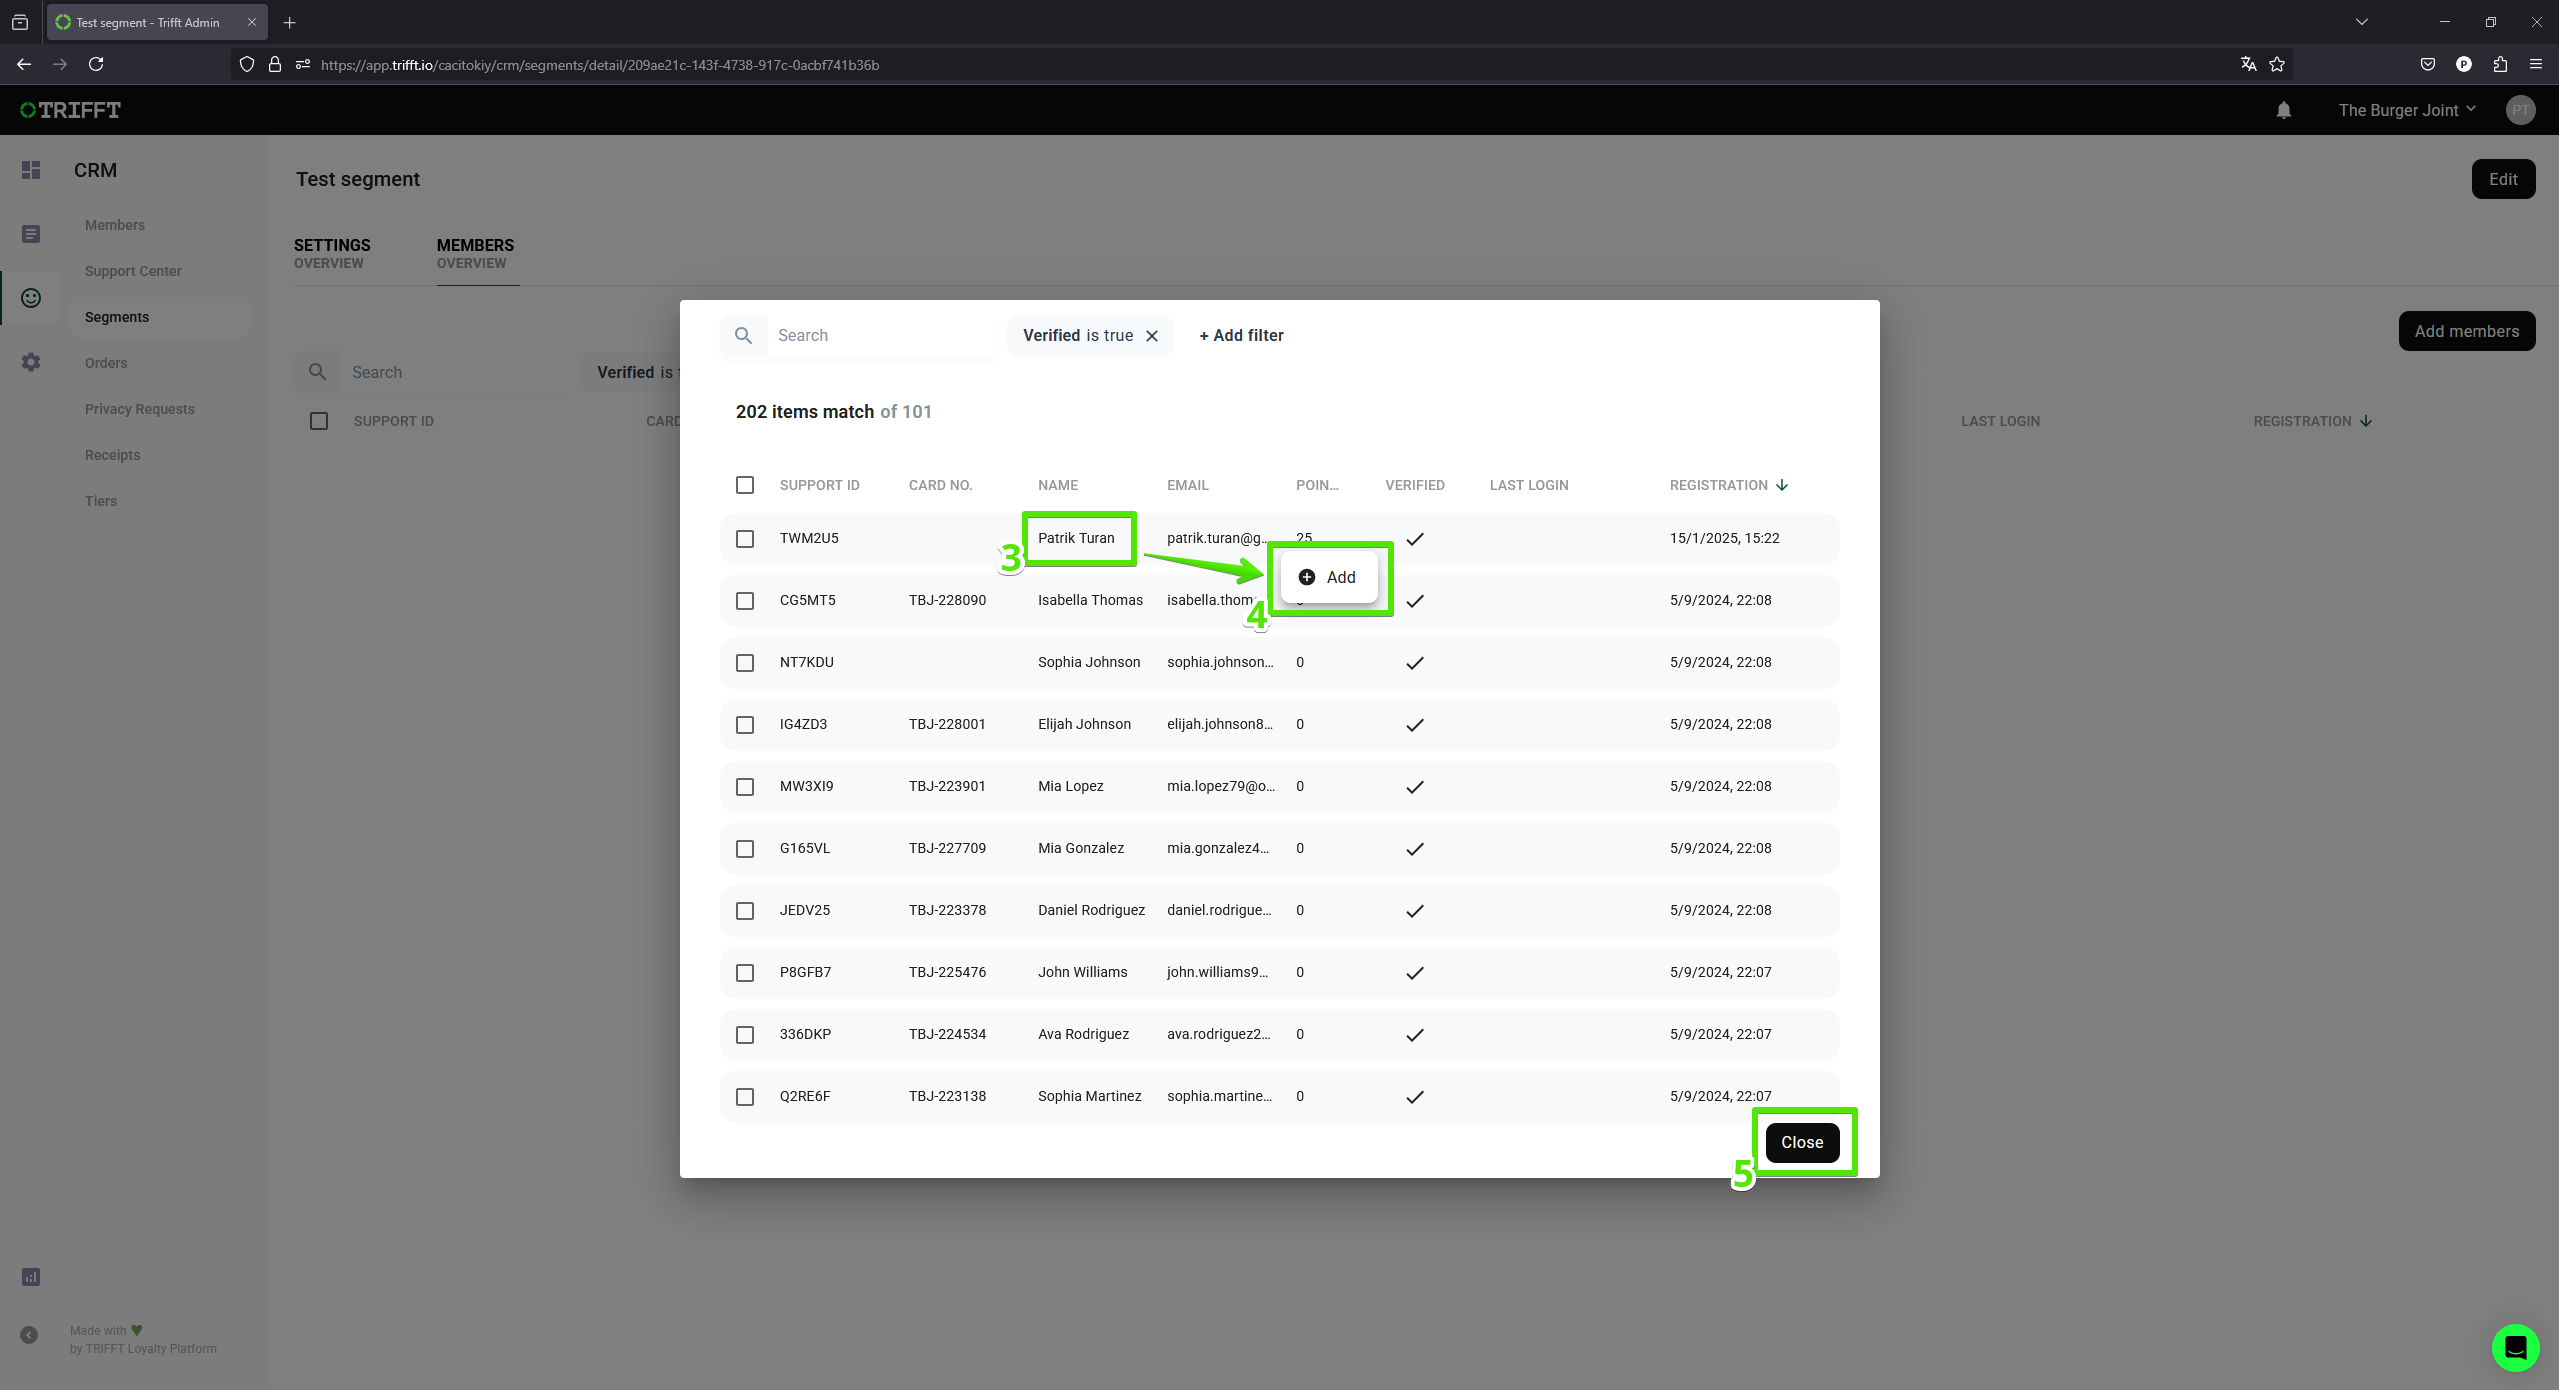
Add members - step 2
Search and Remove a member from Segment
- On the Member Overview tab you can see a list of all members added to your segment and a
total number of members (1)in segment. - You can also use
filter (2)function for searching the members.
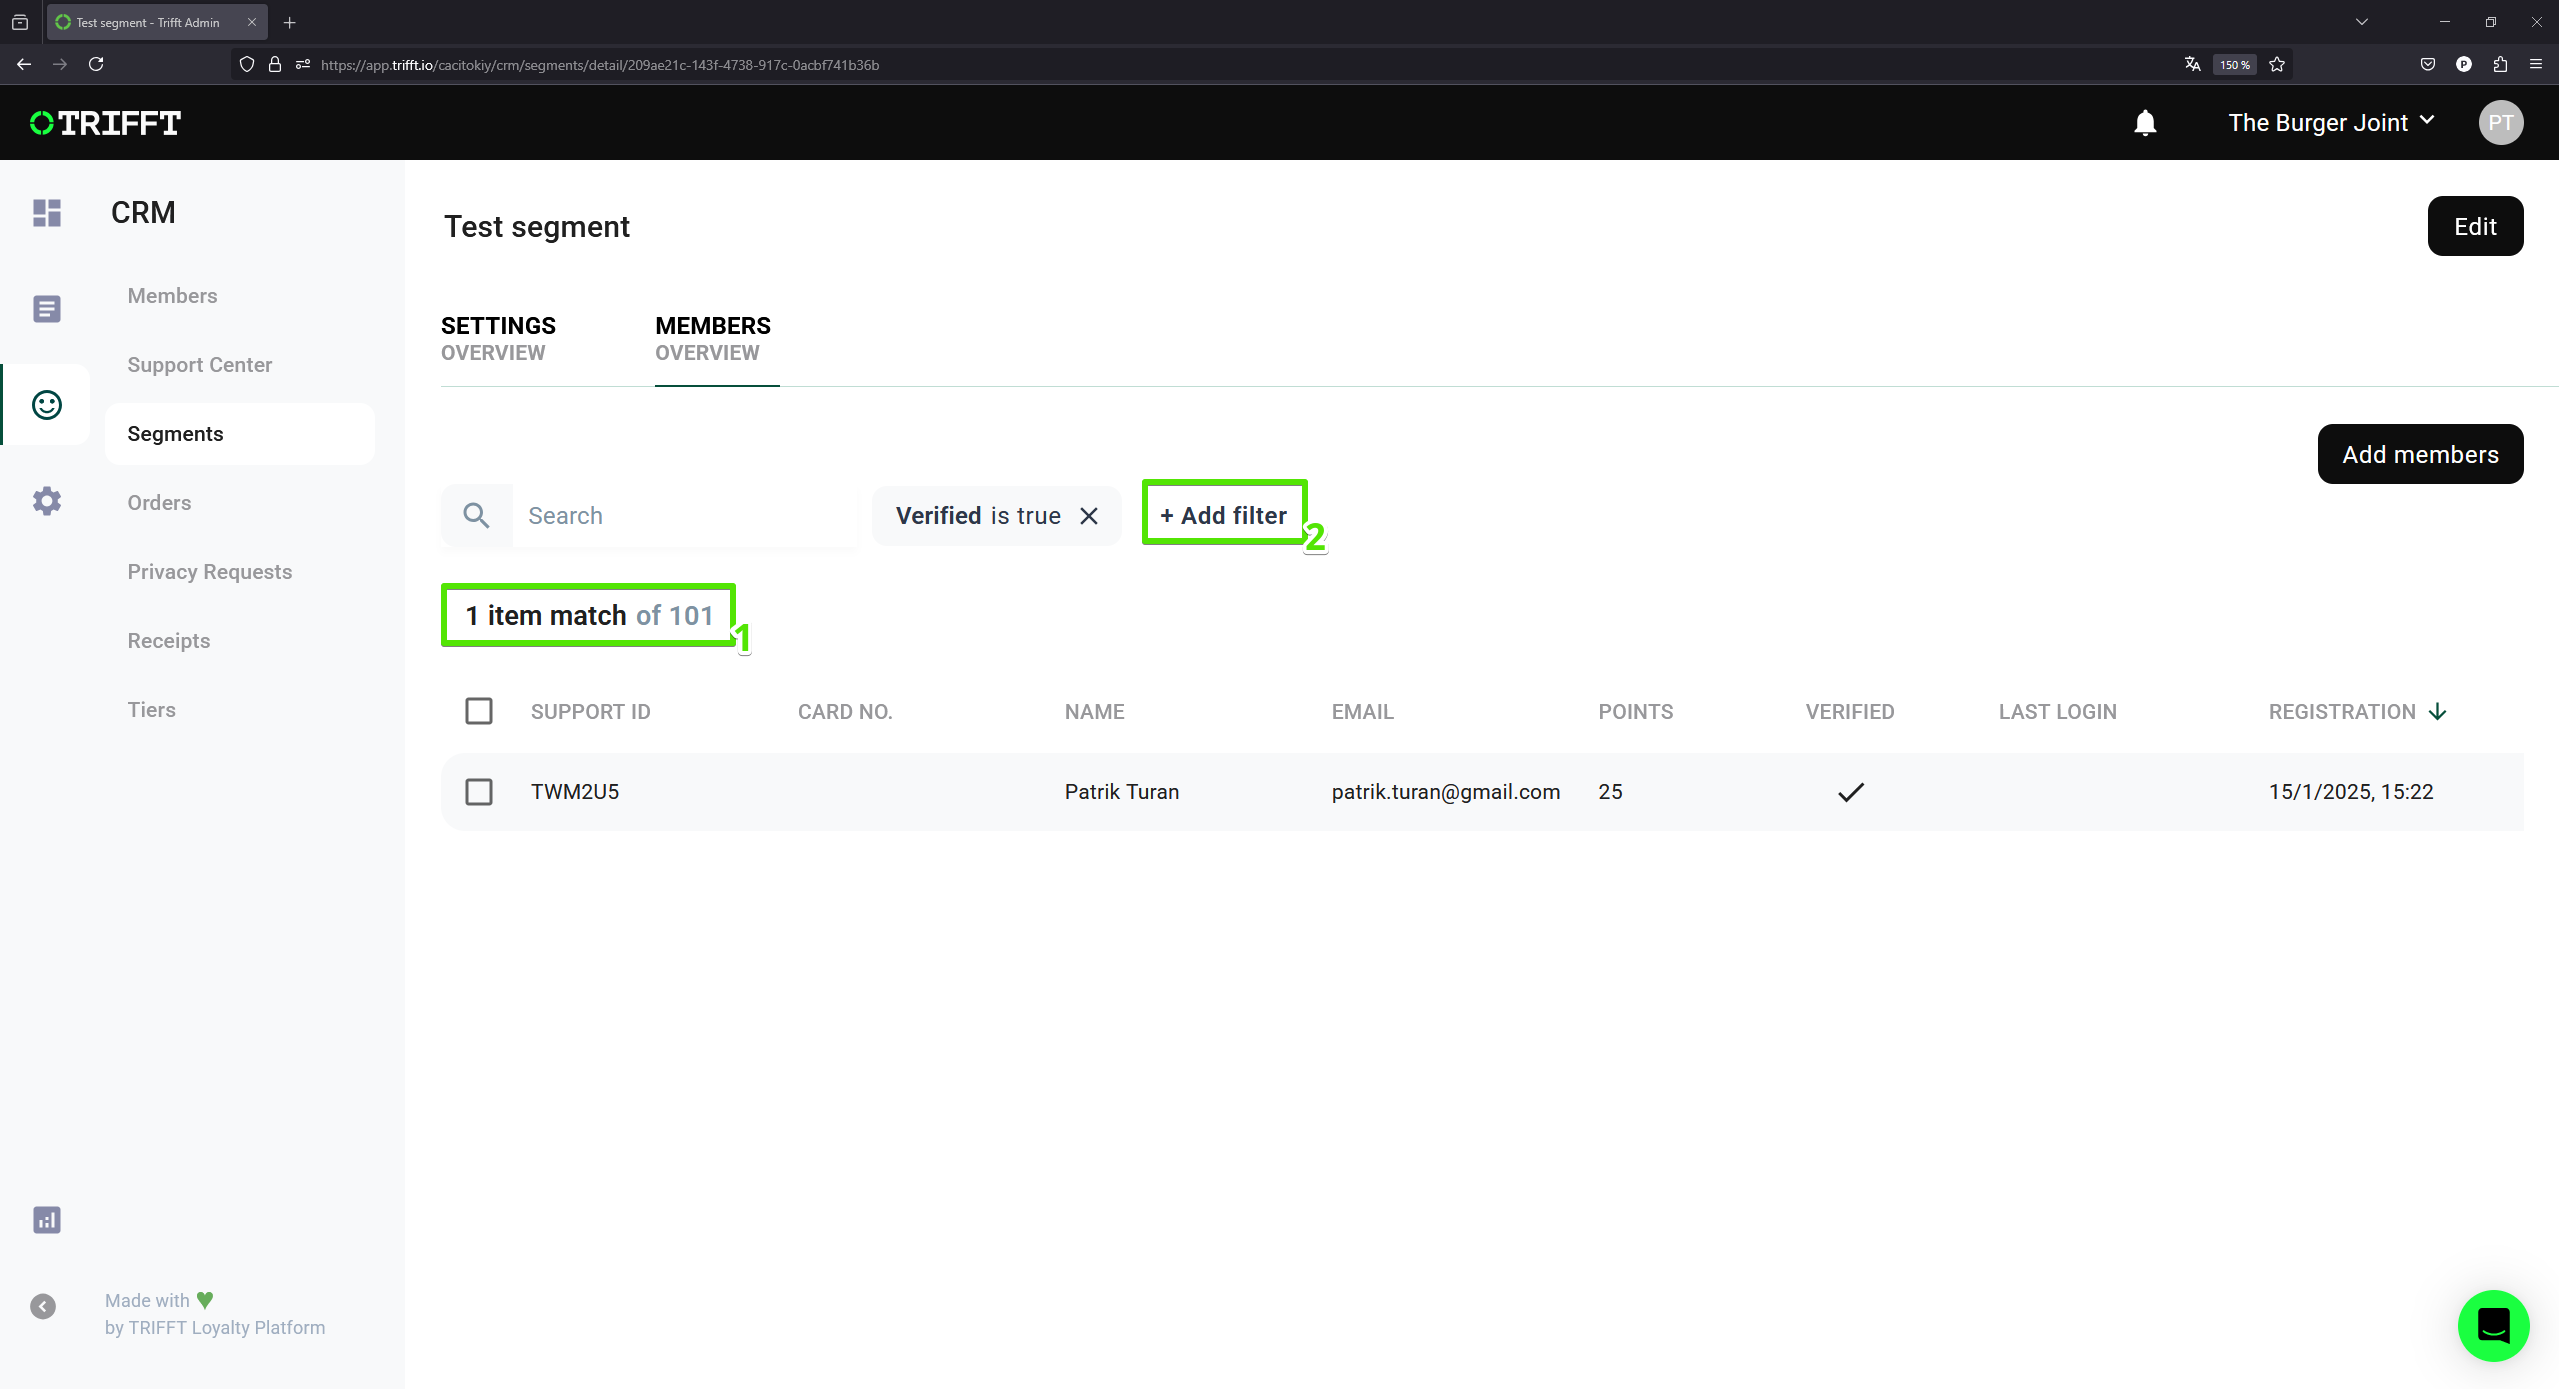
Search a member
- To remove a member from the Segment just find the member, right-click on the
member name (3)and chooseremove (4).
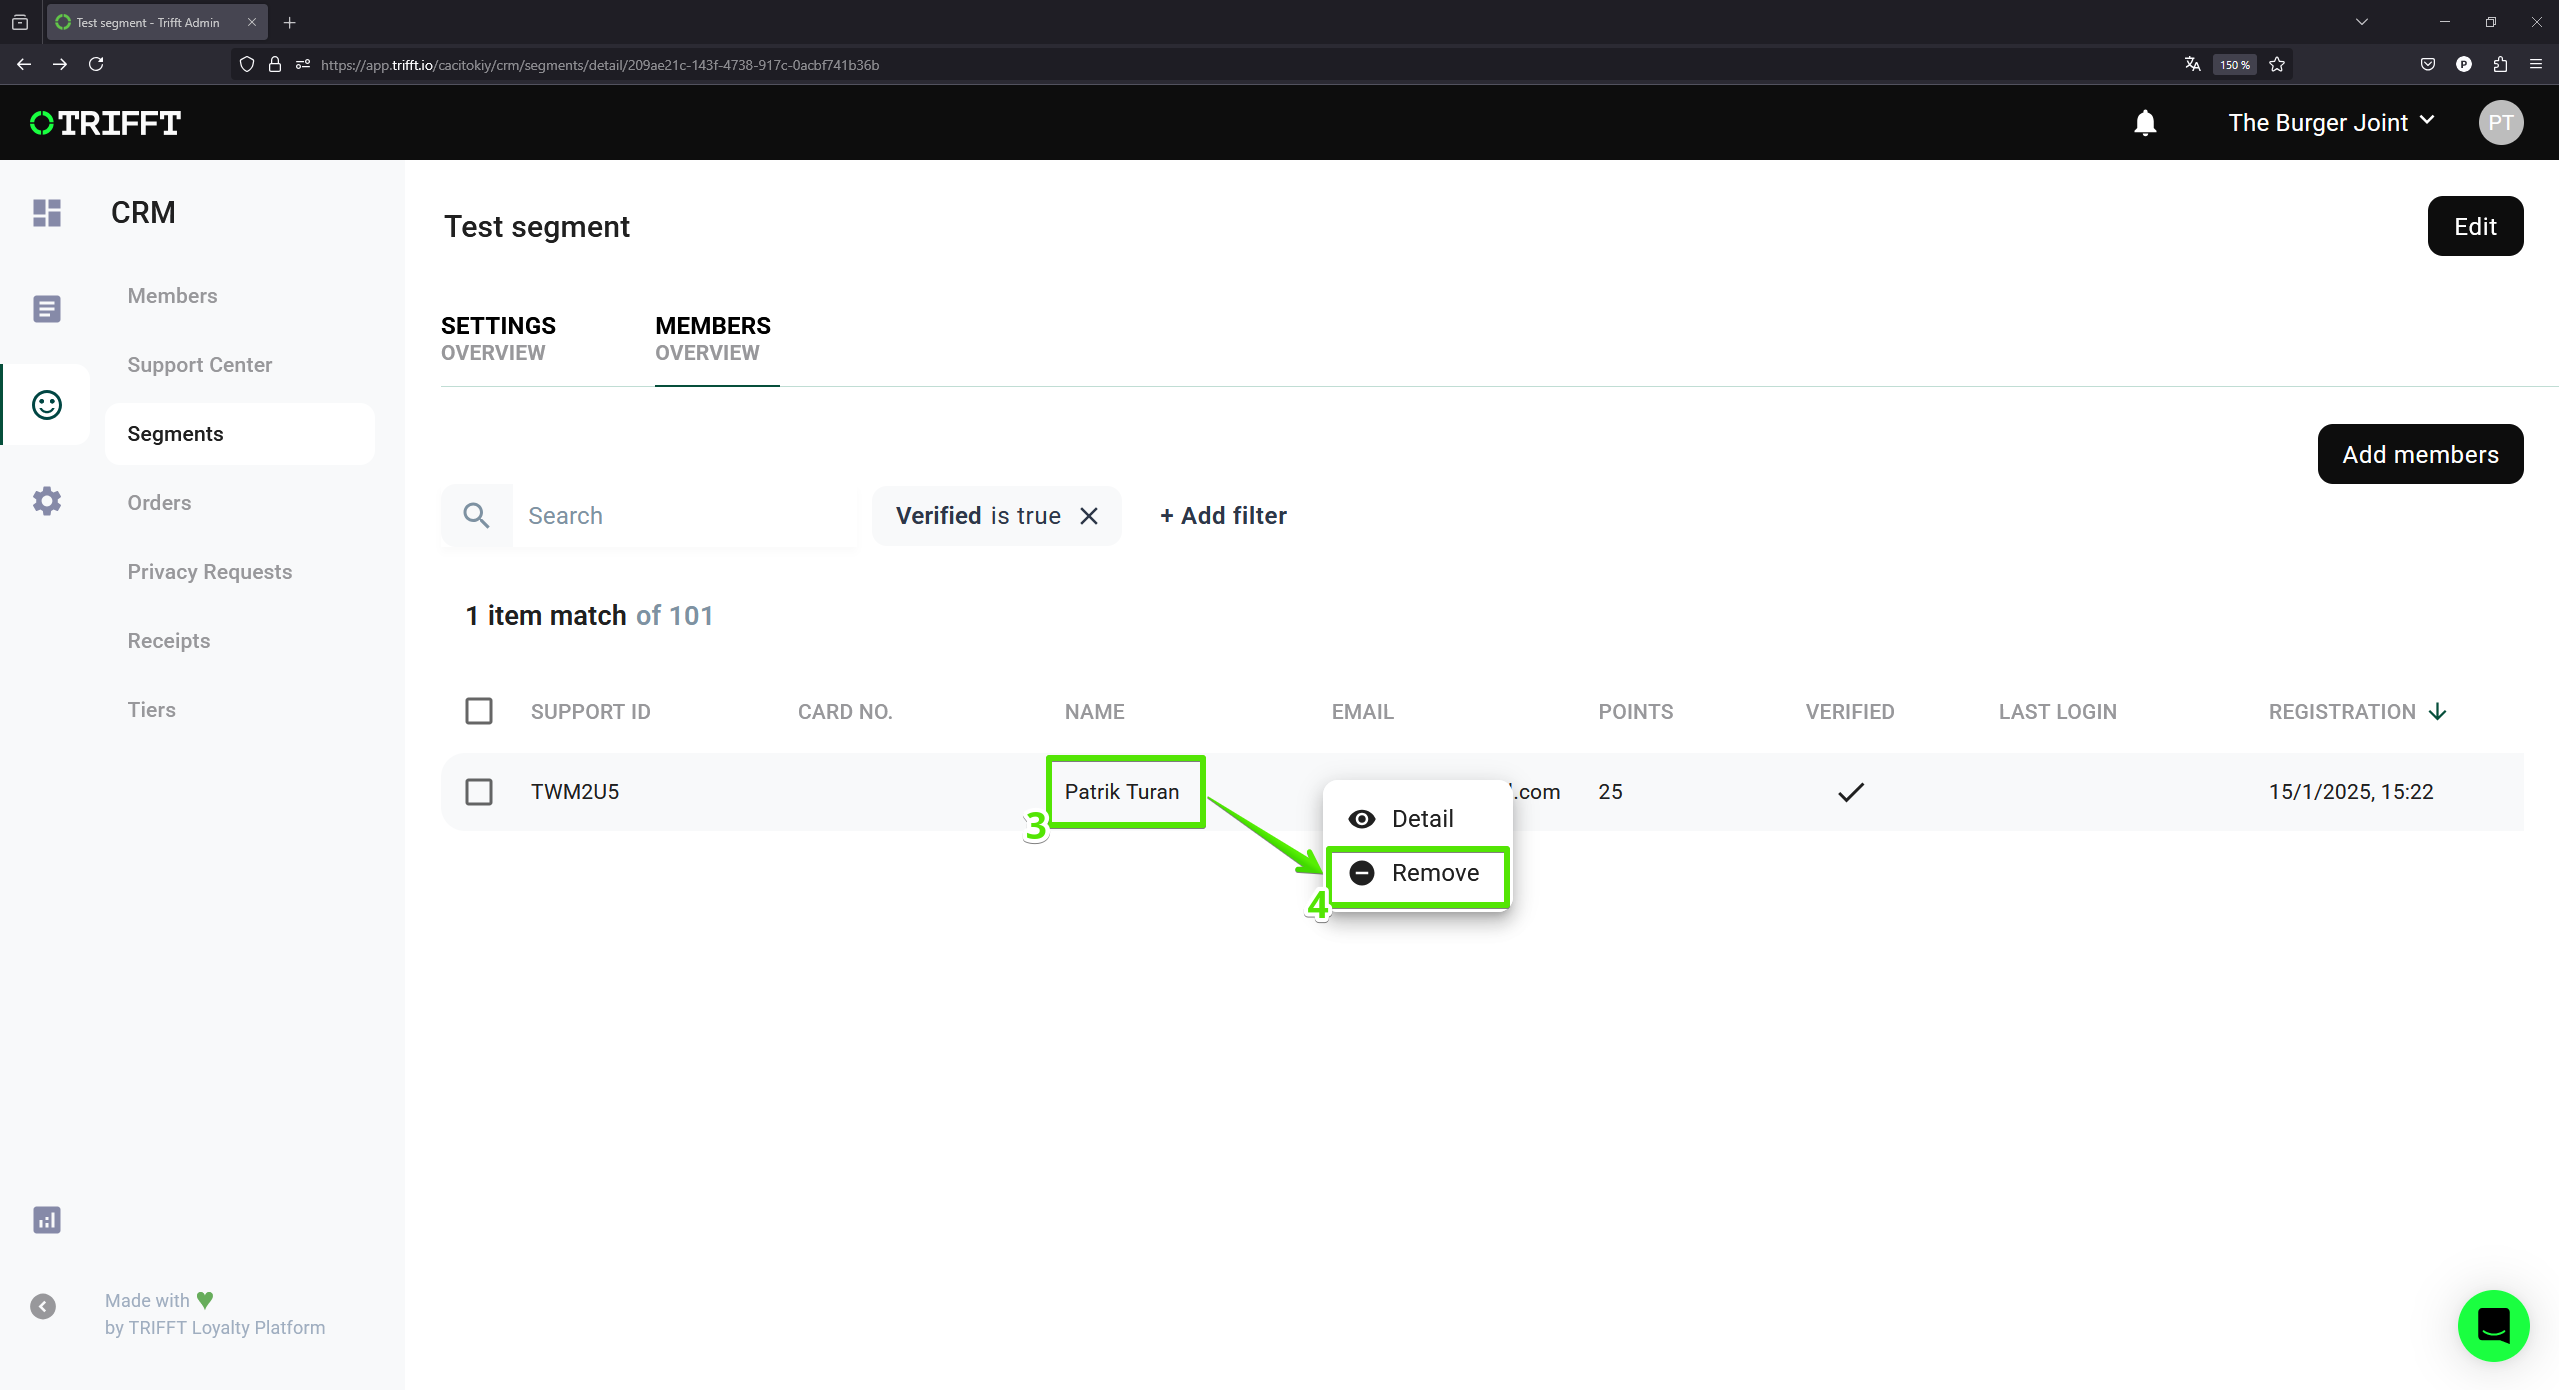
Remove a member
Updated 3 days ago