
Consents
This guide provides an overview of the Consents feature, its purpose, key functionalities, and how to effectively utilize it within the platform.
Having user consents in your app is mandatory under several laws, such as the GDPR in the EU and the DPA in the UK, especially for terms and conditions and data protection. TRIFFT goes beyond these basic requirements by offering additional consent options, such as push/email/SMS notifications. Consents can be categorized as either mandatory or voluntary. Additionally, the app provides flexibility by allowing users to give their consents either during the registration process or later through their profile settings.
What Are Consents?
- Definition: Consents refer to the permissions granted by users, allowing businesses to process their personal data for specified purposes.
- Purpose: The primary aim of managing consents is to uphold user privacy rights, comply with legal requirements, and foster trust through clear and informed consent practices.
Key Features
-
Dynamic Consent Management
- Create and modify consents across all channels directly from the Content Cockpit, ensuring consistency and ease of updates.
-
Version Control and Event Tracking
- Versioning of consents helps you with the tracking of consent history and proving which version each user has agreed to.
-
Automatic Re-Consenting
- Automatically prompt users to re-consent to the latest version when changes are made, ensuring ongoing compliance.
-
Configurable Options
- Designate consents as required or optional based on the organization's needs and regulatory obligations.
- Enable a parameter that forces users to scroll through the entire consent text before allowing them to provide consent, ensuring they have read the content.
- You can also choose from various types of consents and their versions.
Types
There are several different types of consents depending on their purpose.
| Type | Descrpition |
|---|---|
| TC | general terms and conditions |
| DPR | data protection regulations |
| DP | data protection |
| OUT_MARKETING | general marketing communication |
| OUT_SMS | text messaging |
| OUT_EMAIL | email communication |
| CUSTOM | all other project-specific consents |
Versions
TRIFFT offers users two different versions of consent options.
- Simple Consent is designed for straightforward consent collection, primarily used for cases where a long description is not required. Since it is not possible to provide additional details, this type of consent is ideal for situations like age verification or permissions for marketing communication via email, etc.
- Complex Consent is used when detailed information about specific consent is necessary. It is suitable for cases such as data protection agreements or terms and conditions, where longer and more comprehensive consents are required.
Example Use Case
Scenario:
The company requires the customer to sign mandatory consents during registration while also giving them the option to subscribe to regular newsletters via email.
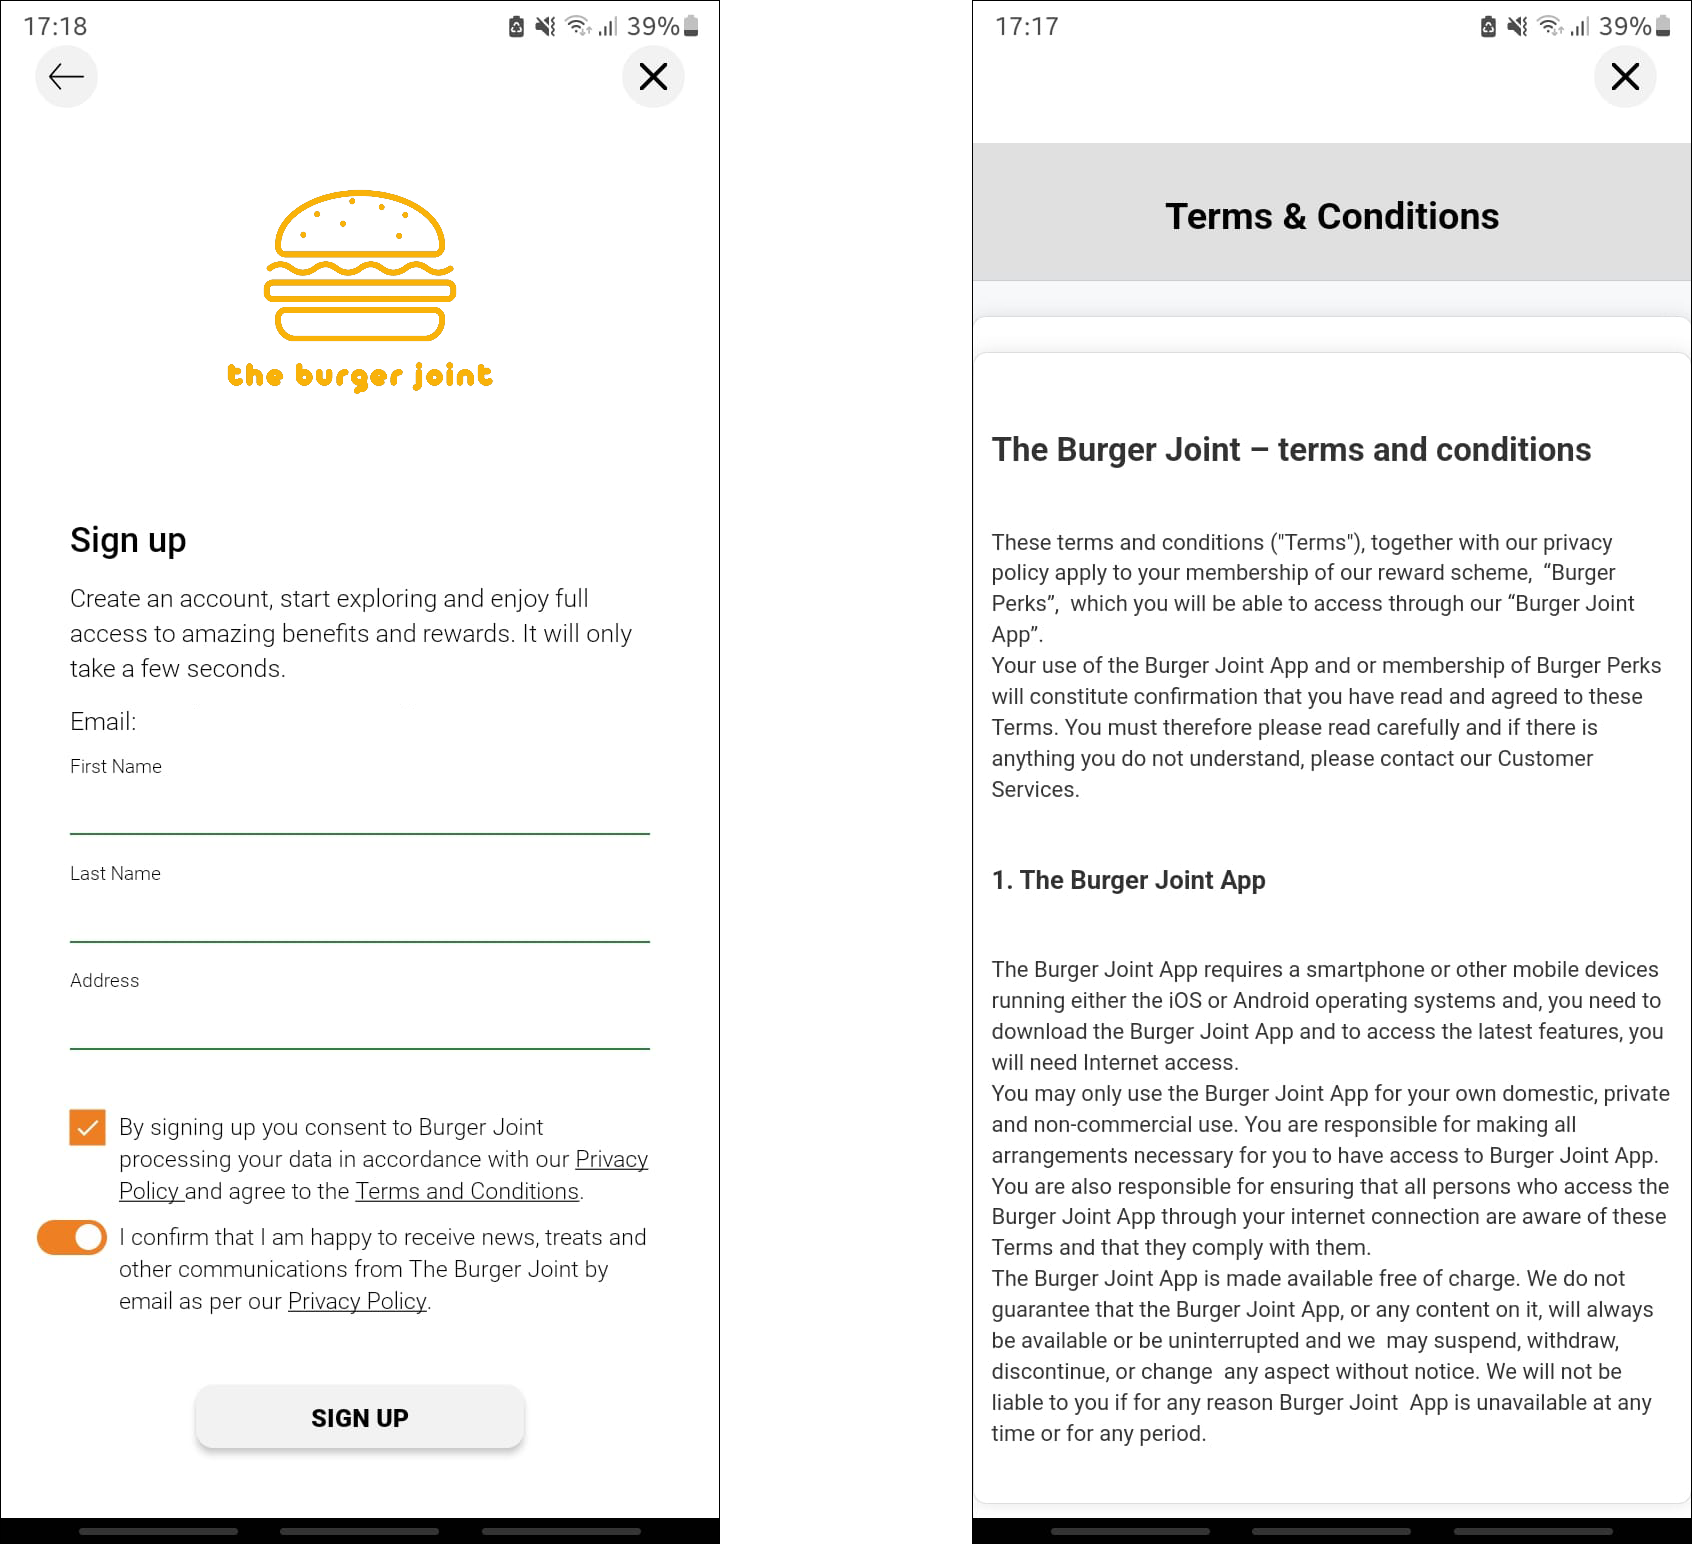
Preview of Consents signing during the registration and detail of Terms and Conditions.
Updated 3 days ago