
Creating a consent
This guide will help you learn how to create and customize consent settings effectively.
Create a new Consent
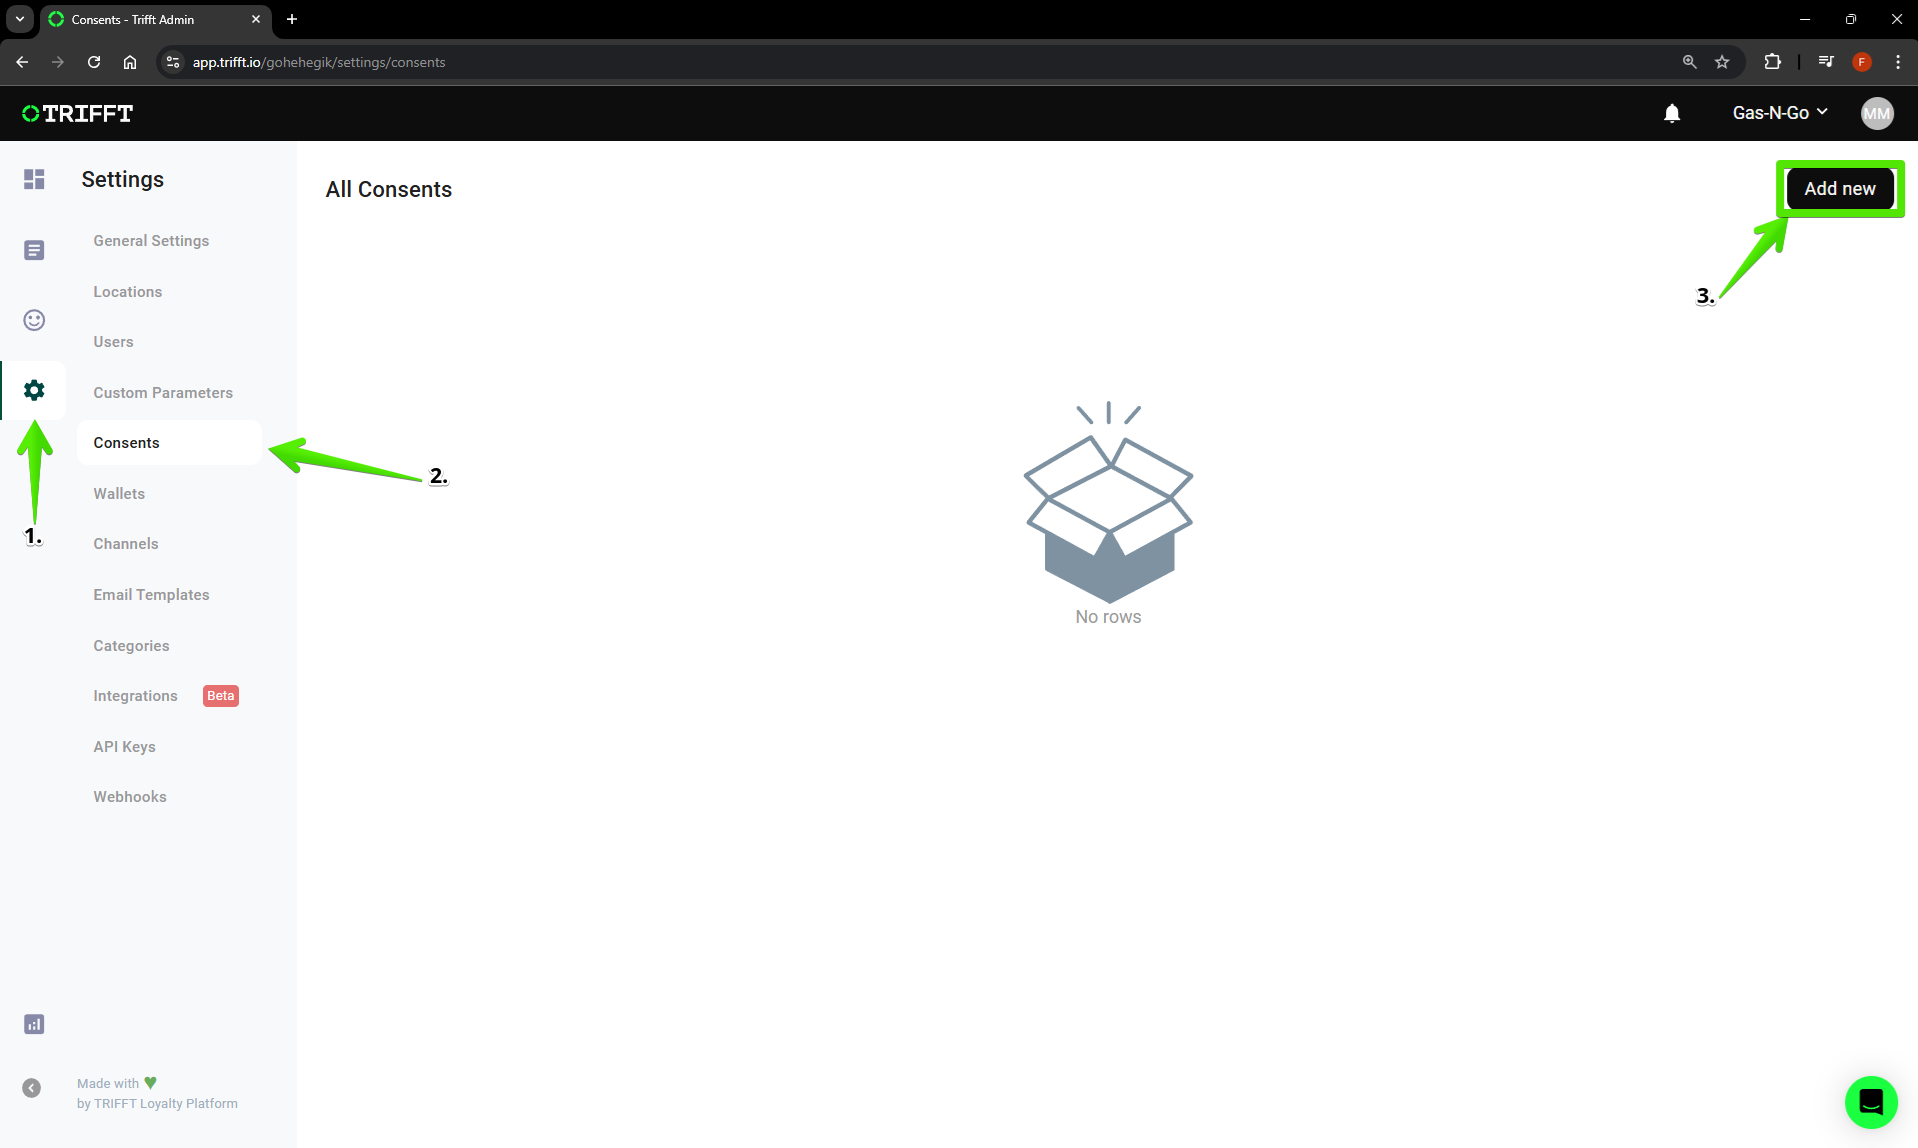
- Navigate to the
Settings (1)and selectConsents (2). - You will see a list of all Consents saved in your project.
- To create a new Consent, click the
Add New (3)button located in the top-right corner of the page.
Setup the basics
- Provide a
title (1)for the Consent. - Choose one of the
types (2). Types of consents are explained in the previous article. - Setup other optional functions:
Function | Description |
|---|---|
Required | If consent is mandatory user can´t register without ticking the checkbox If consent is not mandatory user can proceed the registration without sliding the bar |
Registration placement | This consent will be asked upon registration. |
Settings placement | This consent can be seen in settings as well and customer can change the approval later. |

Setup the basics
Setup the version
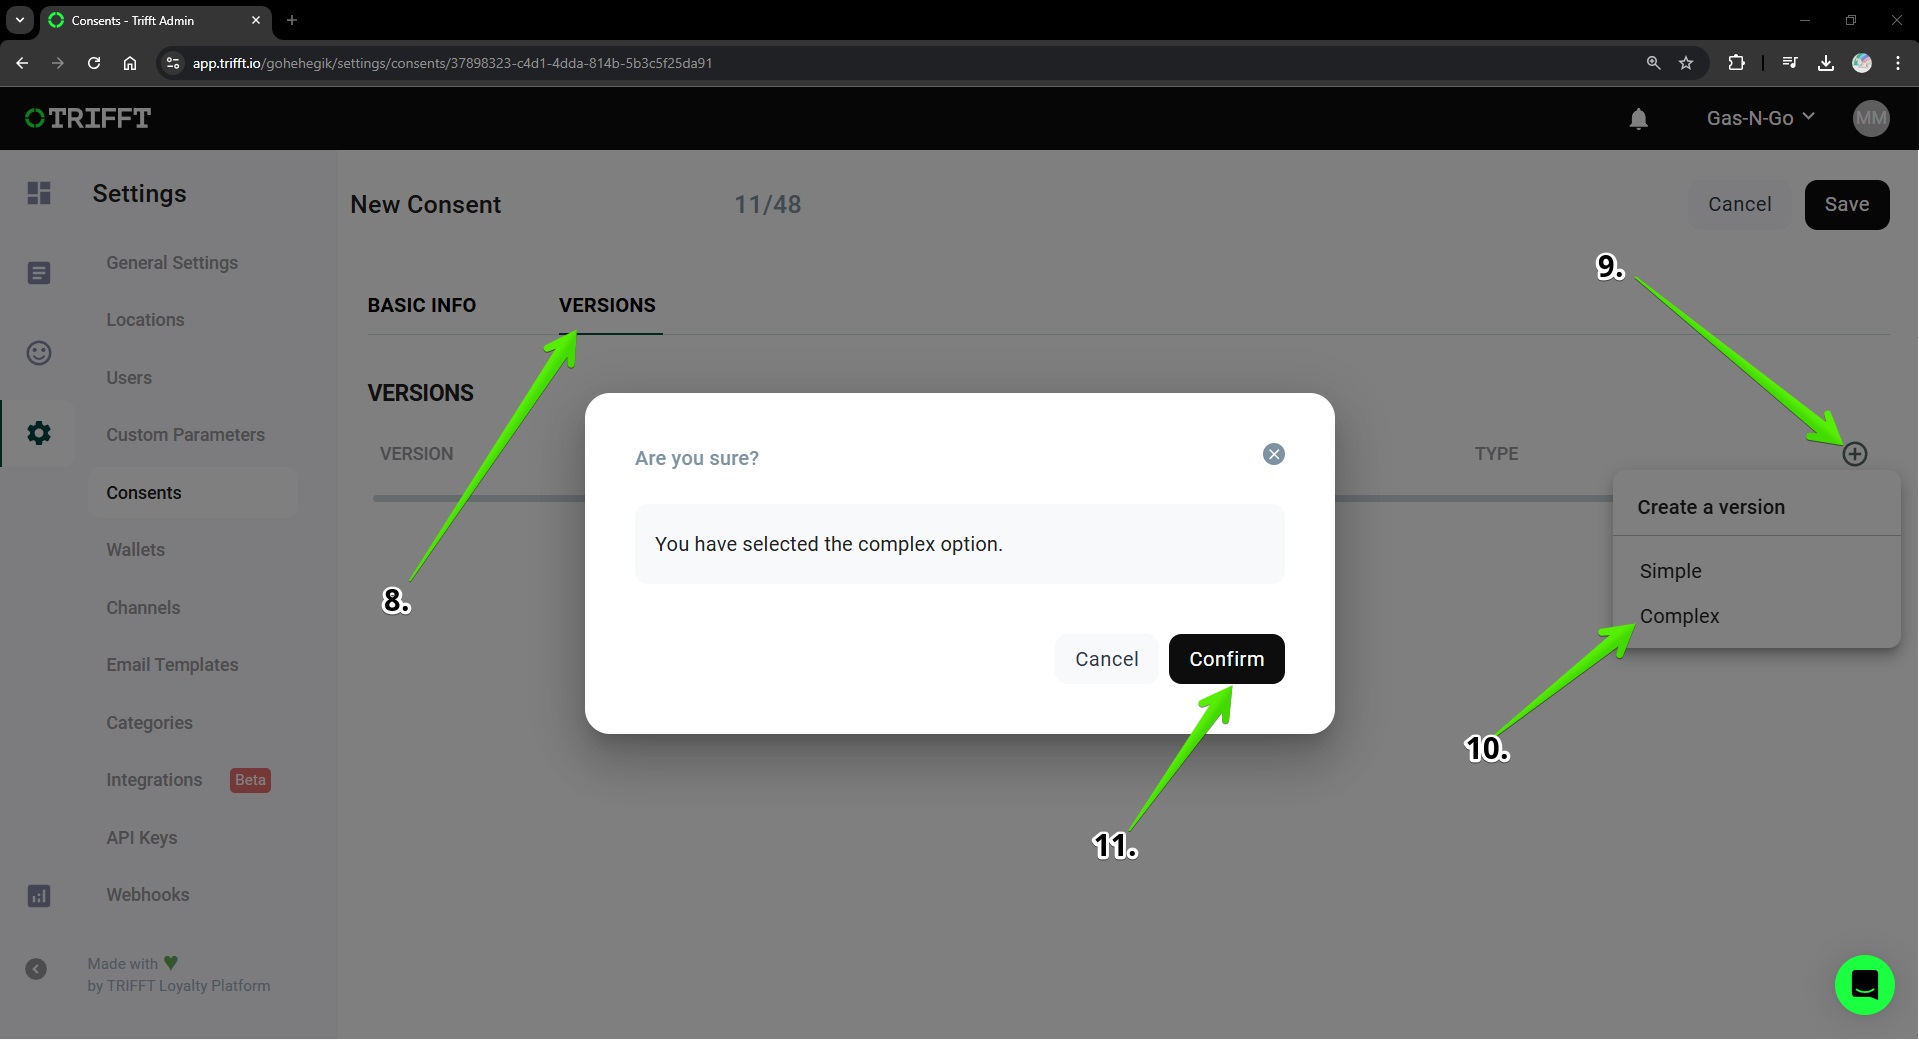
- Once the basics are set up, click on the
Versions (1)tab and choose what version of consent you are about to create. - Click on the
plus symbol (2), choosesimple or complex (3)andconfirm (4)your choice.
Setup the version
Would you like to change already existing consents?Navigate to this screen where you can find the list of all versions and just create their new version.
Creating a Simple consent
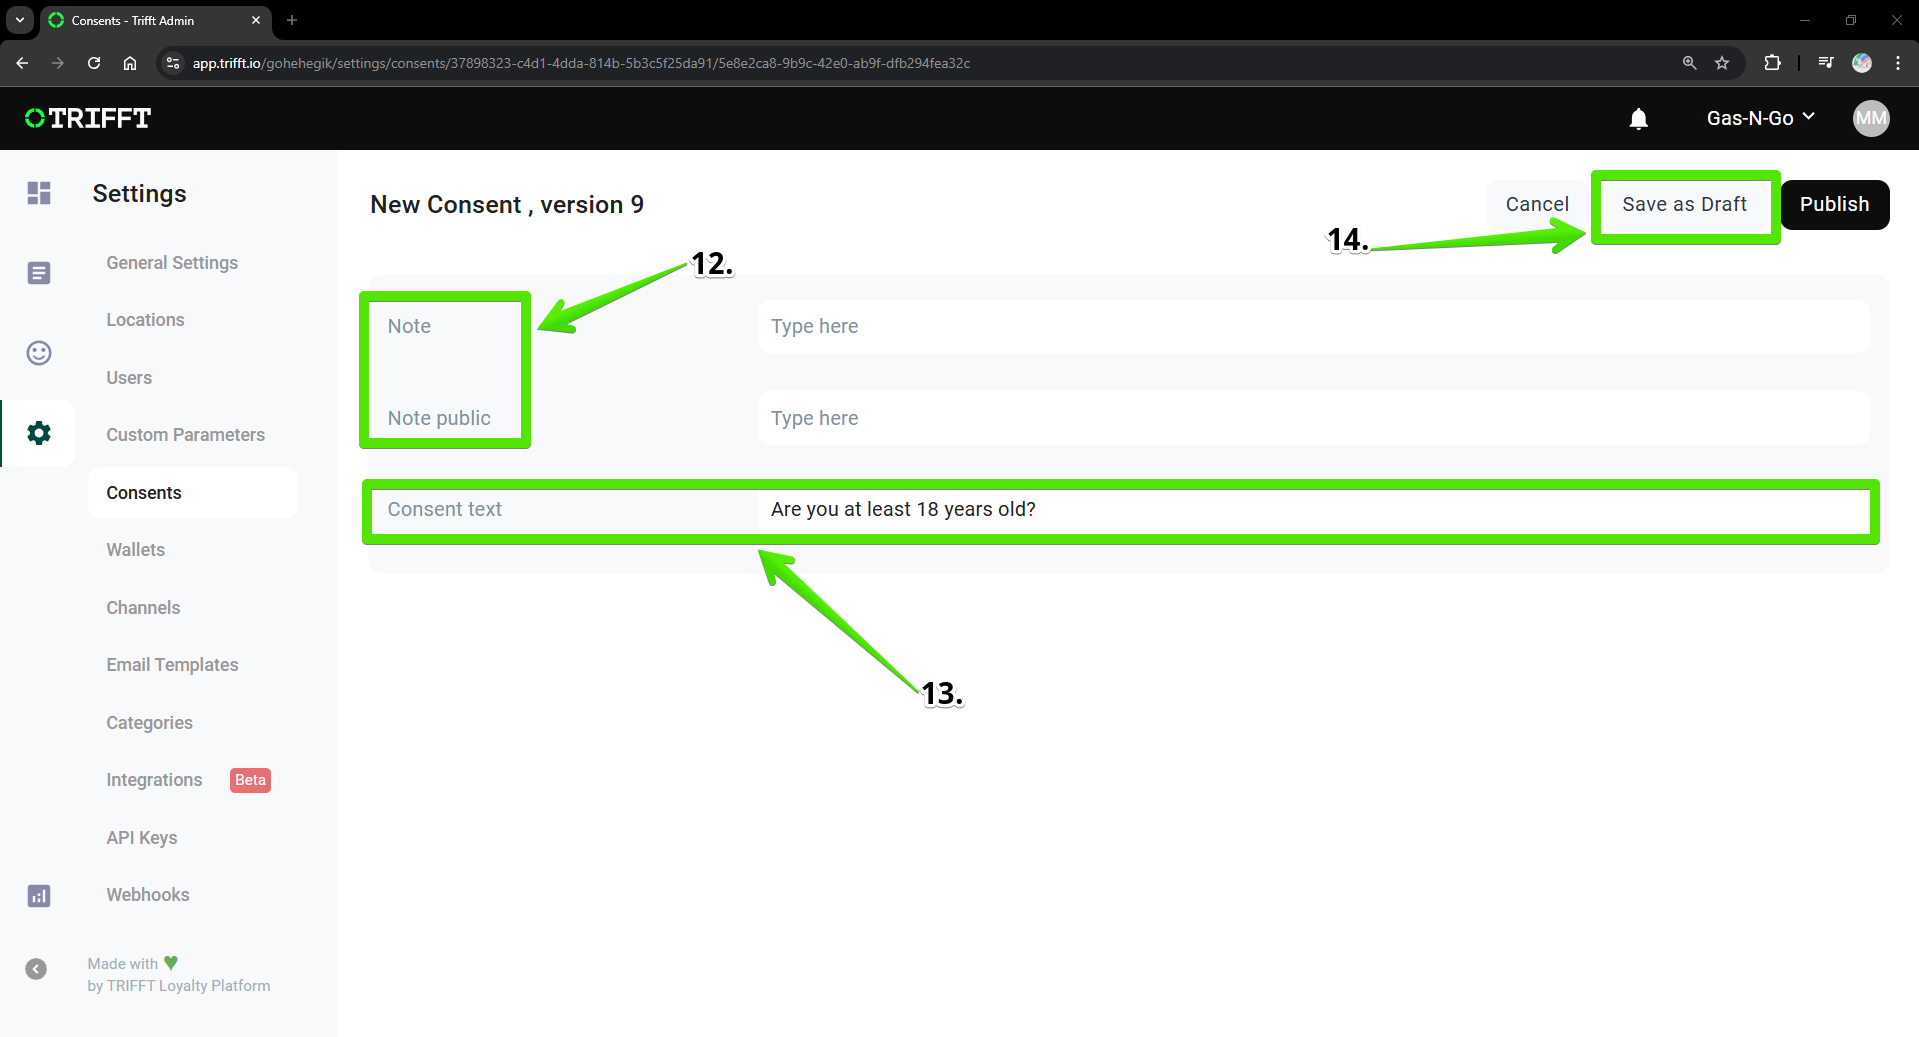
- Fill the
Note (1)which will help you identify the consent in the future andNote public (2)which will be visible for customer. - Both Note and Note Public can remain empty. Note Public is used to notify users about a new version of the consent. If Note Public is empty, the consent text will be displayed as the notification instead.
- Fill the
text of your consent (3)which will appear in the app. - Confirm the settings with the
Save as Draft (4)button in the top right corner.
Creating a Simple consent
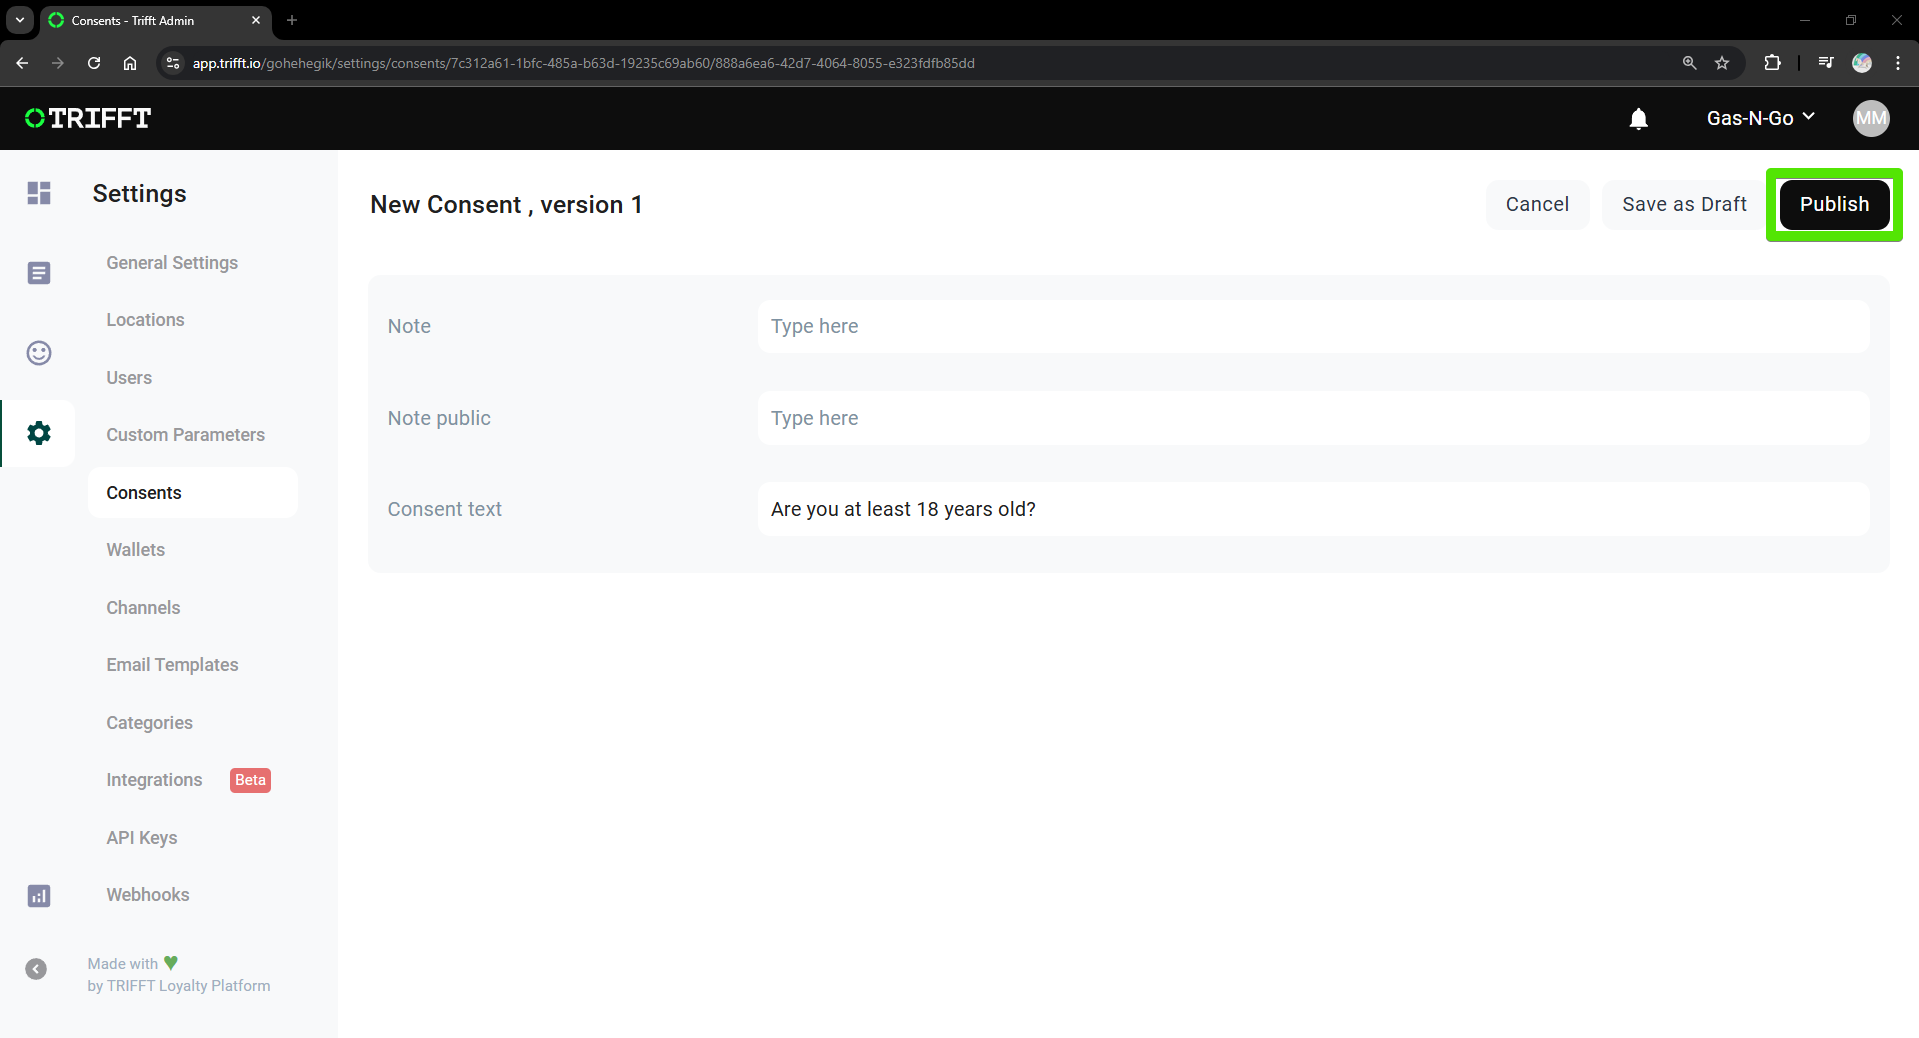
- Once the version is created and saved as a draft, it´s time to publish it.
- Click on the
Publish (5)button in the top right corner to make the consent visible in the app.
Publishing the Simple consent
Creating complex consent version
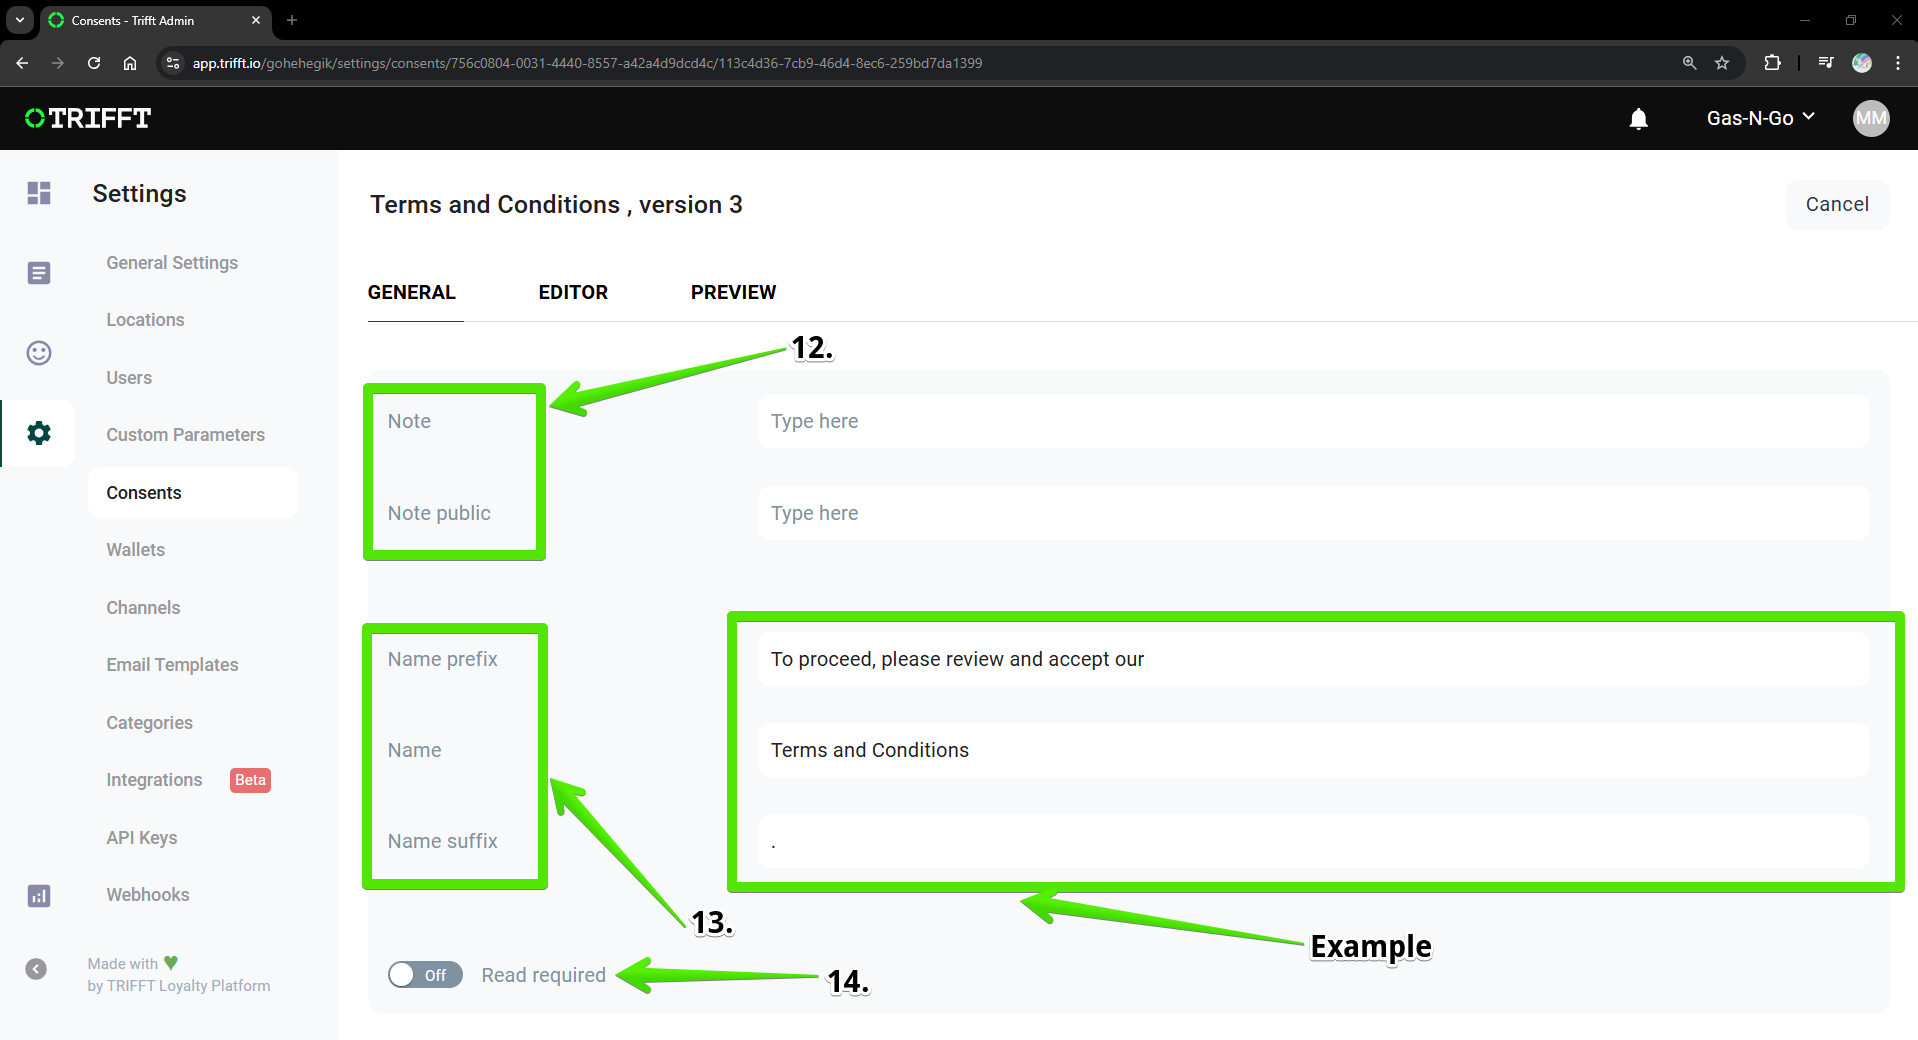
- Fill the
Note (1)which will help you identify the consent in the future andNote public (2)which will be visible for customer. - Both Note and Note Public can remain empty. Note Public is used to notify users about a new version of the consent. If Note Public is empty, the consent text will be displayed as the notification instead.
- Setup the proper
naming (3)of the consent:
| Name | Description |
|---|---|
| Name prefix | Text before consent link (incl. spaces) |
| Name | Consent hyperlink to see consent detail |
| Name suffix | Text after Consent link (incl. spaces) |
- Select the
Read required (4)checkbox if you require users to open and view the full consent before it can be accepted.
Creating a Complex consent
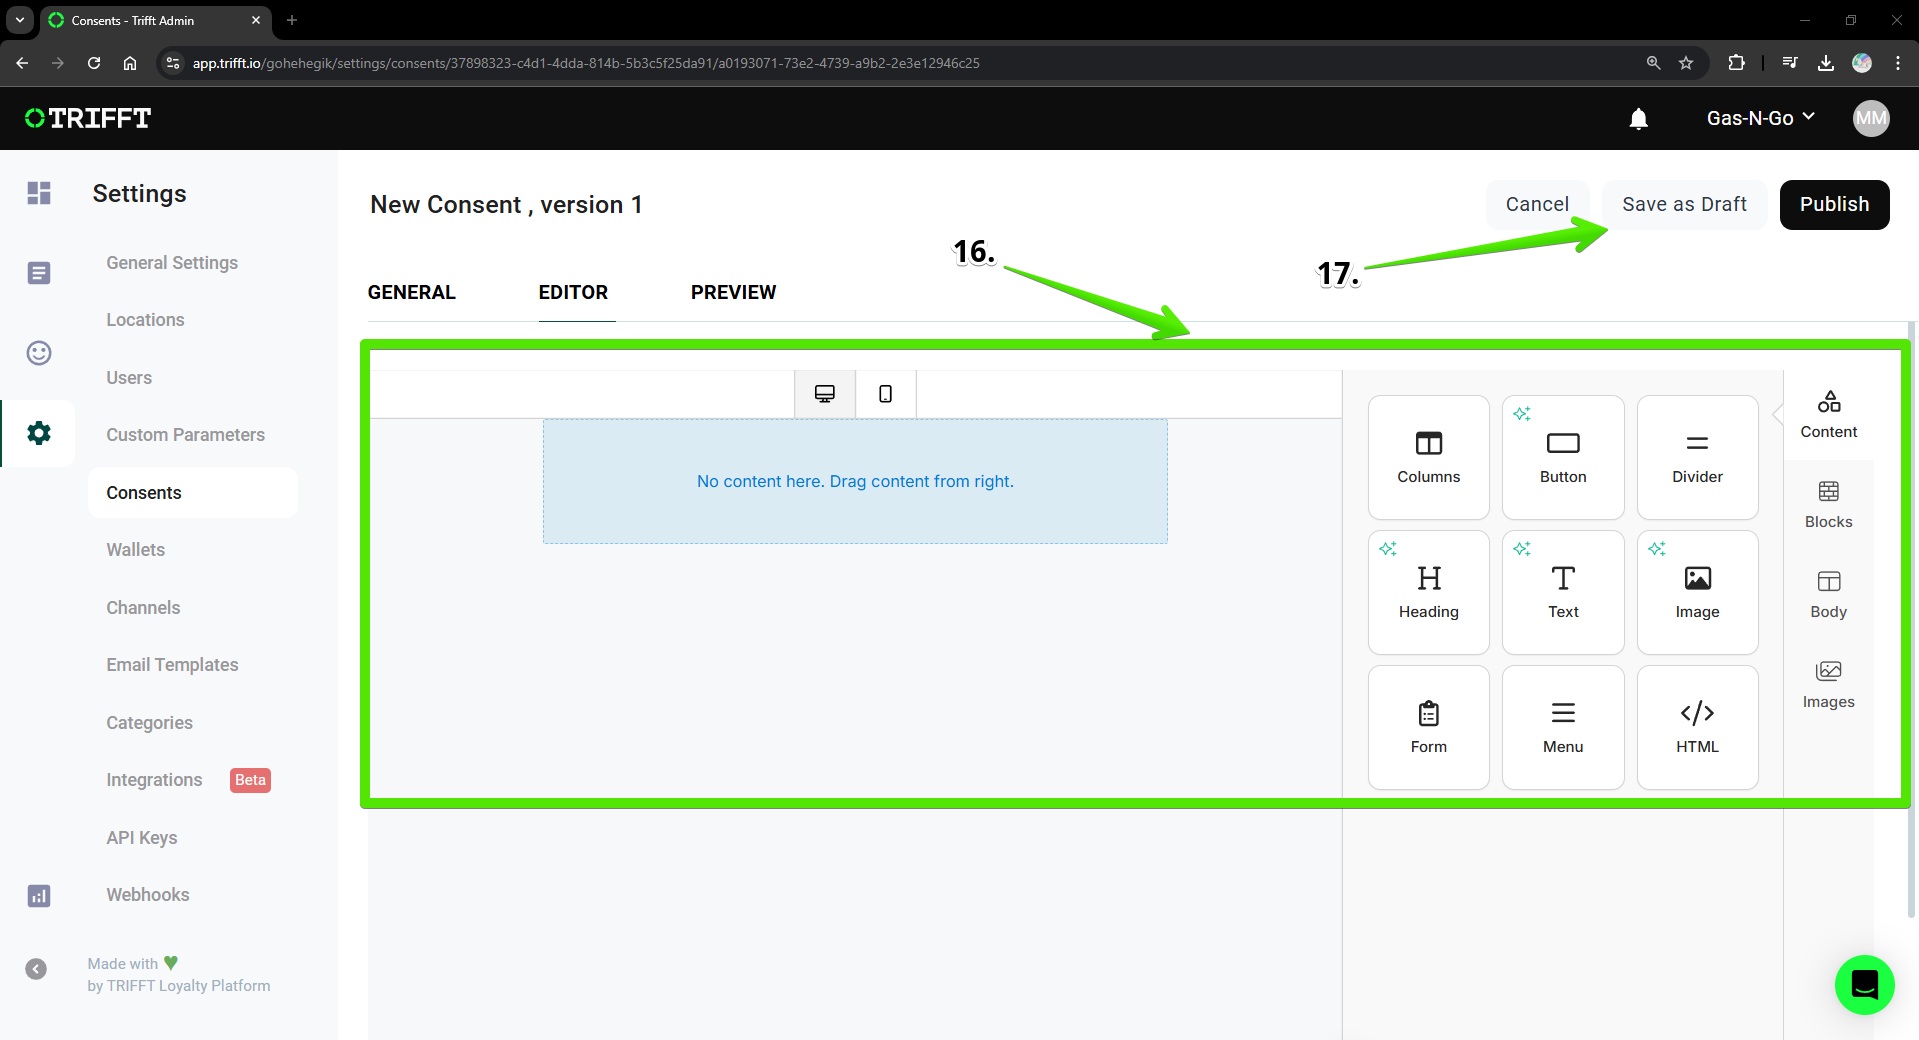
- Once the general settings are set up, click on the
Editor (1)tab. - Prepare the
body (2)of your consent that the user can agree to. You can use formating tools, images, buttons, etc. You can also usePreview (3)tab to show the final output that will be visible to customer. - Once your consents are ready, click on the button
Save as Draft (4)in the top right corner.
Prepare the body of your consent
- You just created a new version of your consent. Now it´s time to publish it to make it visible in the app.
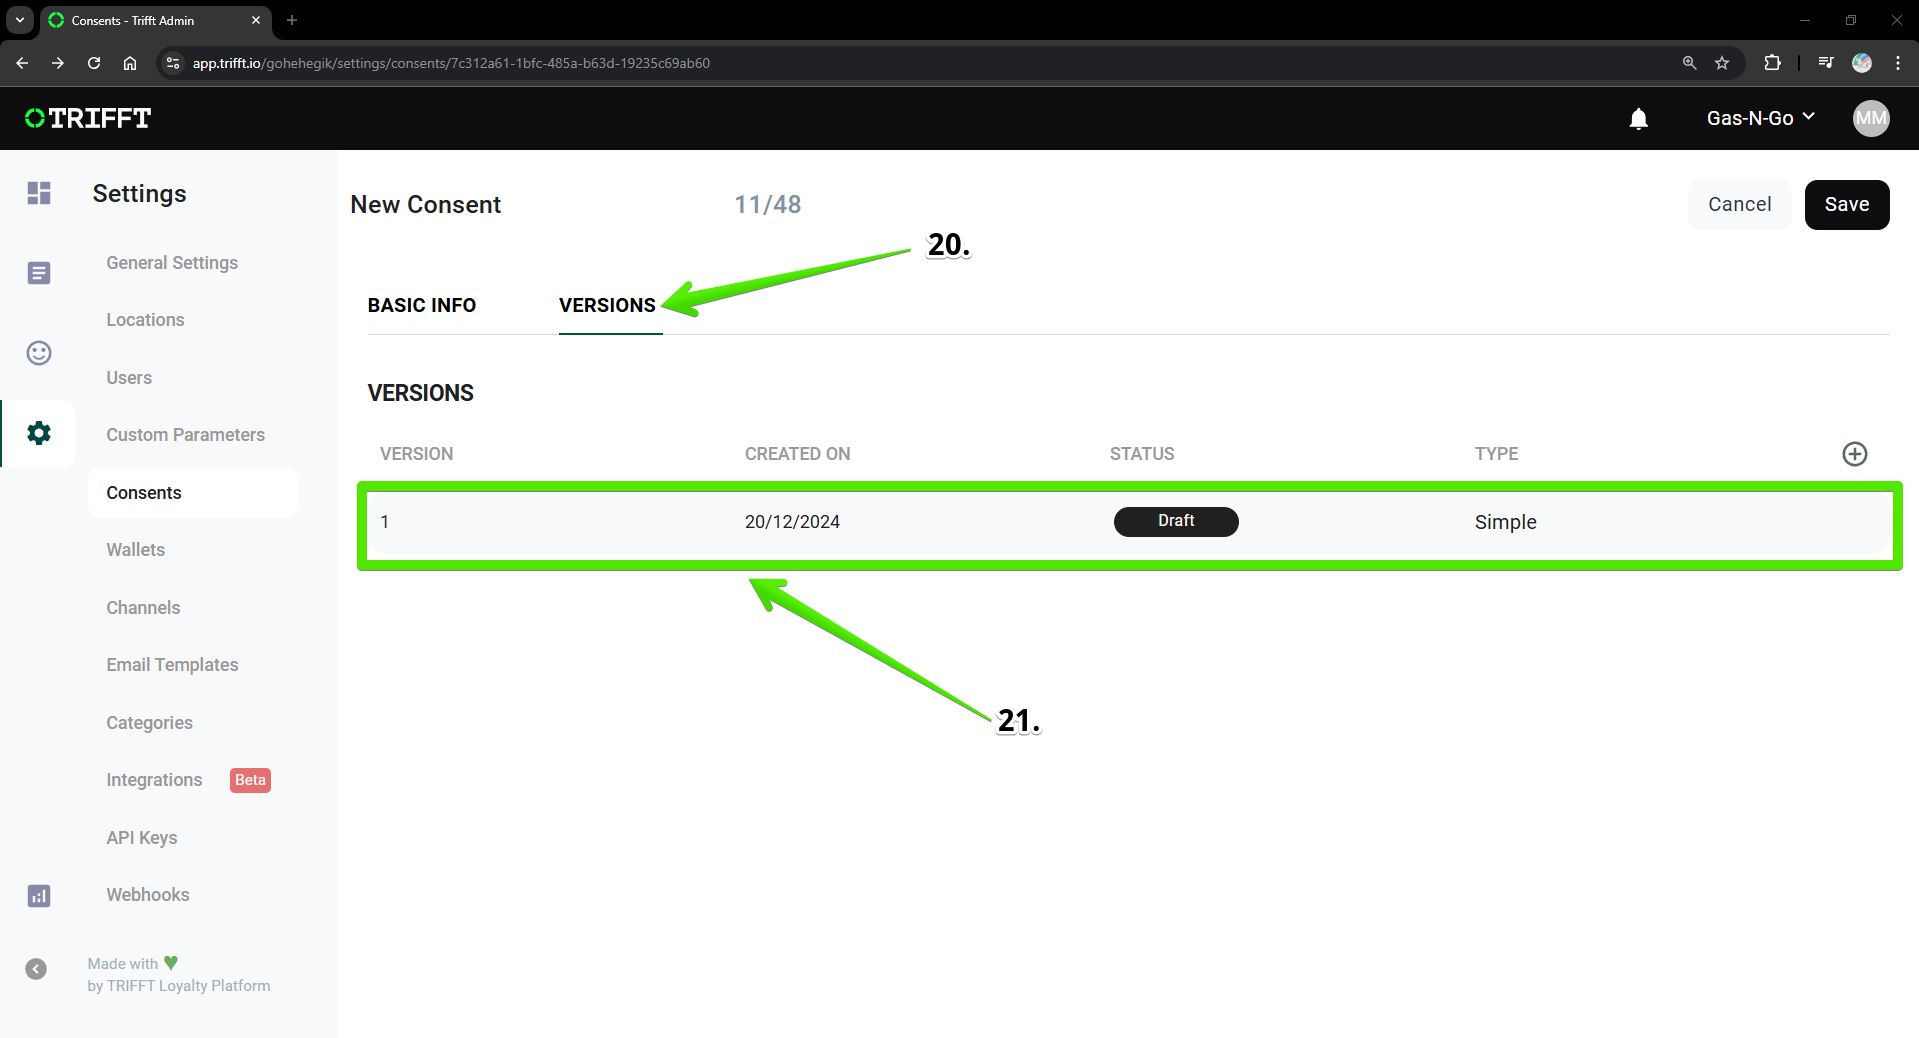
- Click on the
Versions (1)and choose theversion (2)you just created by clicking on it.
Publishing the consent - step 1/2
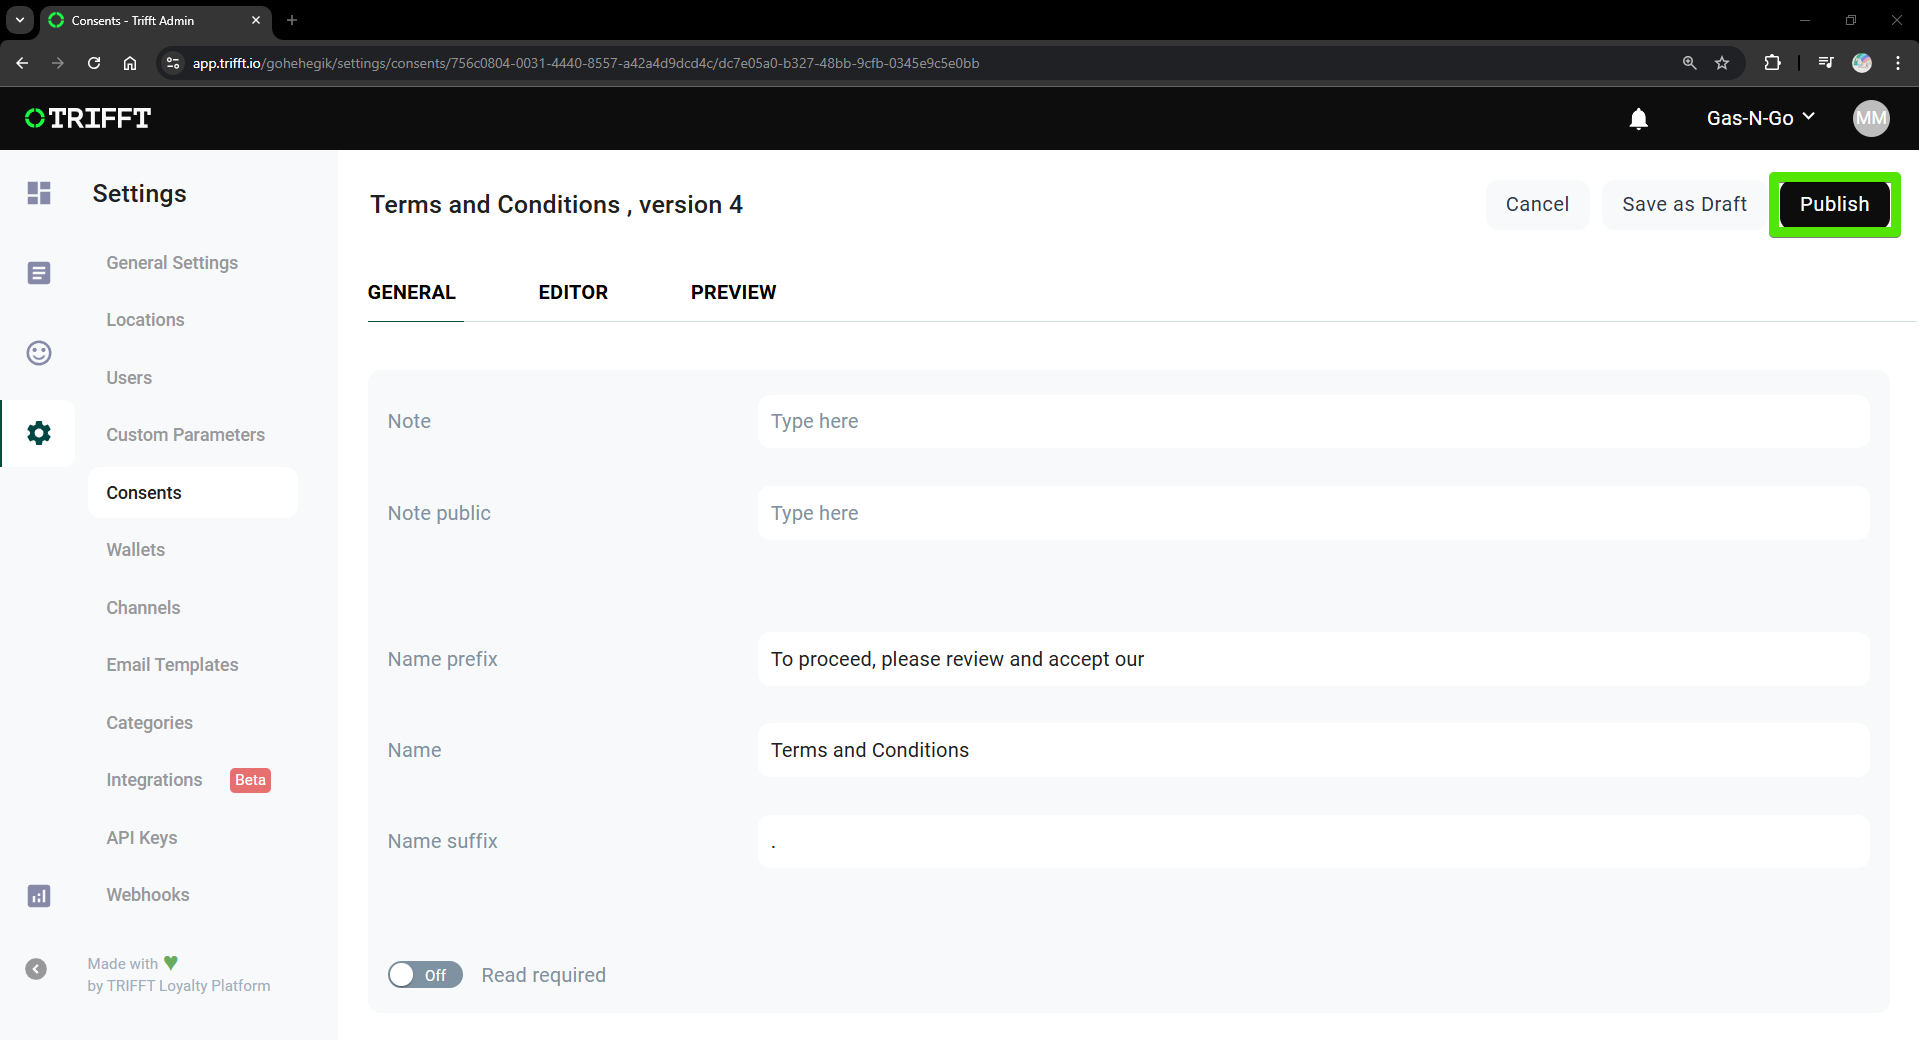
- Publish your consents by clicking on
Publish (1)button in the top right corner.
Publishing the consent - step 2/2
Once the consent is published, the naming can only be changed by creating a new version.
Updated 14 days ago