Creating Leaflet
This guide provides step-by-step instructions for creating and configuring Leaflets in the system.
Create a new Leaflet
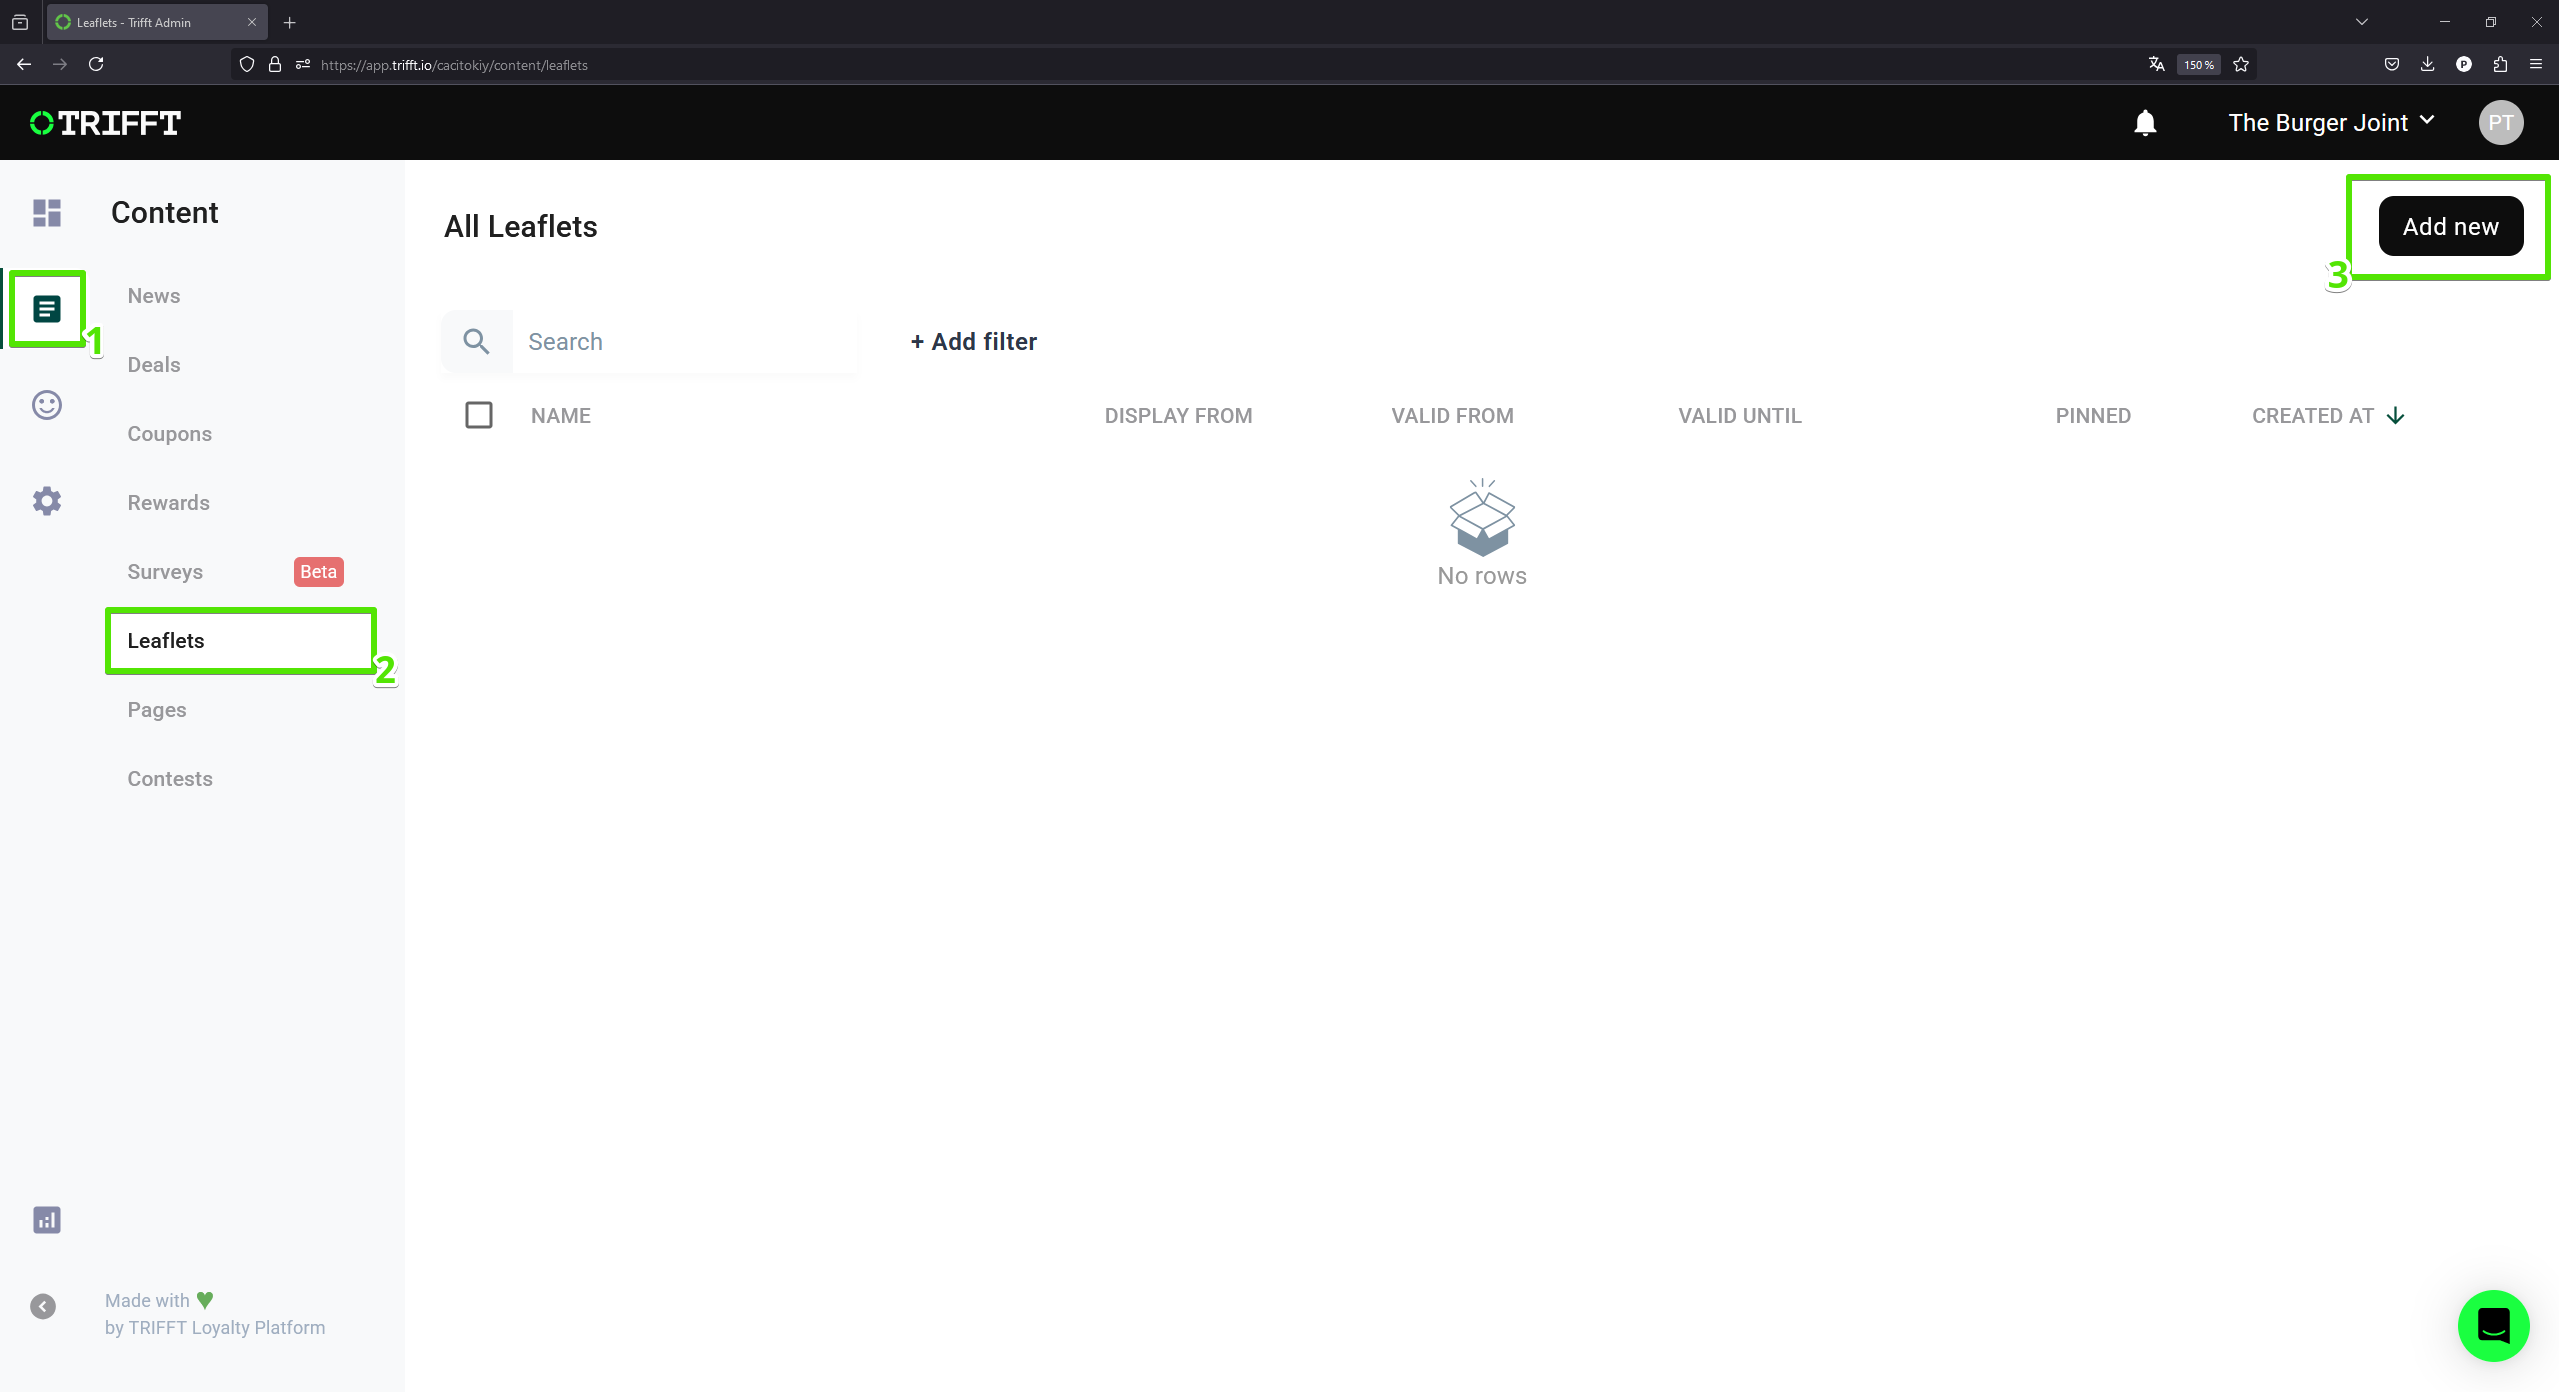
- Navigate to the
Content (1)and selectLeaflets (2). - You will see a list of all Leaflets saved in your project.
- To create a new Leaflet, click the
Add New (3)button located in the top-right corner of the page.

Create a new Leaflet
Basic information
-
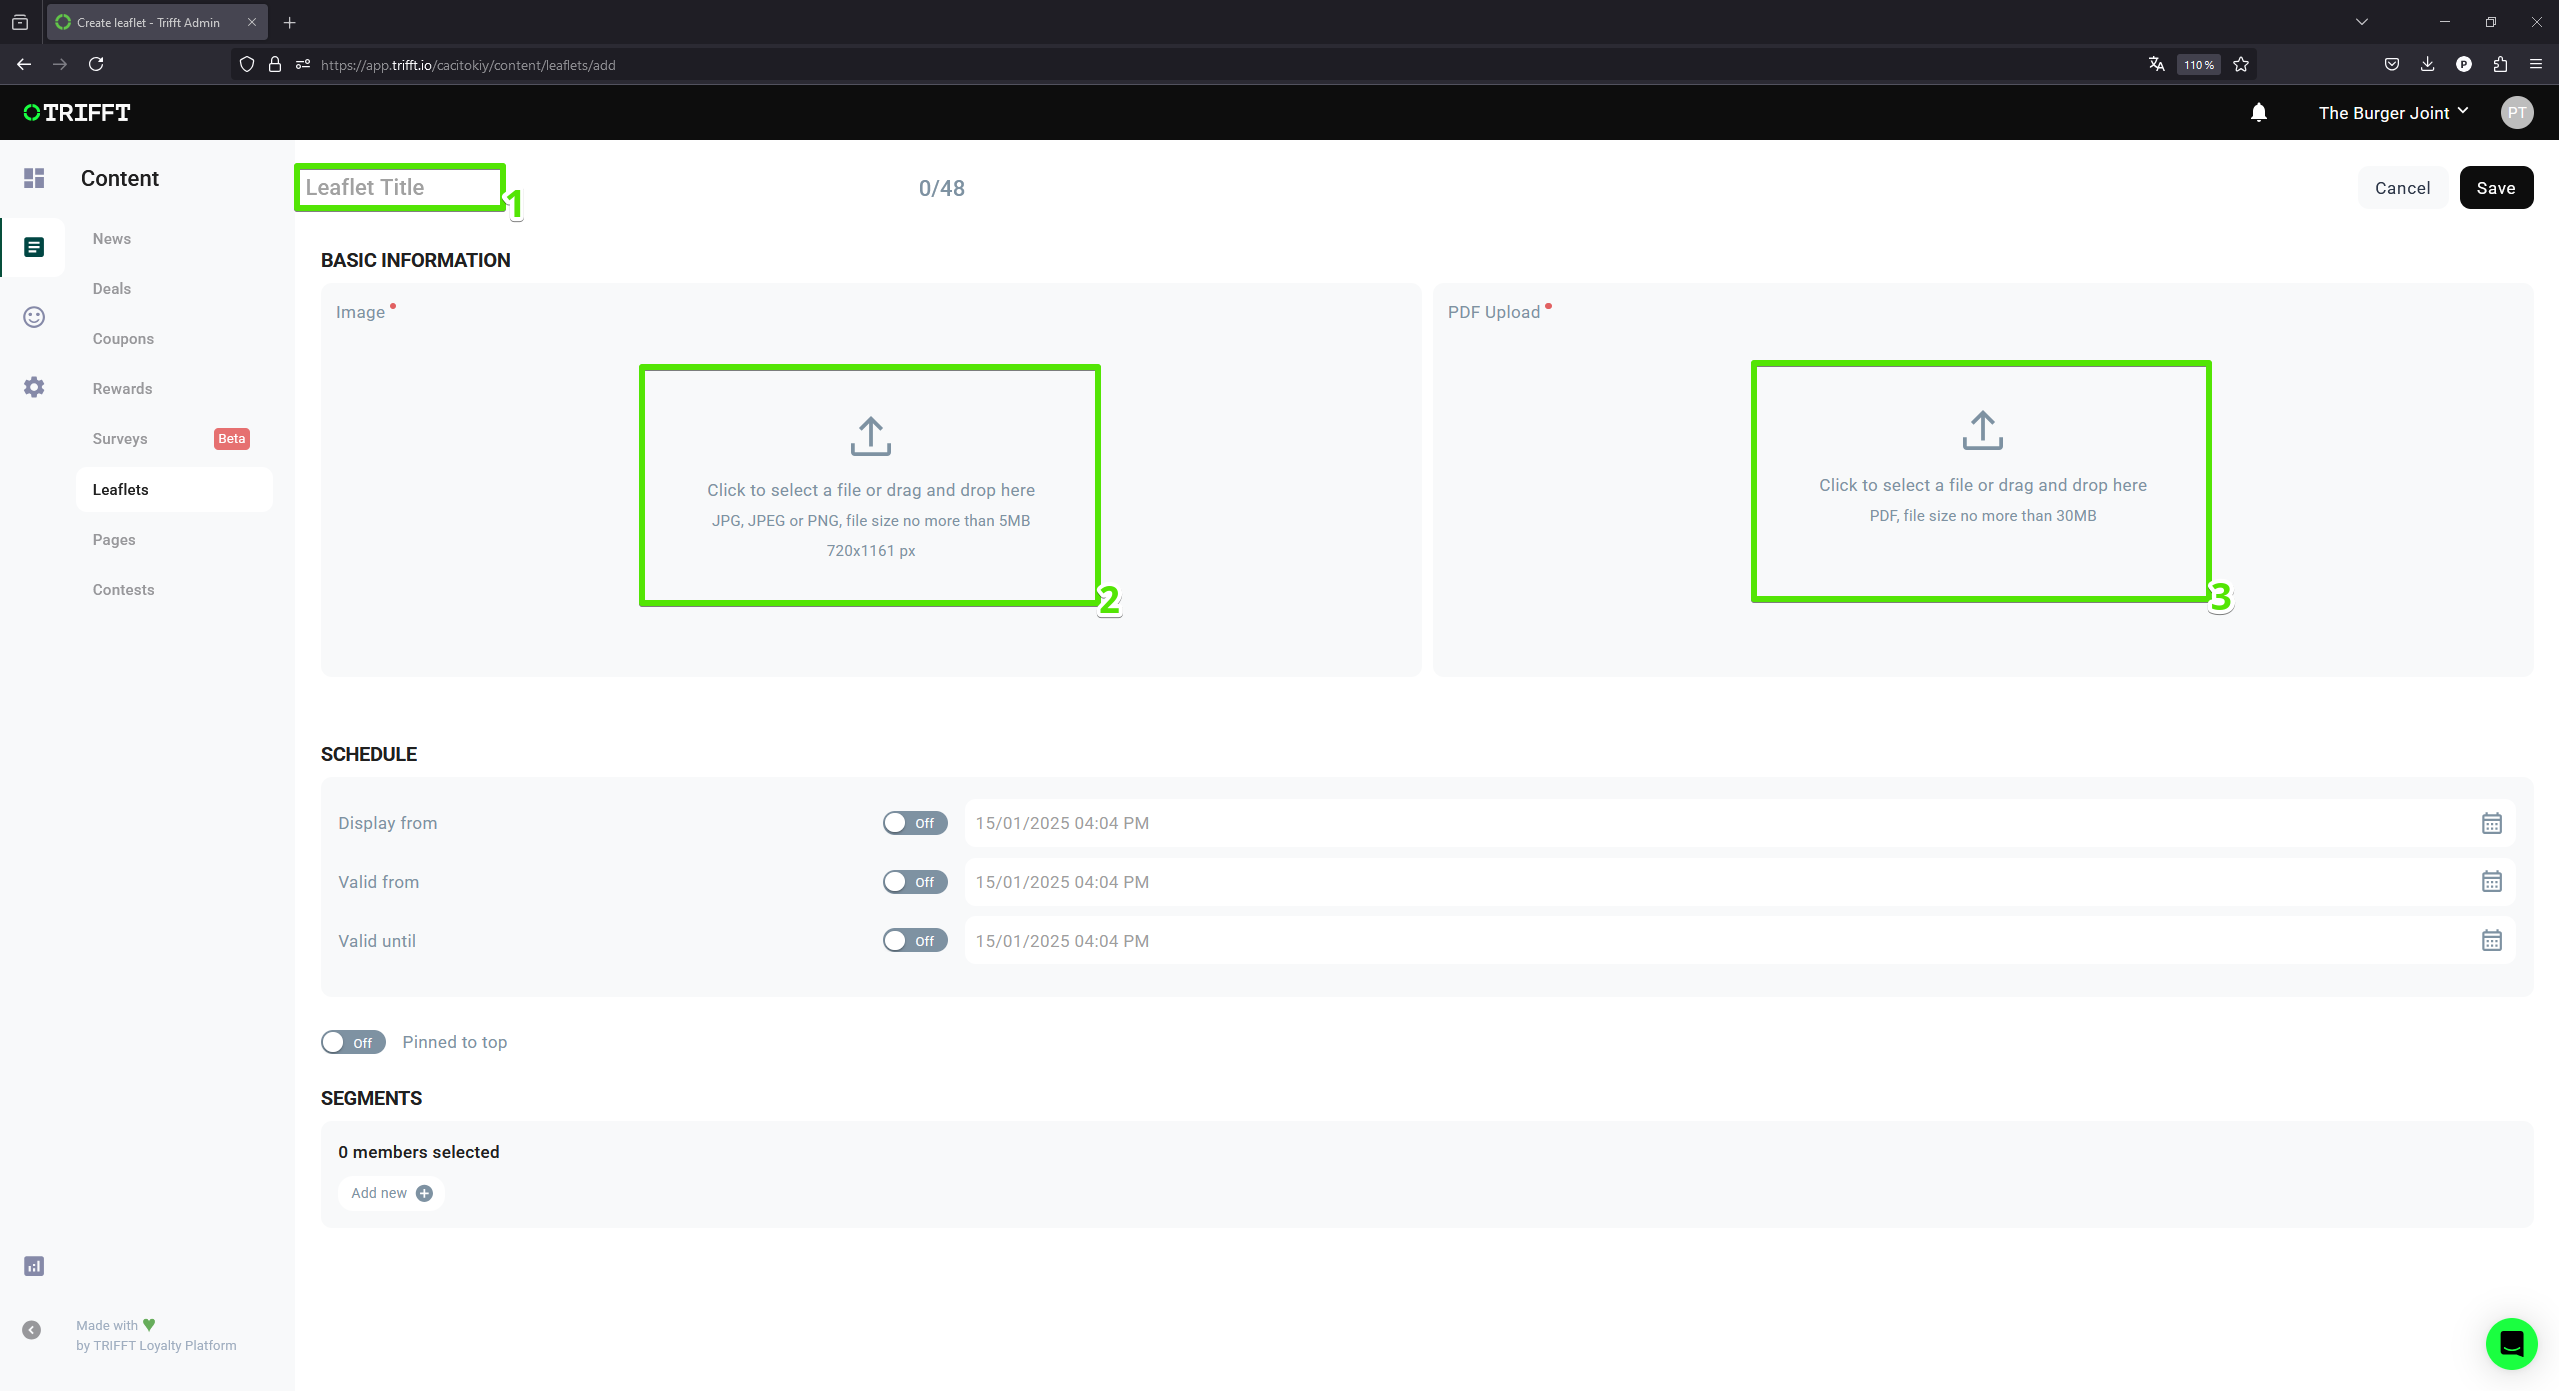
Enter the Leaflet name:
- Provide a
title (1)for the Leaflet.
- Provide a
-
Upload a Preview Image:
- Upload an image that will serve as a
preview (2)for the Leaflet. - This image will be displayed in the Leaflet list for easier identification.
- Upload an image that will serve as a
-
Upload the PDF Document:
- Select and upload the
PDF file (3)that will be linked with the Leaflet.
- Select and upload the

Fill the Leaflet Title and upload a preview image of Leaflet and PDF
Schedule
-
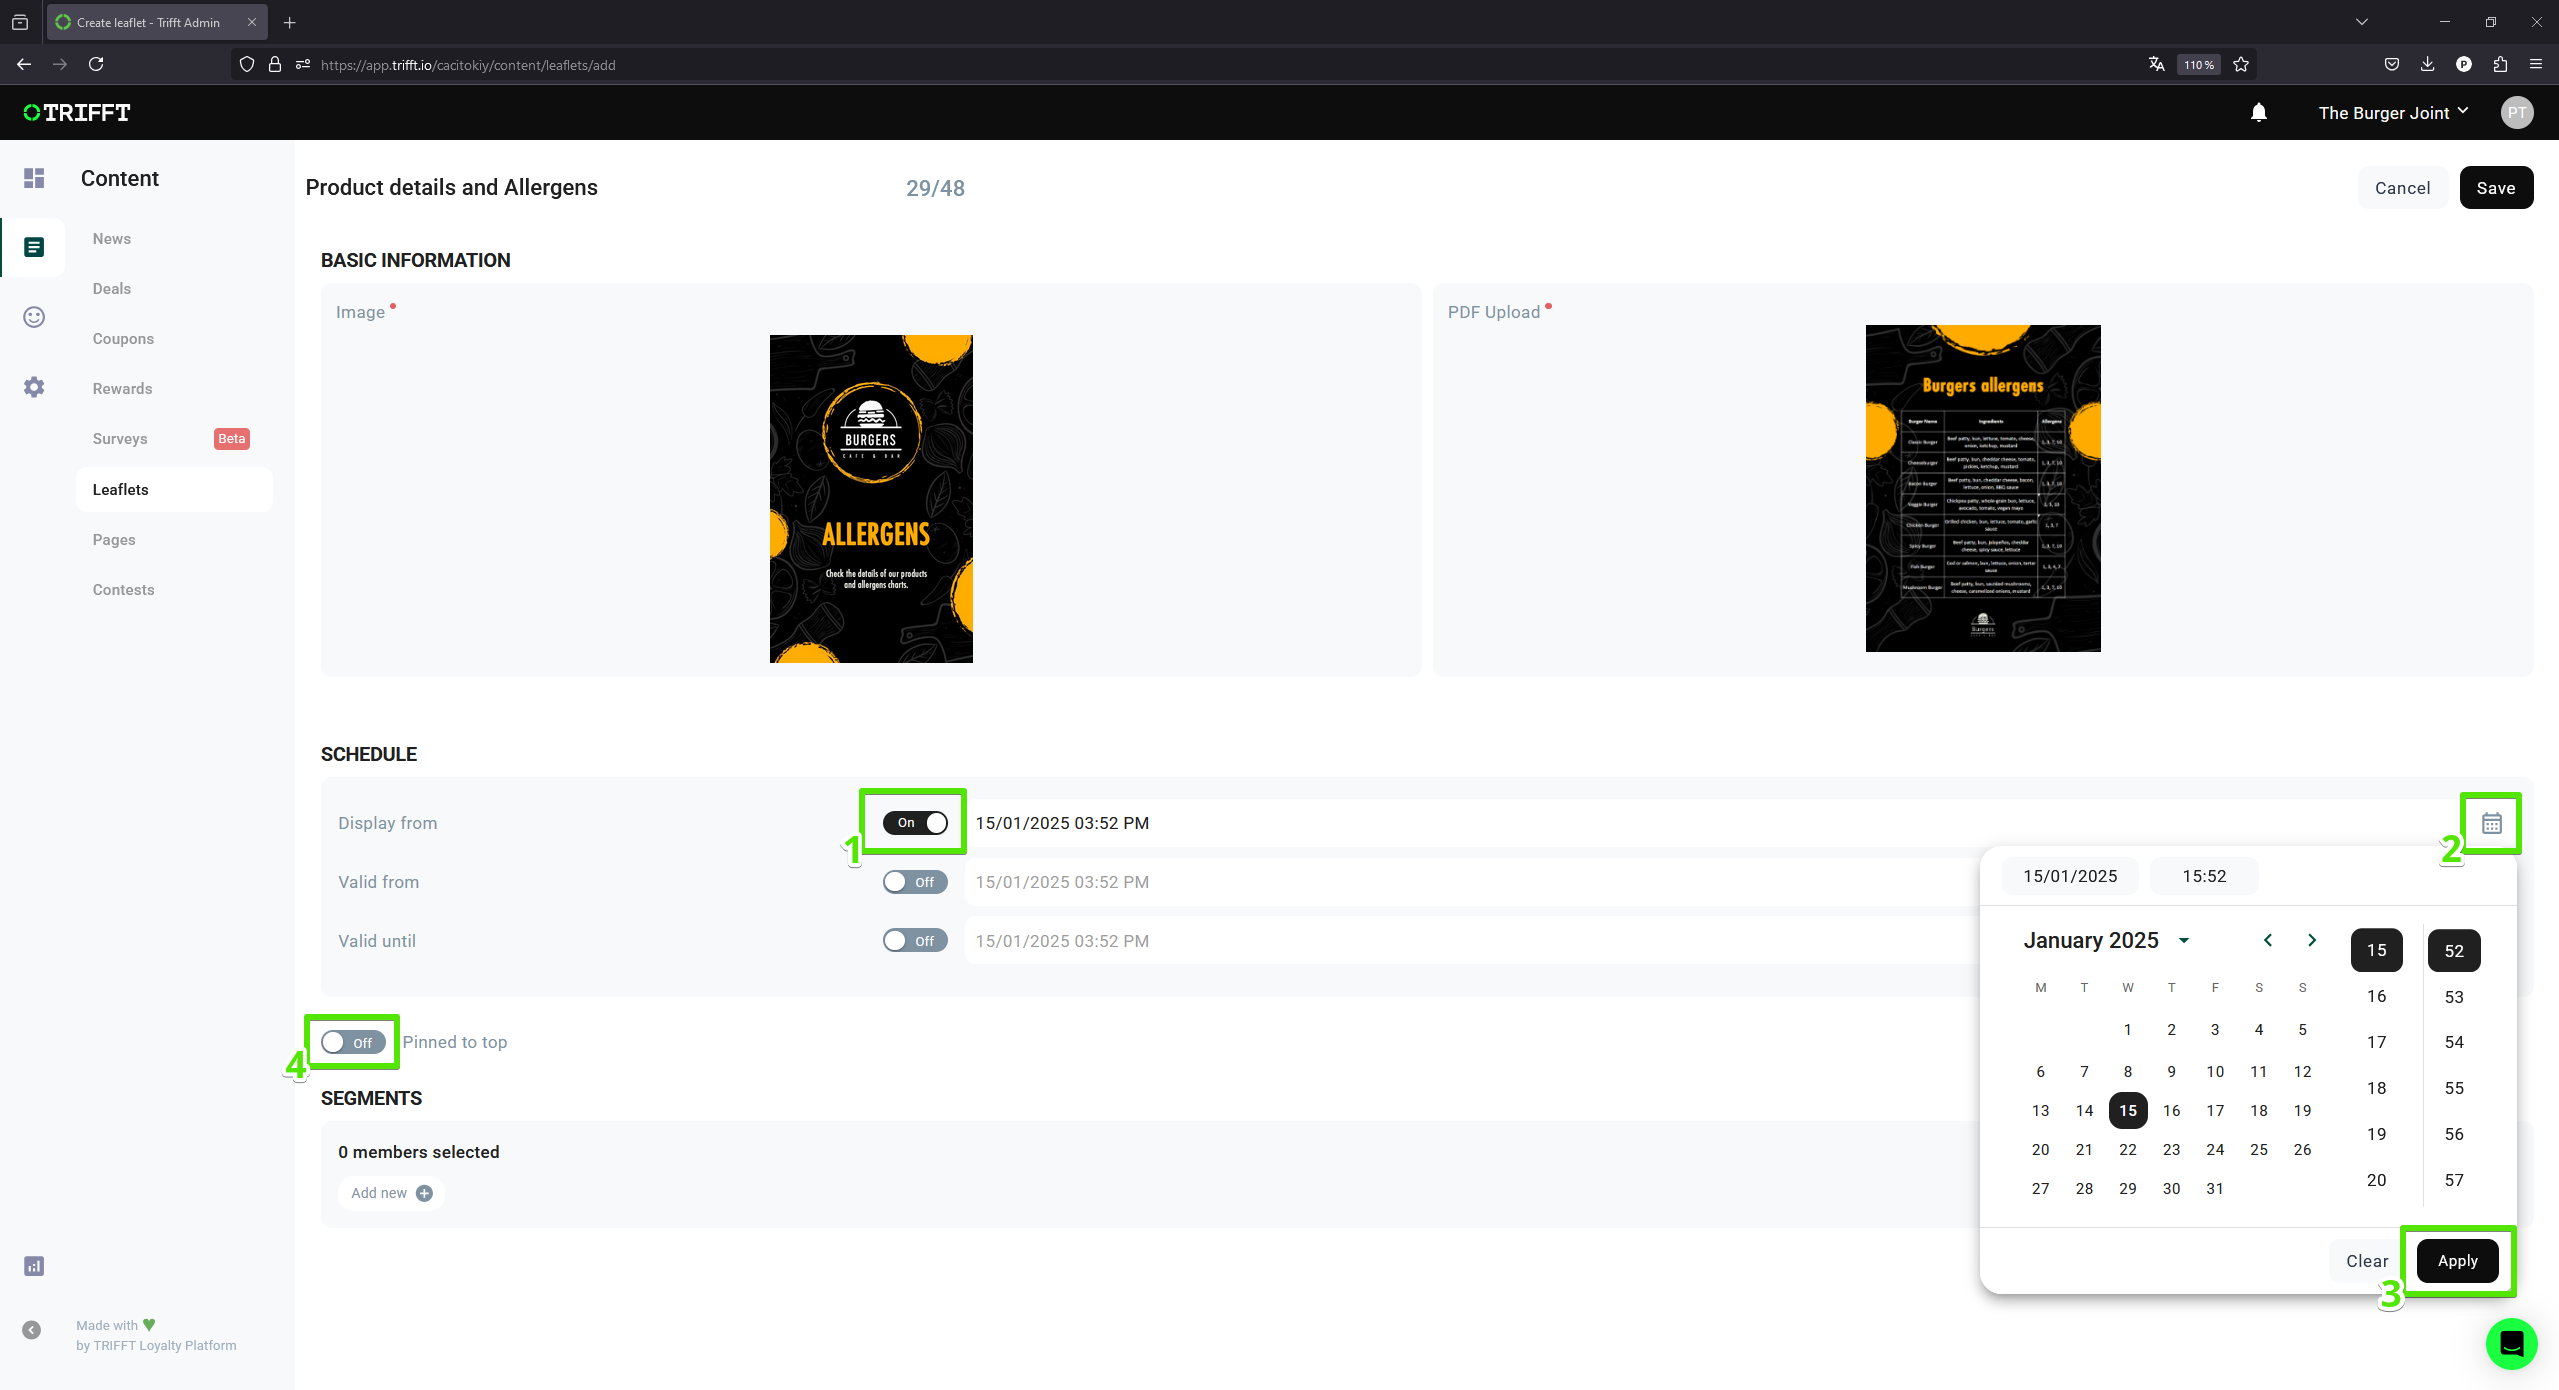
Enable scheduling:
- Turn on the
scheduling button (1).
- Turn on the
-
Set Display and Validity Dates:
-
Click on the
calendar icon (2)to set the following:- Display From: The date and time from which the Leaflet will appear in the app (sometimes you may want to show upcoming leaflets to your customers in advance).
- Valid From: The start date and time for the Leaflet’s validity (useful for promotional materials where visibility can start before the validity).
- Valid Until: The end date and time for the Leaflet’s validity. After this date the leaflet will disappear from the app.
-
Click on
Apply (3)button to save the changes.
-
-
Pinning the Leaflet (optional):
- To keep the Leaflet at the top of the list, turn on
Pinned to top (4)option.

Scheduling the leaflet
- To keep the Leaflet at the top of the list, turn on
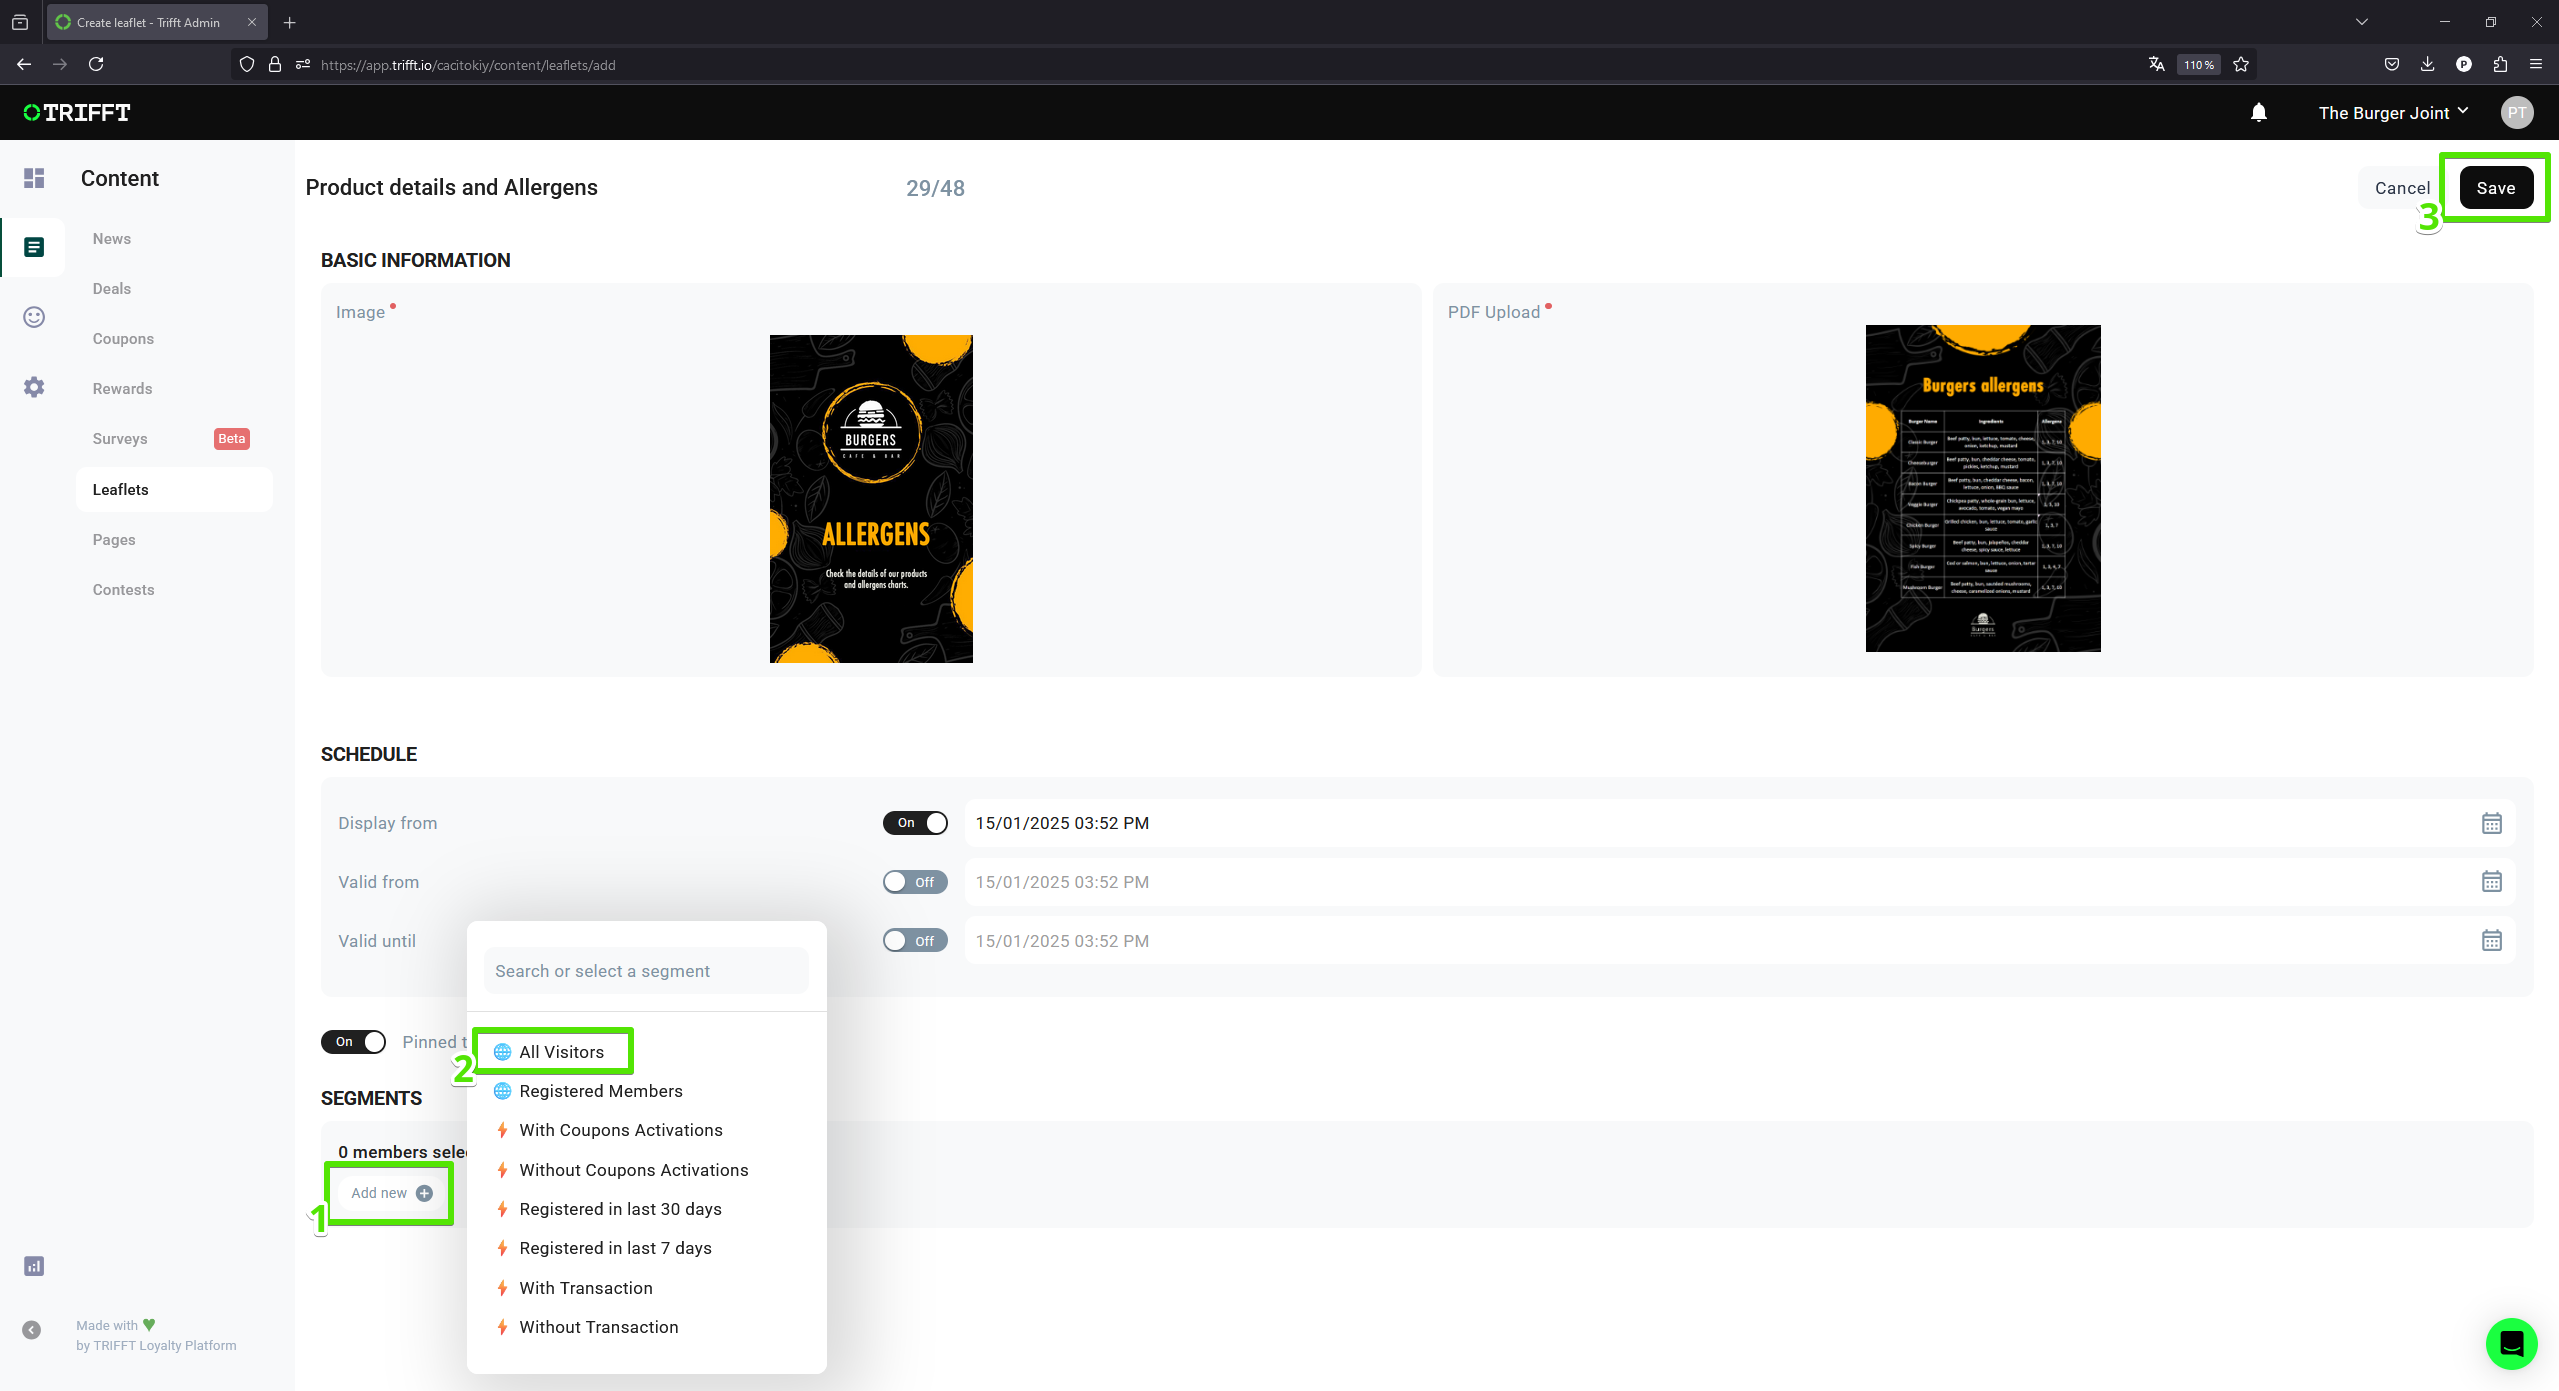
Publishing the Leaflet
Updated about 1 month ago
What’s Next
