
Creating Reward
This guide provides step-by-step instructions for creating and configuring Reward in the system.
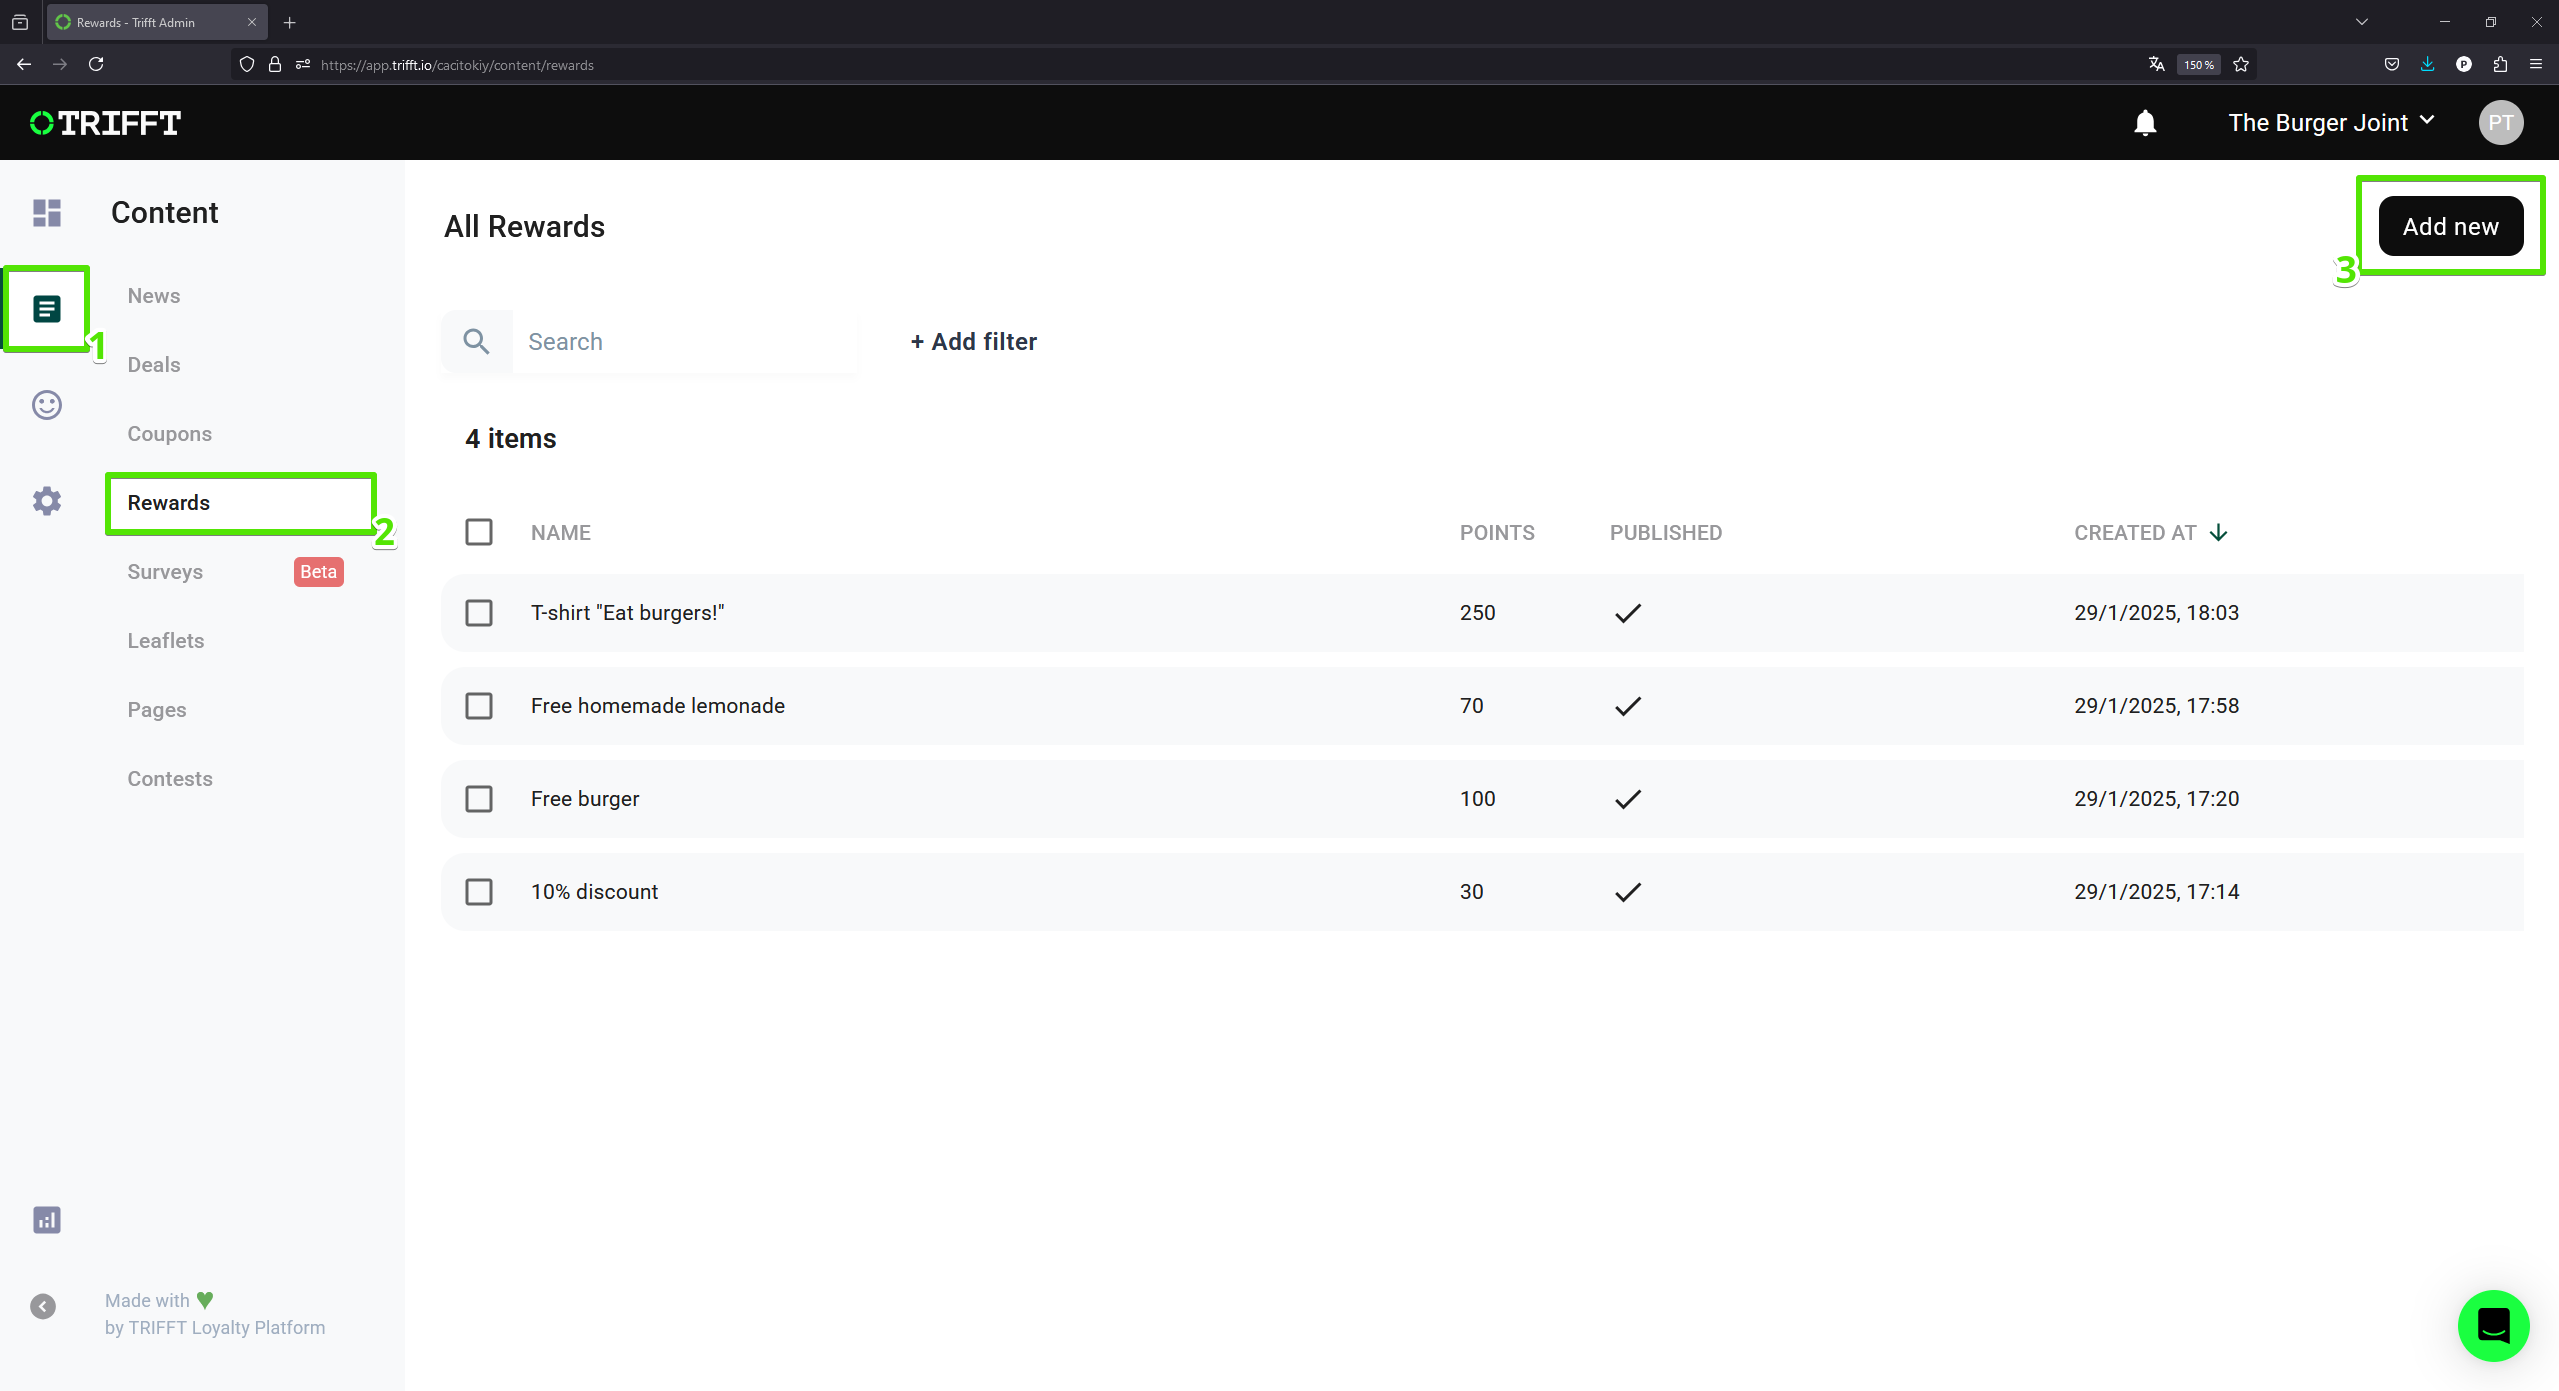
Create a new Reward
- Navigate to the
Content (1)and selectRewards (2). - You will see a list of all Rewards saved in your project.
- To create a new Reward, click the
Add New (3)button located in the top-right corner of the page.
Create a new Reward
Basic information
-
Enter the Reward name:
- Provide a
title (1)for the Reward.
- Provide a
-
Choose a Delivery type:
- Choose one of the
delivery types (2)for the Reward. - This will affect the mechanic of redeeming the Reward.
- All details regarding delivery types you can find in the main article Rewards.
- Choose one of the
-
Set the Points value:
- Enter the number of
points (3)that should be deducted from the customer’s balance after selecting the given reward.
- Enter the number of
-
Select Stock:
- Select this only if you have limited number of rewards available. Once all rewards are redeemed, it will disappear from the list of available rewards. To activate this option, click the
checkbox (4)located next to the Stock field and enter the number of your stock.
- Select this only if you have limited number of rewards available. Once all rewards are redeemed, it will disappear from the list of available rewards. To activate this option, click the
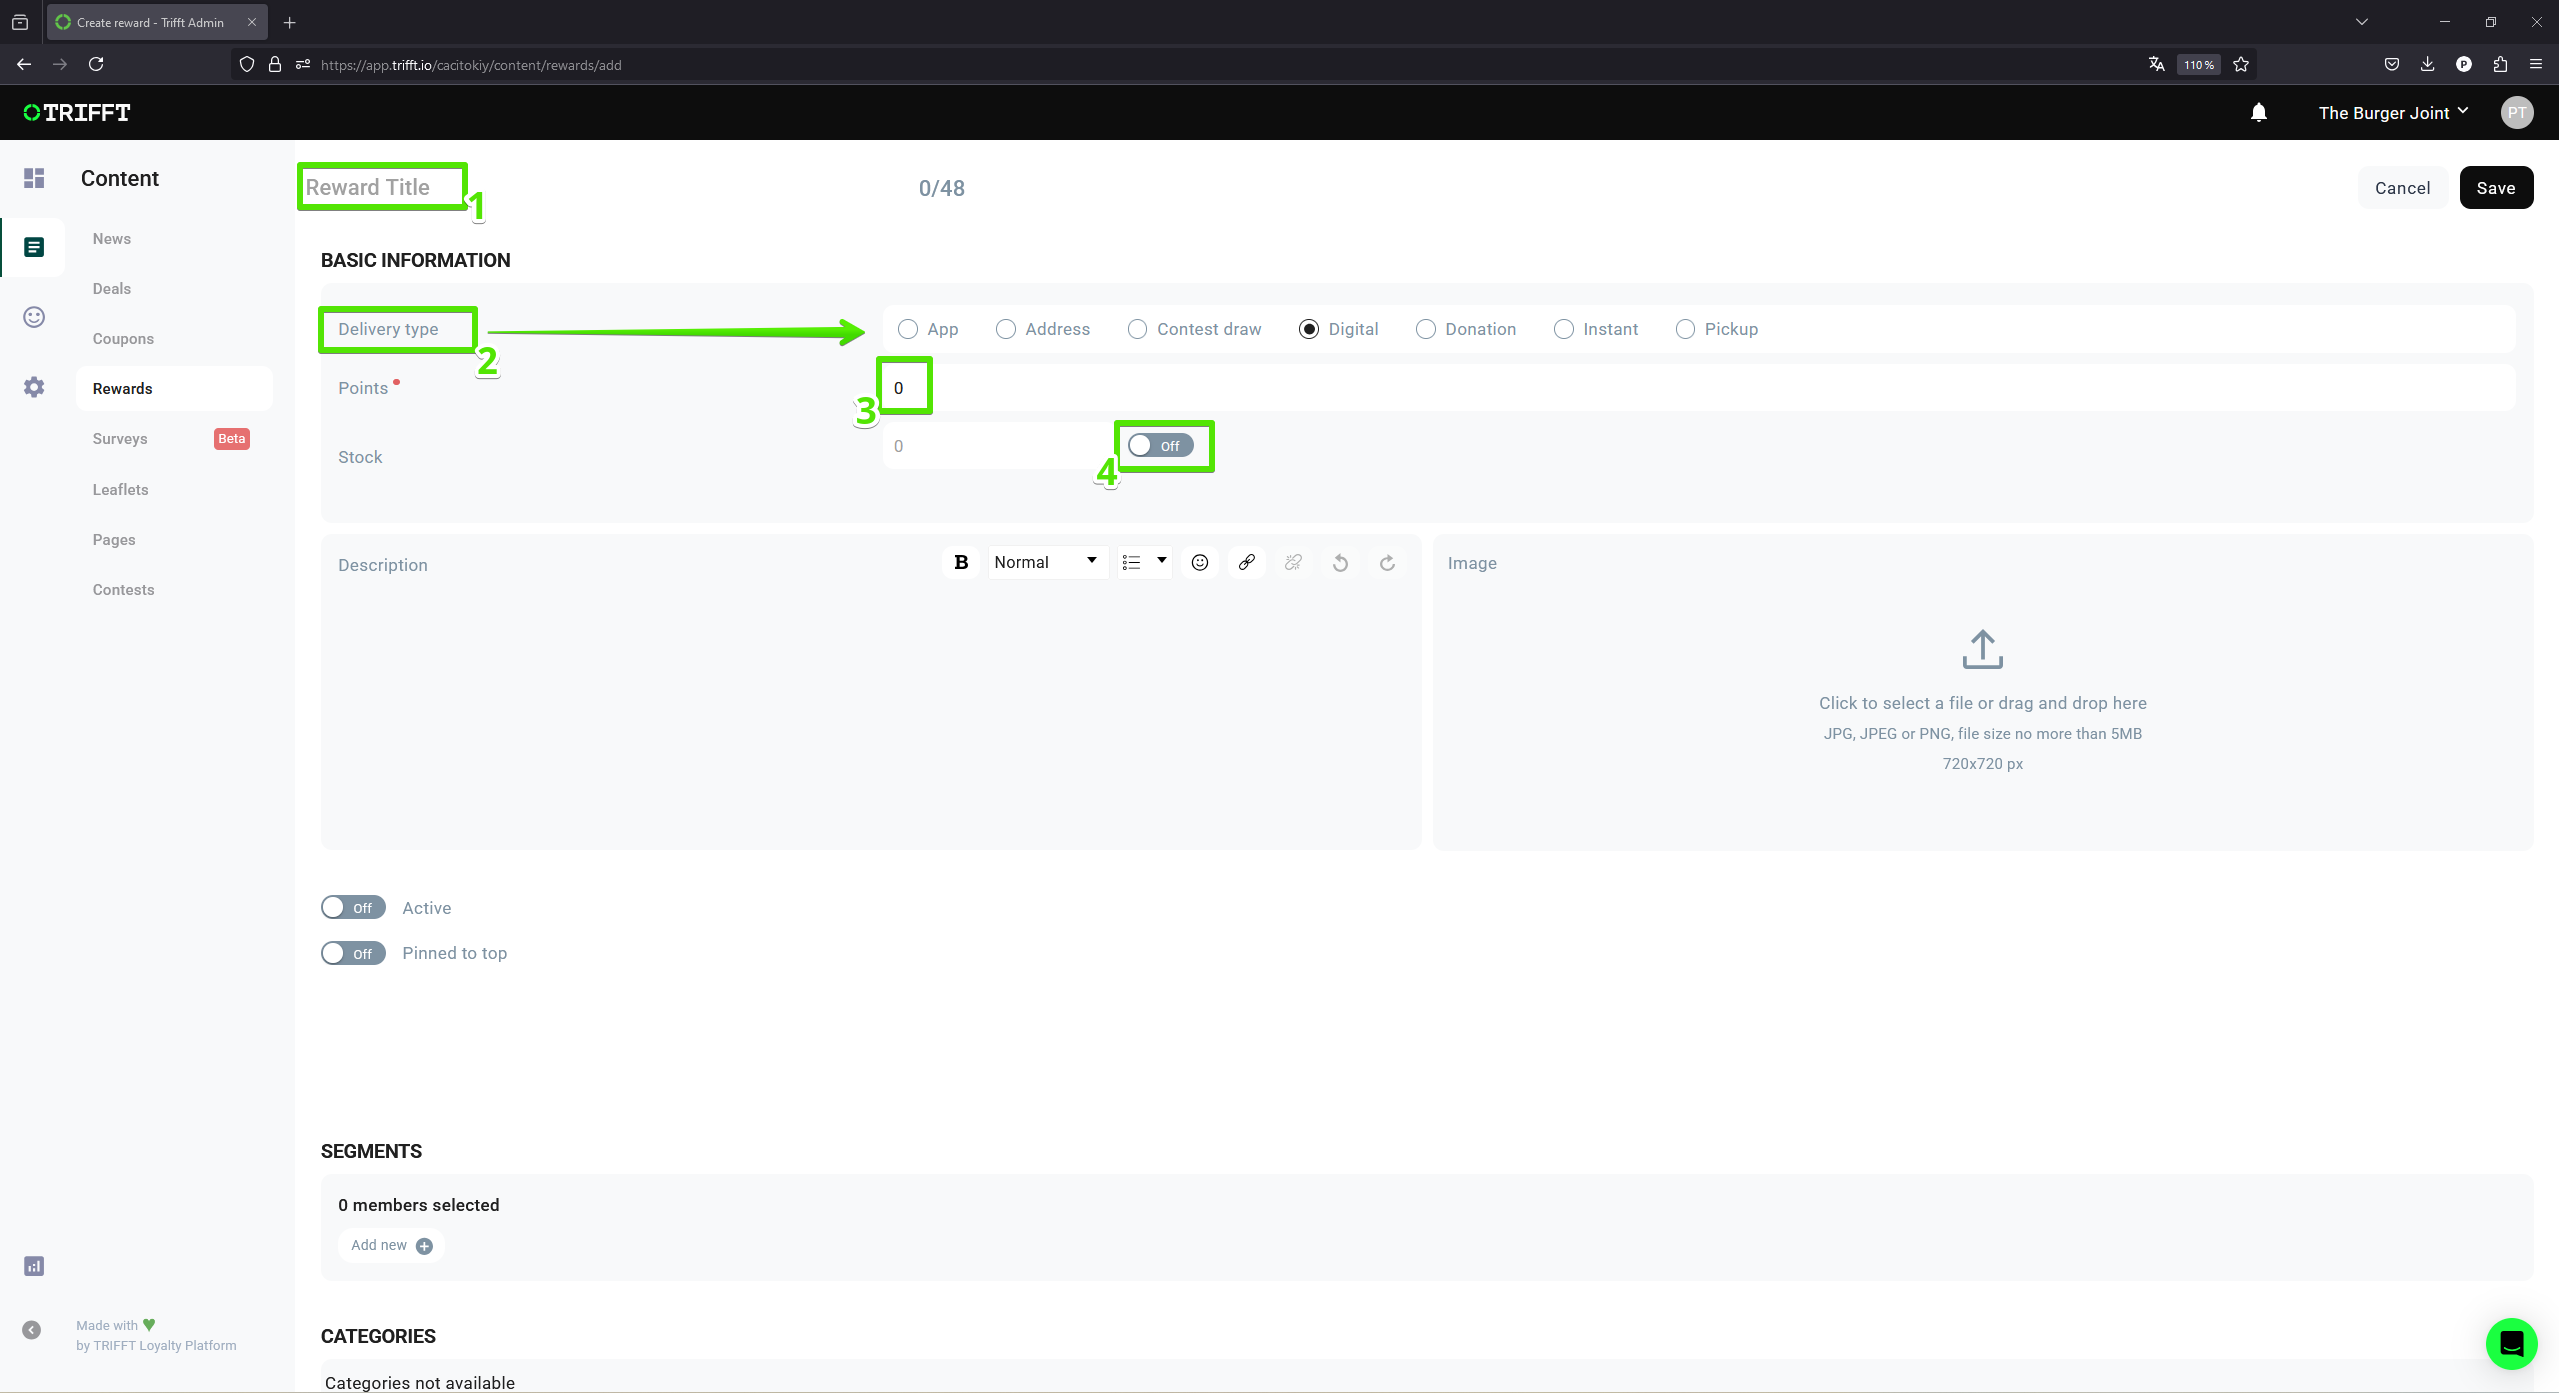
Fill the Reward Title, setup delivery type, points deduction and stock
Description and image
- Fill the
description (1)of the reward. - Description will be visible in the detail of reward.
- Upload an
image (2). - This image will be visible as the small preview in the list of all rewards but also in the detail of the reward.
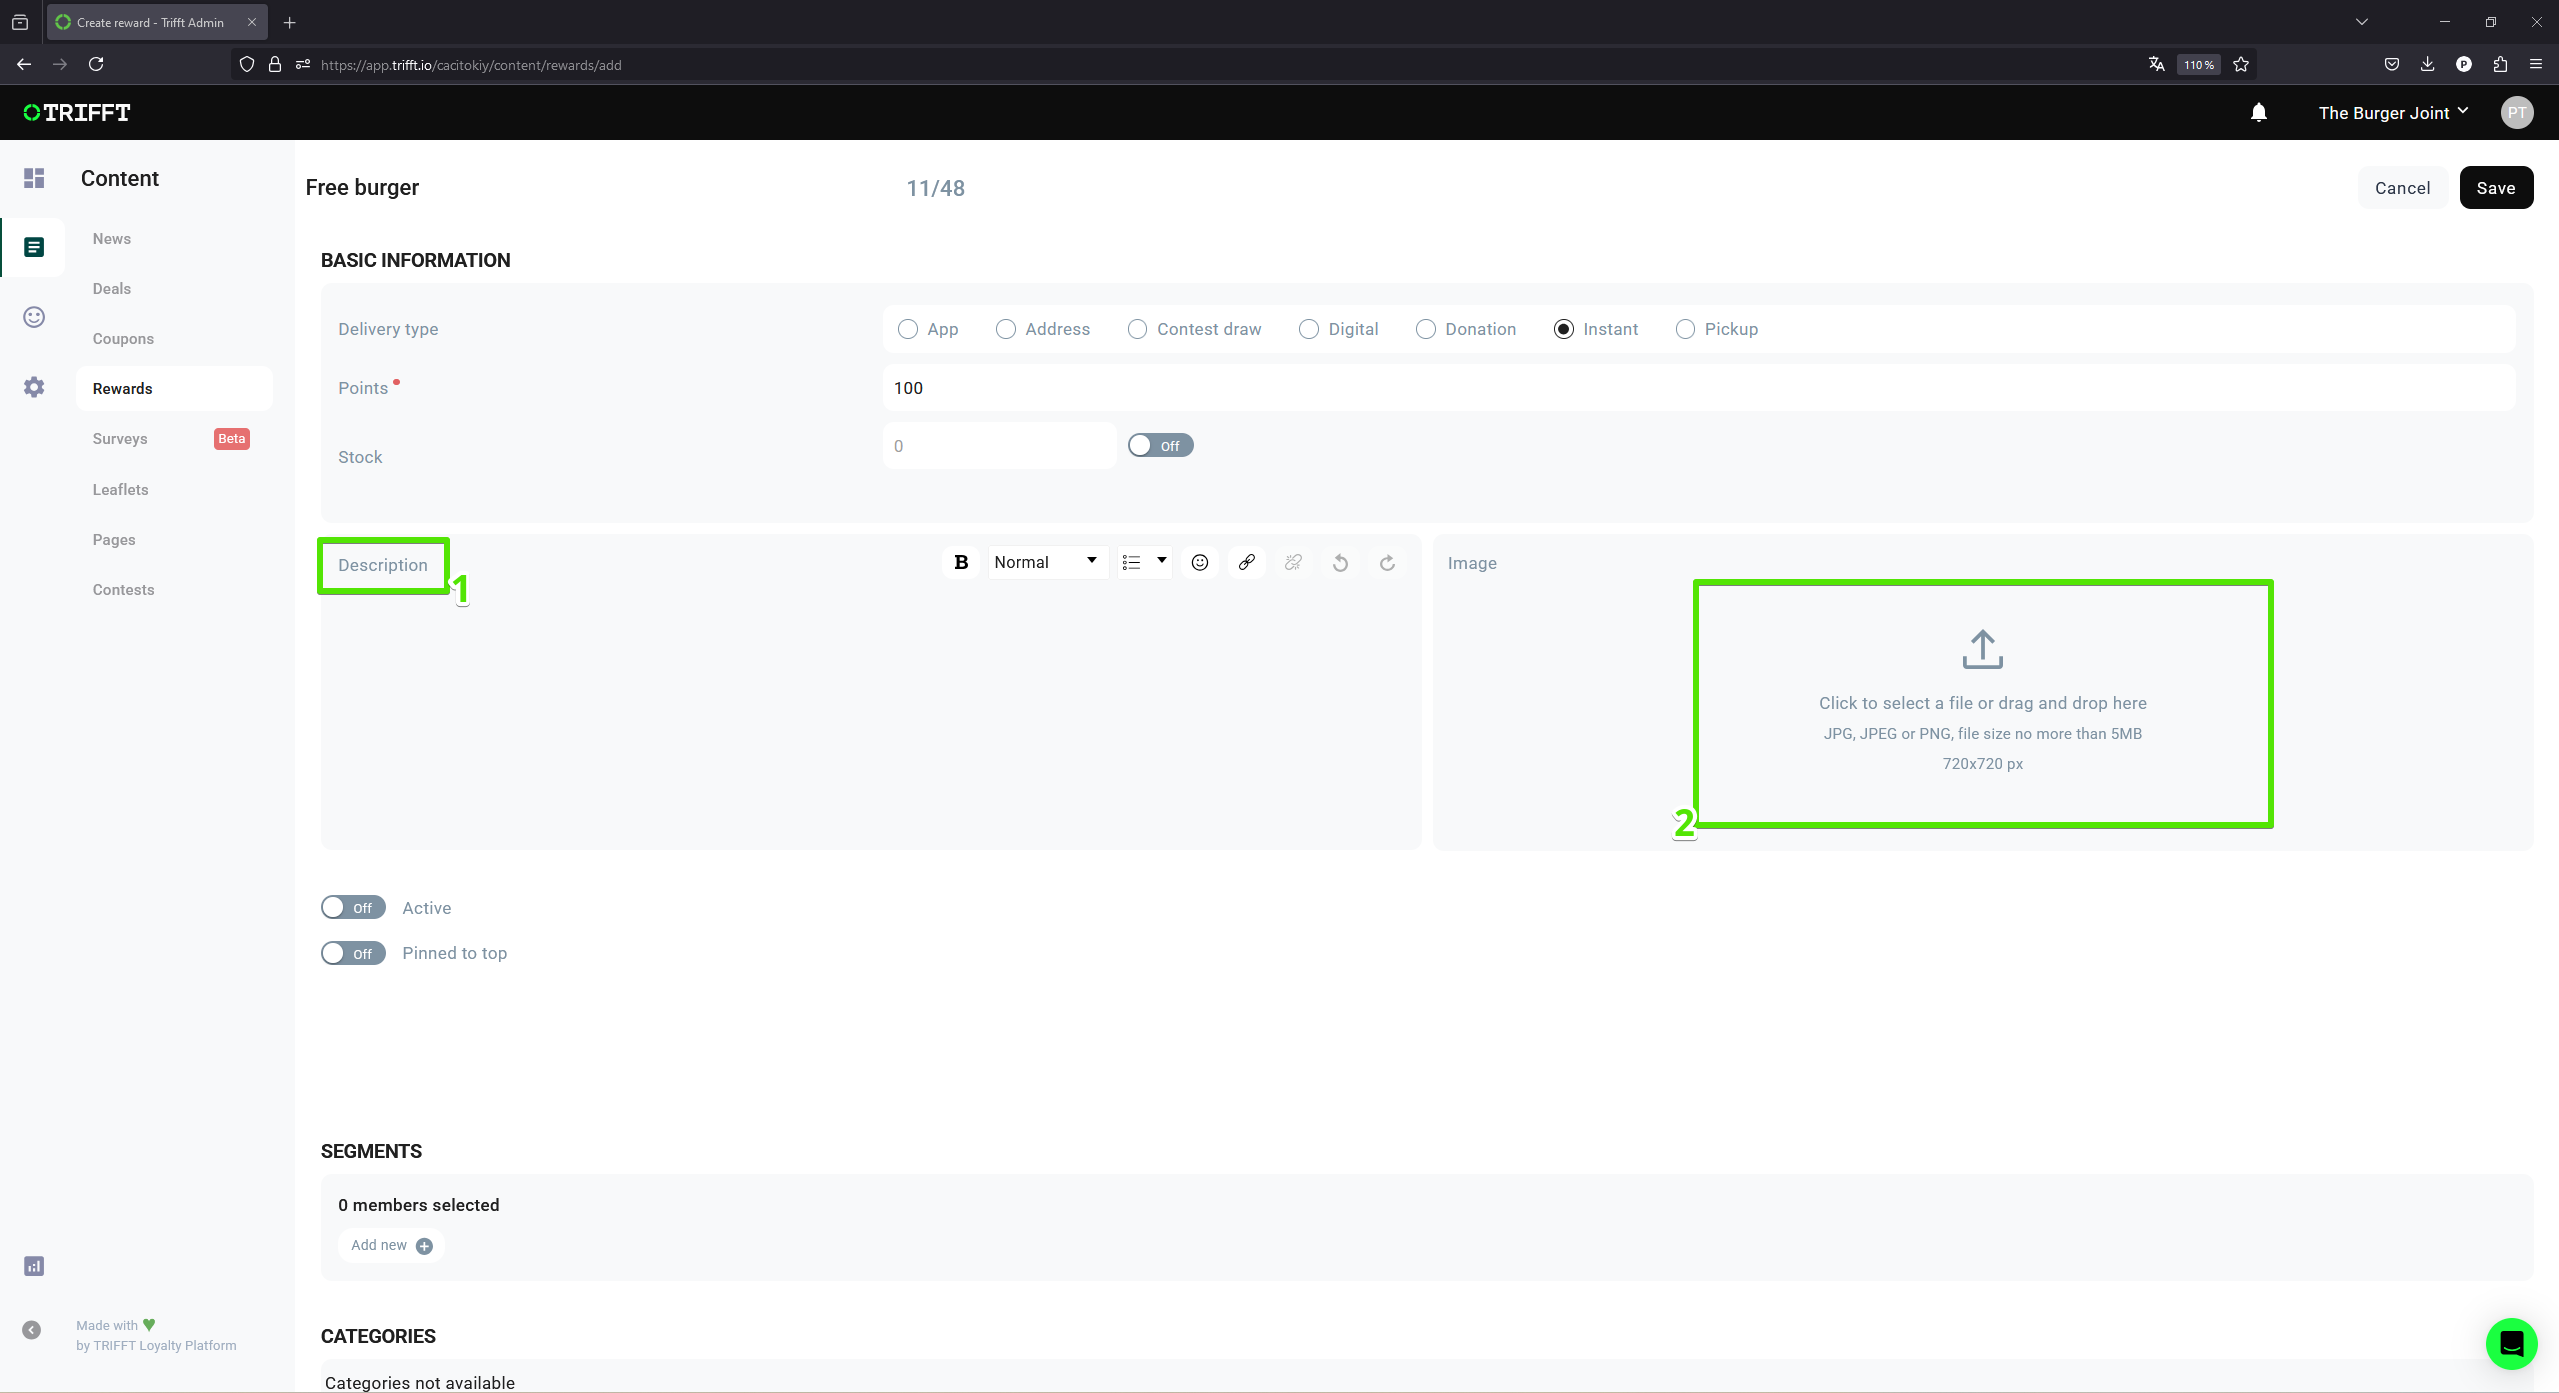
Fill the description and upload an image
Activating and pinning the reward
-
Activating the reward
- Click the checkbox of the
Active (1)button to make the reward active and visible for customers. - If this option is turned off, the reward doesn't appear in the app (customers can't see it) but is still visible in the administration.
- Click the checkbox of the
-
Pinned to top (optional)
- The original sorting of your rewards is according to the number of points needed for the activation (lowest at the top).
- To ignore this sorting and keep the reward at the top of the list, turn on
Pinned to top (2)option.
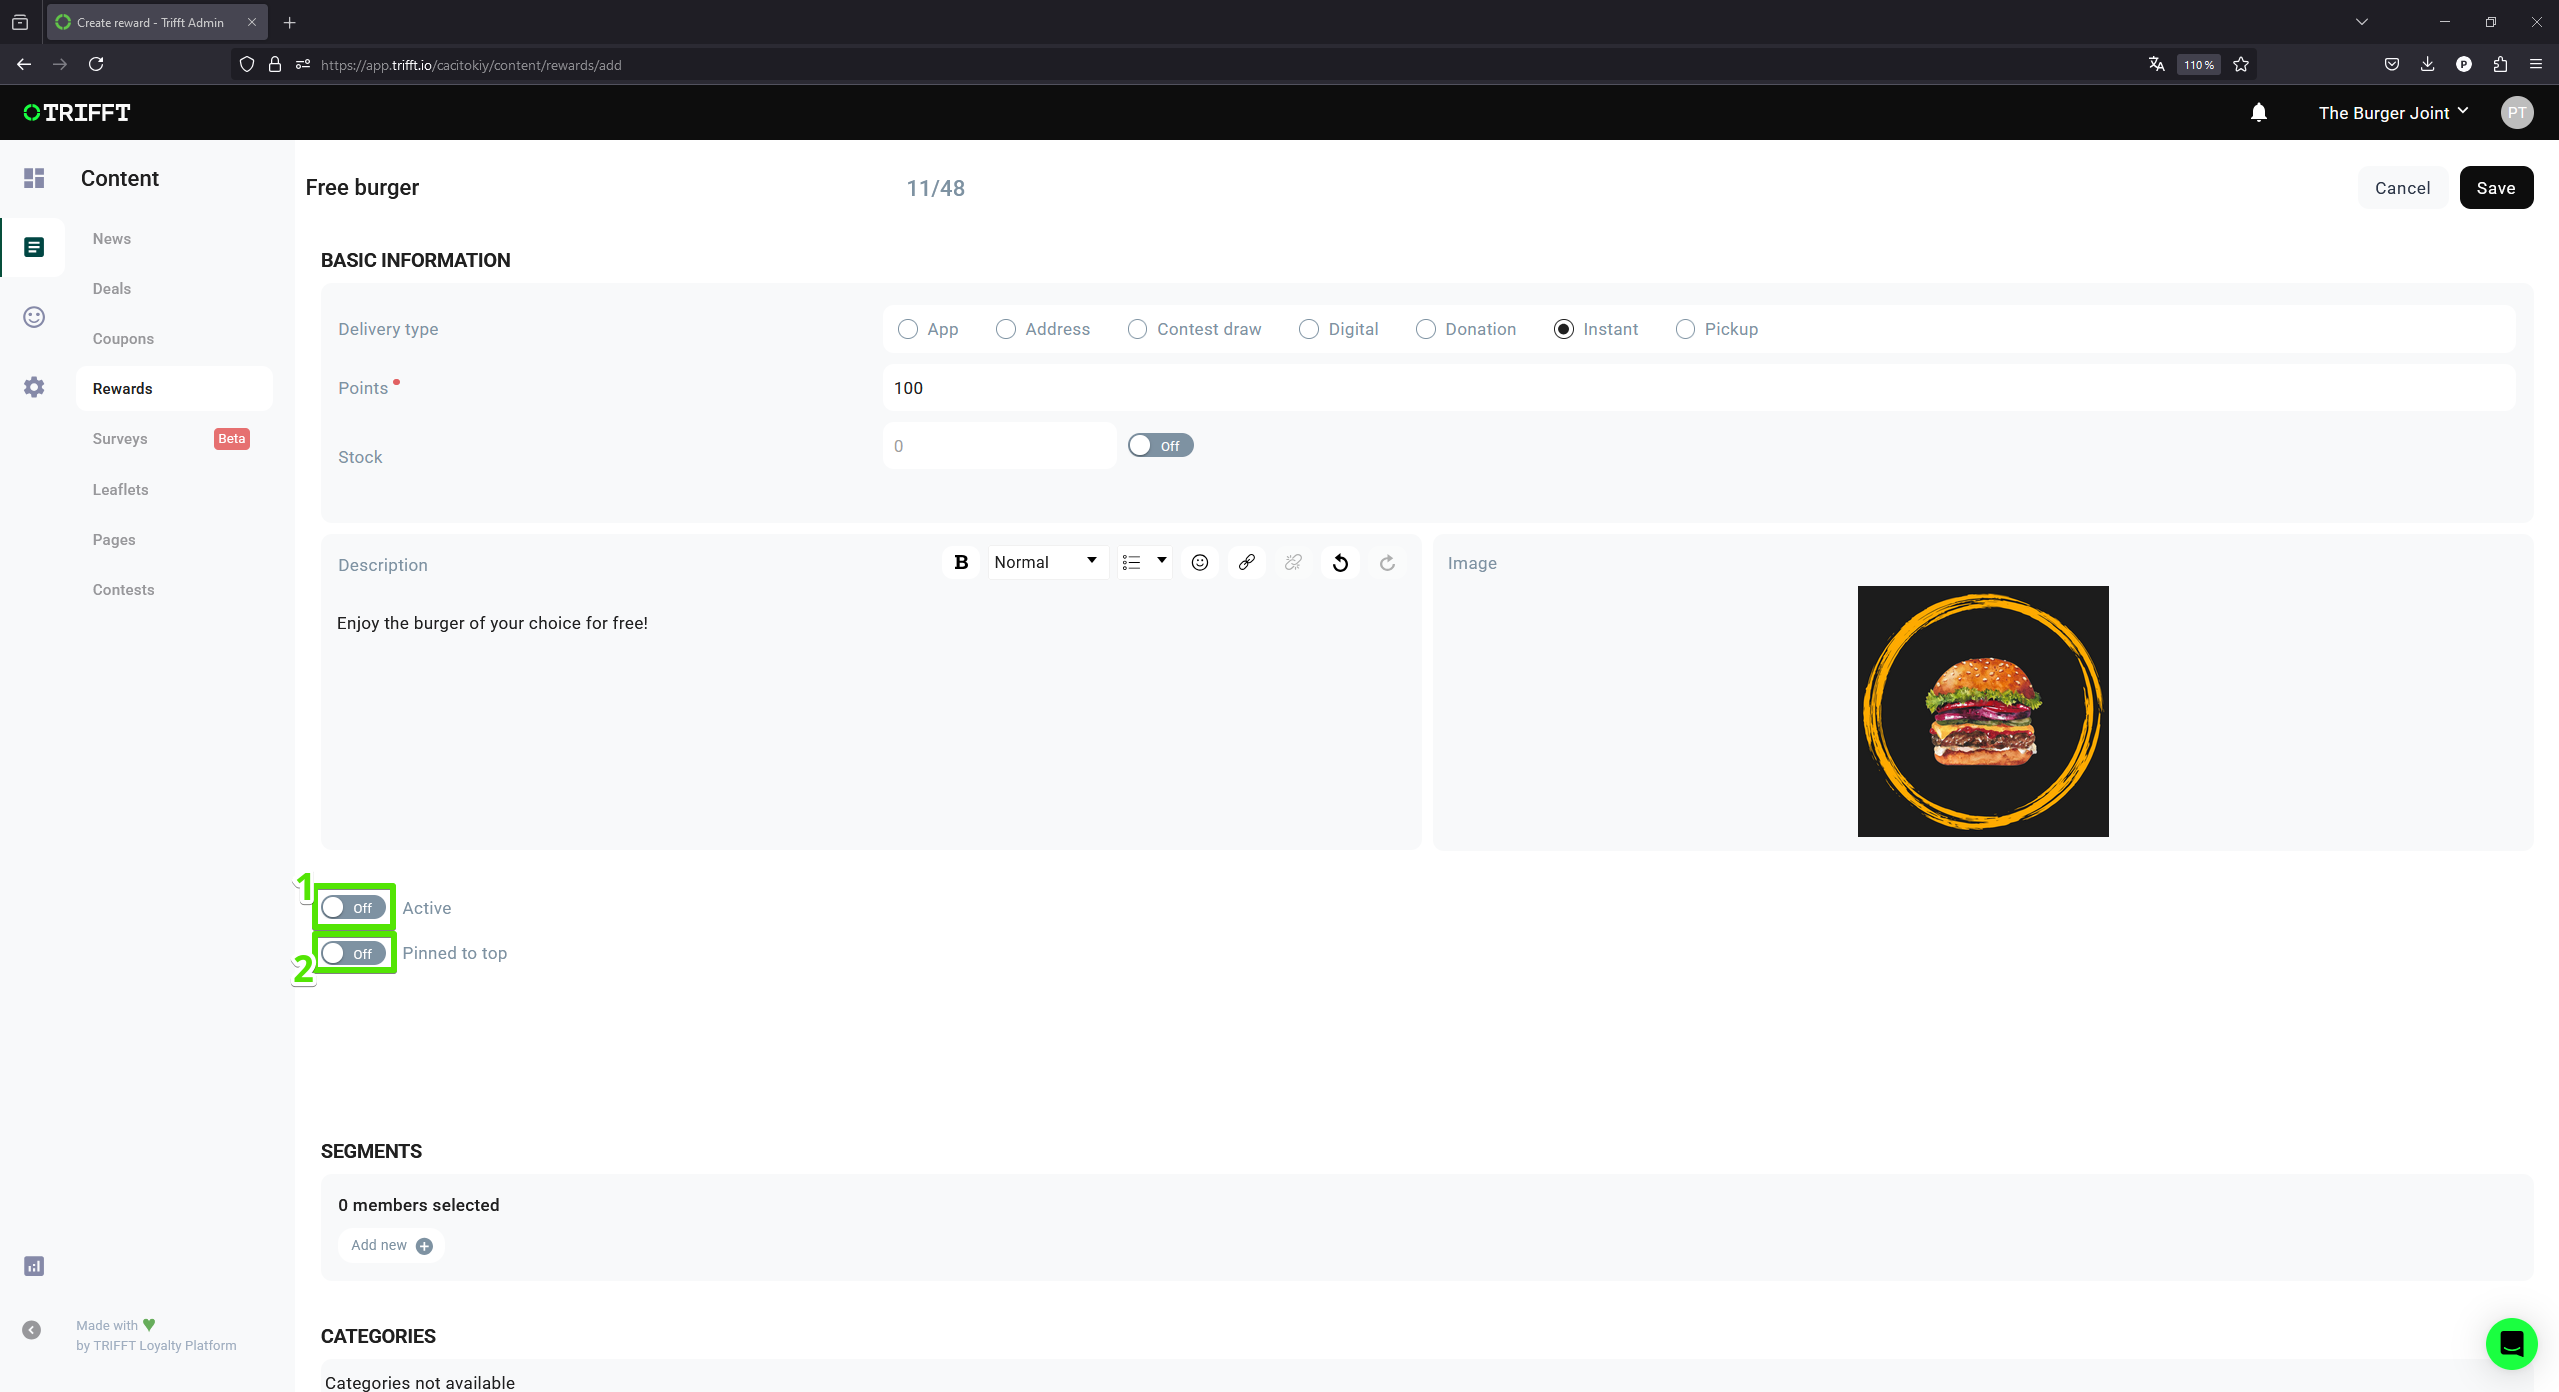
Activating and pinning the reward
Publishing the Reward
-
Add a segment
- Click
Add New (1)to add a segment. - Select the
desired segment (2)to define who can view the Leaflet.
- Click
-
Categories
- If you already created
categories (3), you can use this feature in rewards as well. - In the article categories you can learn what this feature is and how to set it up.
- If you already created
-
Save the Reward
- Once all configurations are complete, click the
Save (4)button in the top-right corner to publish the Leaflet.
- Once all configurations are complete, click the
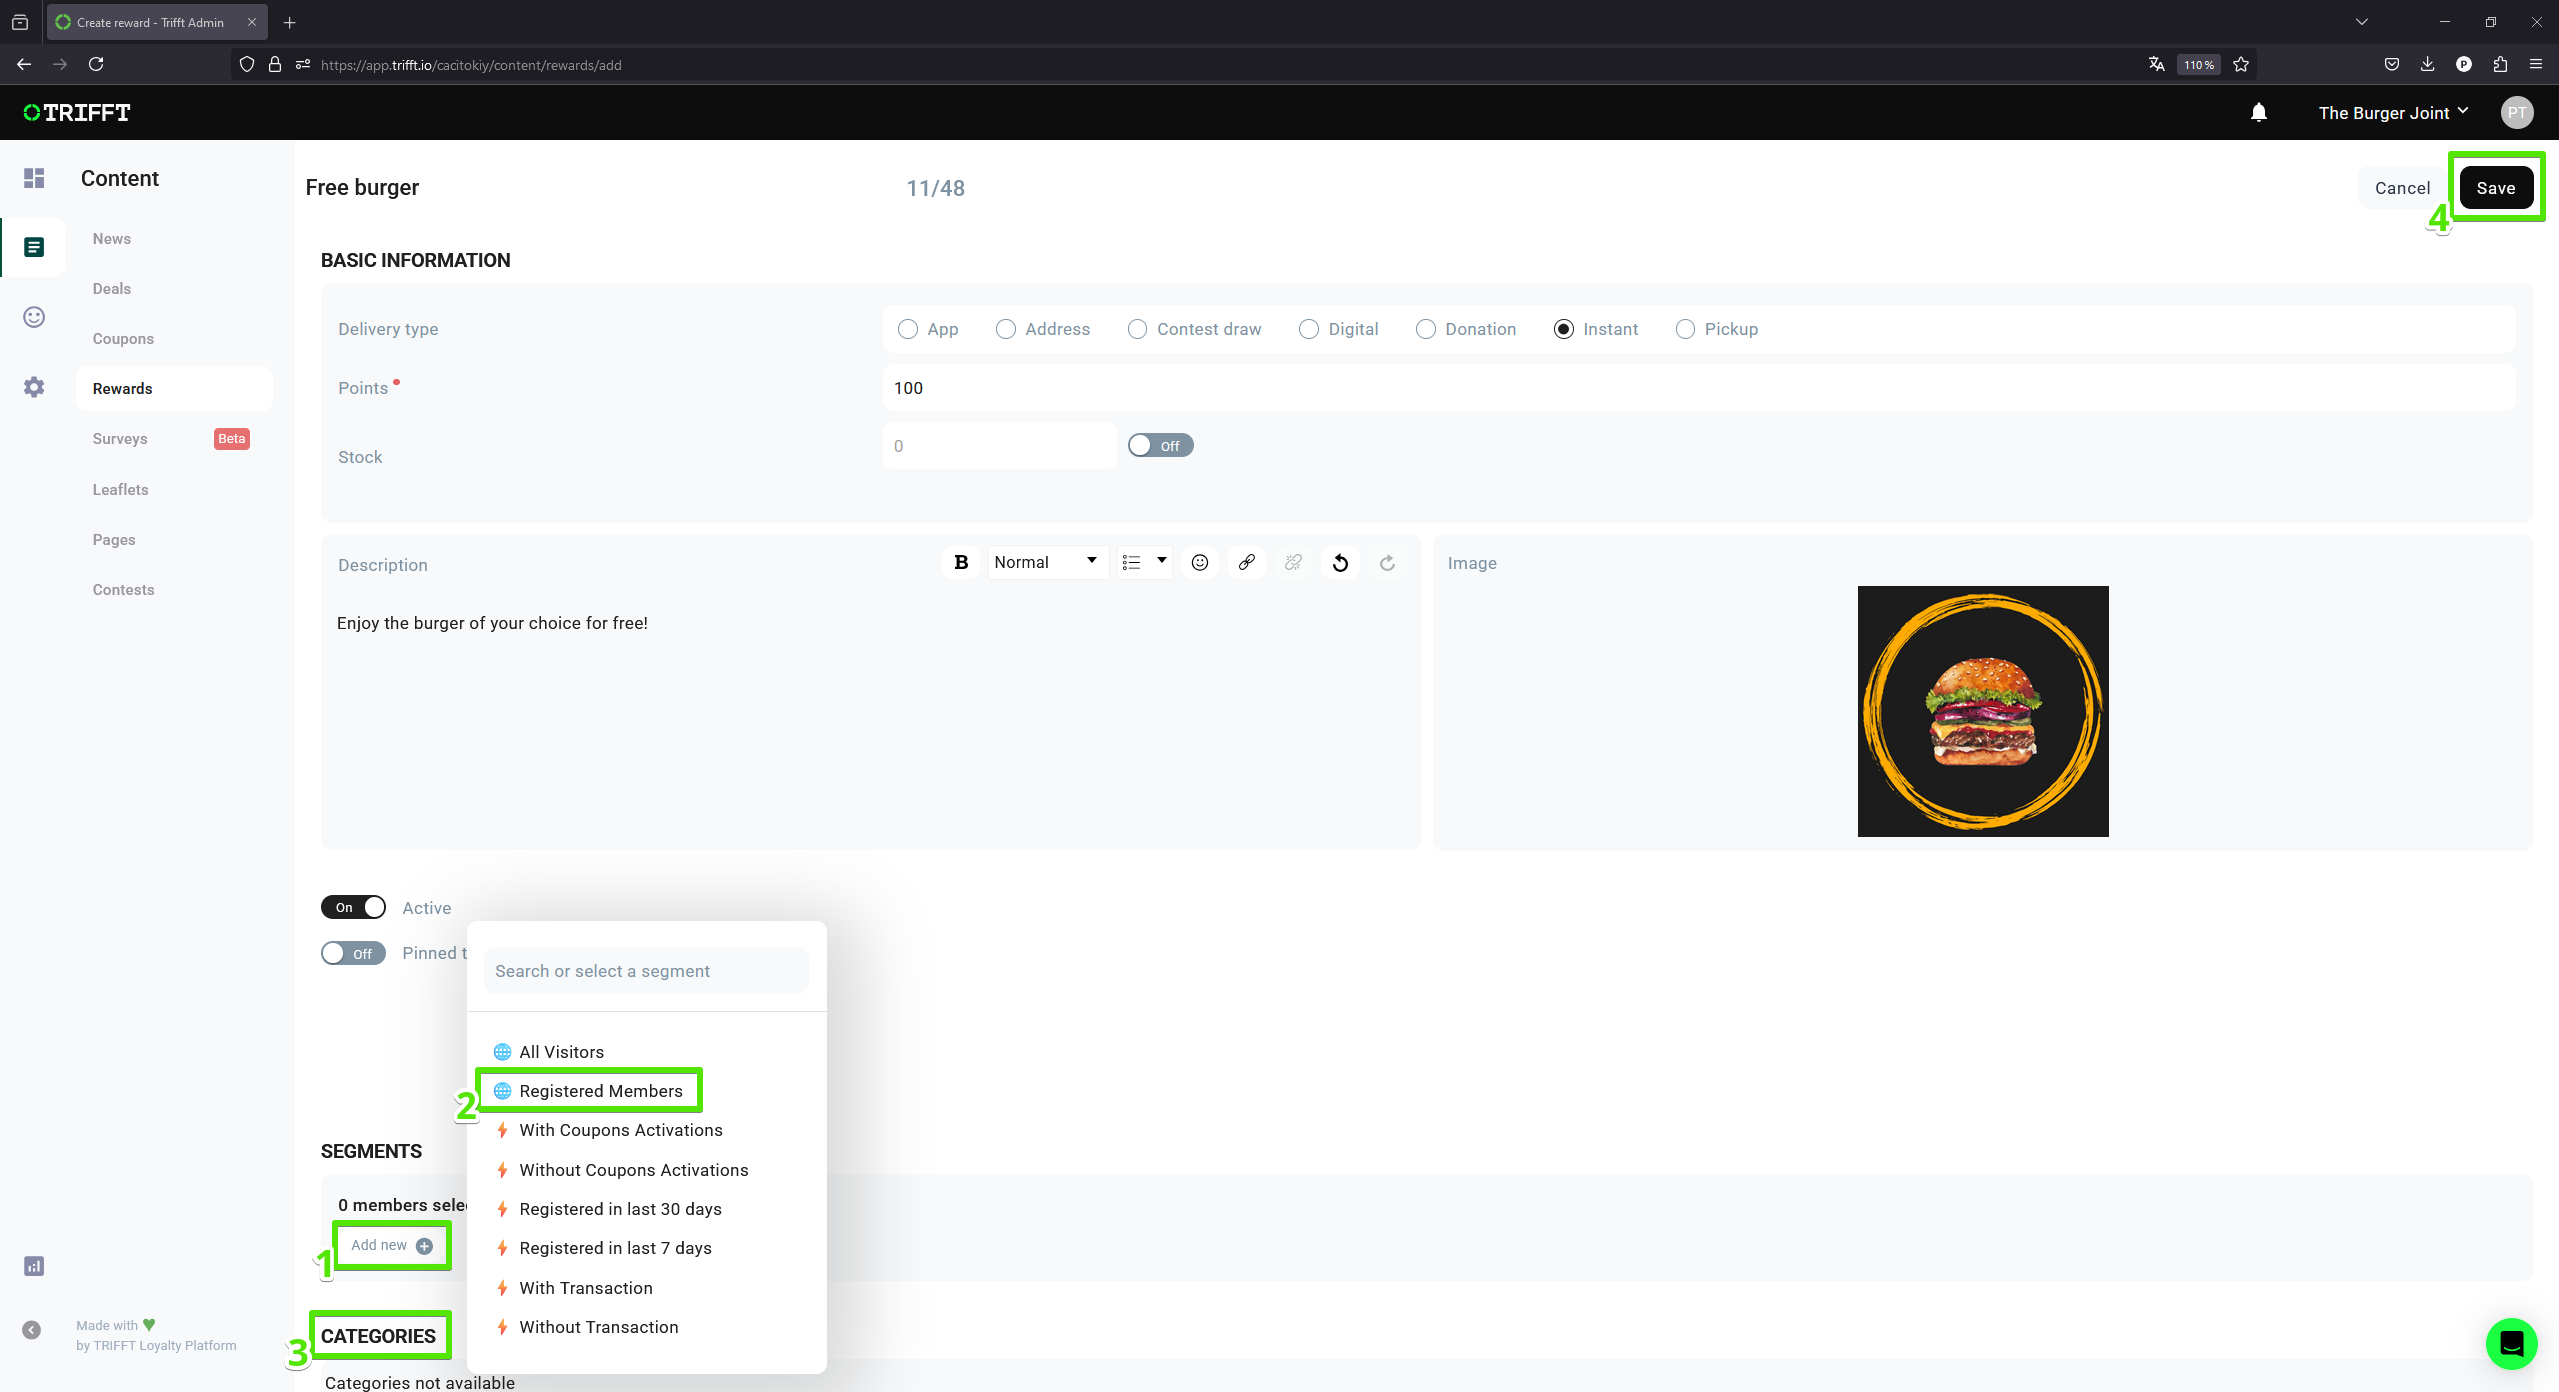
Add a segment, setup categories (optional) and save
Updated 2 days ago